Pathologic 2
Blender Model Tutorial
Update
You can now download the models through this Google Drive folder. Thank you to RoarkAnimations (Youtube, Twitter) for archiving these and allowing me to share them with everyone.
I've also added the Bachelor's retail model (different from the alpha model that rotten-eye had ripped), the Webley revolver, General Block, and the Polyhedron to that folder.
Summary
This page contains information on how to download, unpack, set up, pose, and render rotten-eye's Pathologic 2 models in Blender.
If you'd like, you can also view the Pathologic 2 Character Turntables I've made using these models.
If this webpage is too large to view comfortably, you can also view sections as individual pages.
Table of Contents
- Software needed
- Downloading and Unpacking Models
- Setting Up Models in Blender
- Posing
- Rendering
- Output Settings
- Setting up Cameras
- Lighting with HDRIs / World Shader Nodes
- Animating a Turntable
- Rendering the Turntable
- Looping Turntables in Davinci Resolve
Software Needed
Blender. This is the application that we will use to texture, pose, and render models.
An application that can unpack .rar files. WinRAR and 7-ZIP both work. I'll be using 7-ZIP in this tutorial.
Optional
A video editing software. We can export as image sequences and mp4s directly from Blender, but a separate software can be useful to loop things like turntables several times over. I'm not too familar with Blender's video editor, so I use Davinci Resolve instead. It's free and available for Windows, Mac, and Linux.
An HDRI. When rendering models, we can use basic environment settings and ambient occlusion to create neutral, straightforward renders. However, HDRIs are an easy way to give a scene more natural and complex lighting, and this can be useful for artists. I'll be using Photo Studio 01 by Sergej Majboroda on HDRIHaven, since it's free, as is everything on HDRIHaven. Satara Night by Greg Zaal is a nice warm one, and Kloppenheim 02 by Greg Zaal is a very interesting greenish night-time one.
Downloading and Unpacking Models
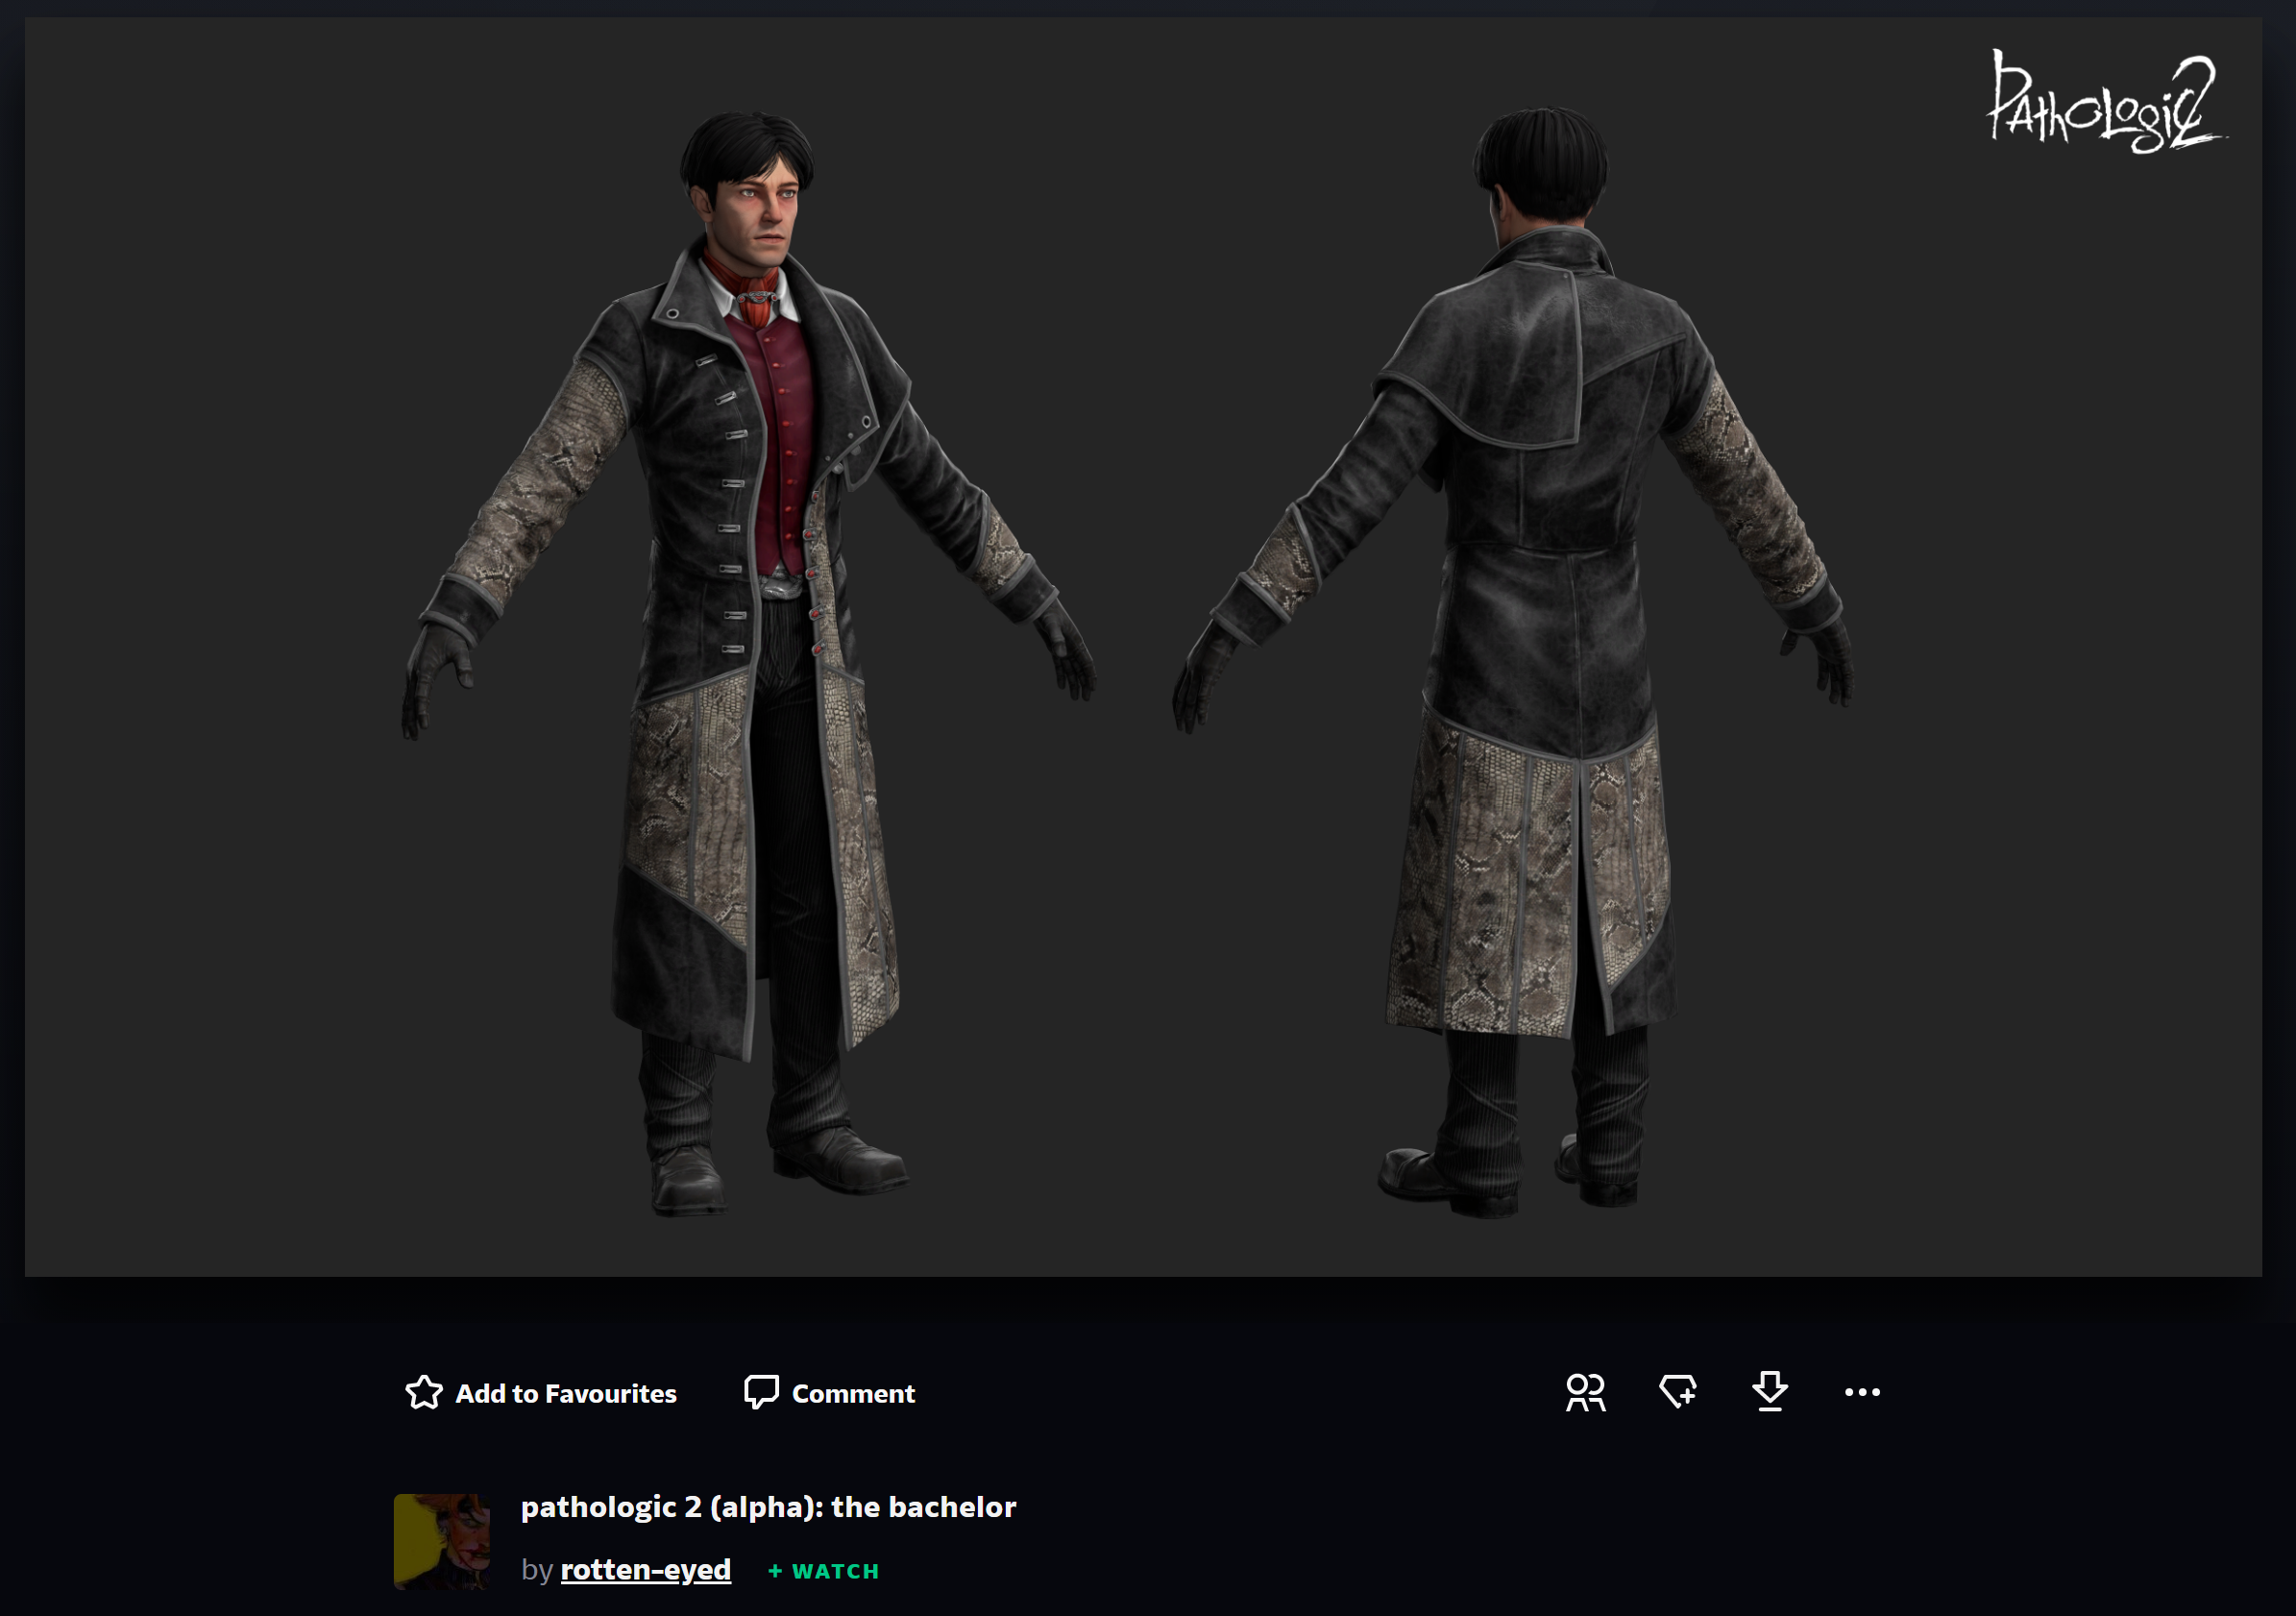
Once you've downloaded Blender, you can go ahead and download a model from rotten-eye's Pathologic 2 gallery. I'm going to be using The Bachelor's model.
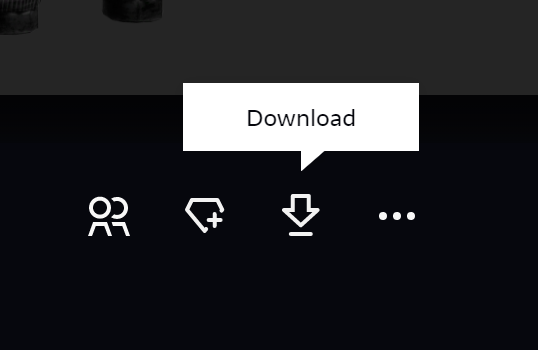
Most of them can be downloaded directly from deviantArt, but some have a mega.nz link at the bottom of the description, like the Executor and Tragedian models.
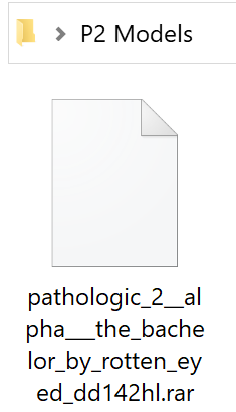
The models come packaged as .rar files. I recommend moving this file to a specific folder in your Documents or Pictures before unpacking.
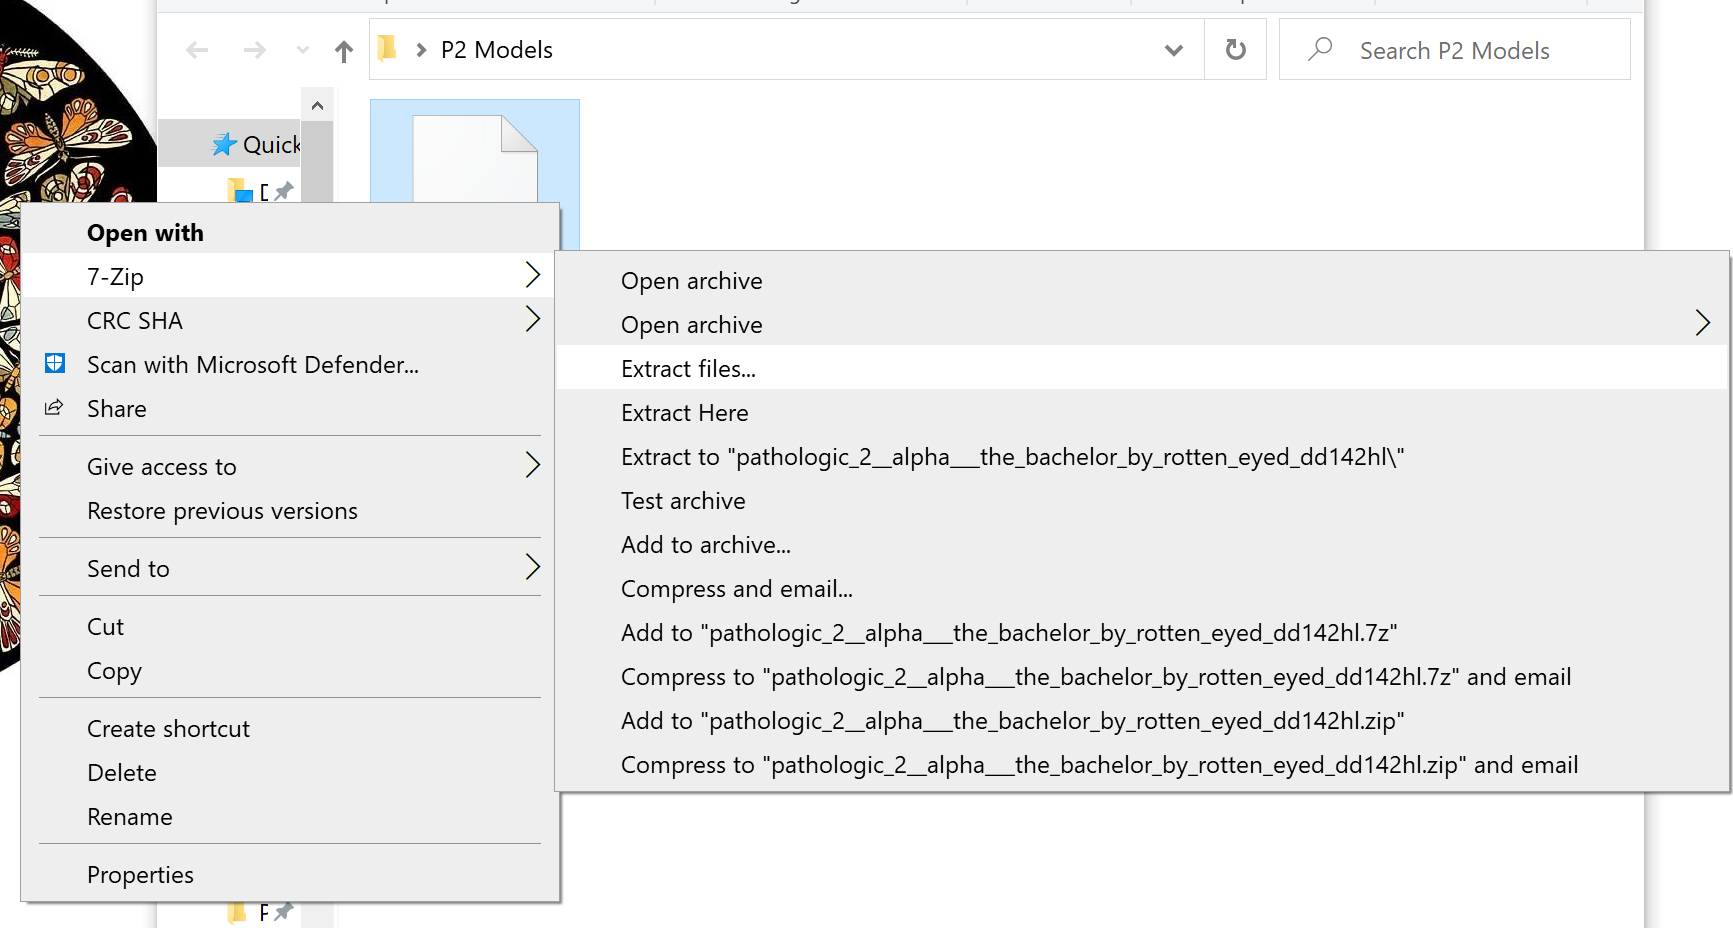
To unpack the .rar file into regular folders, right click on it and hit extract. I use 7-ZIP, but you might see a different icon or name depending on which unpacking application you're using. Press OK on any of the unpacking options that pop up.
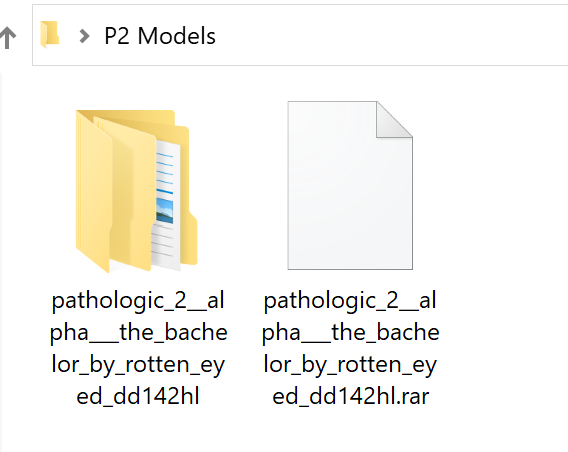
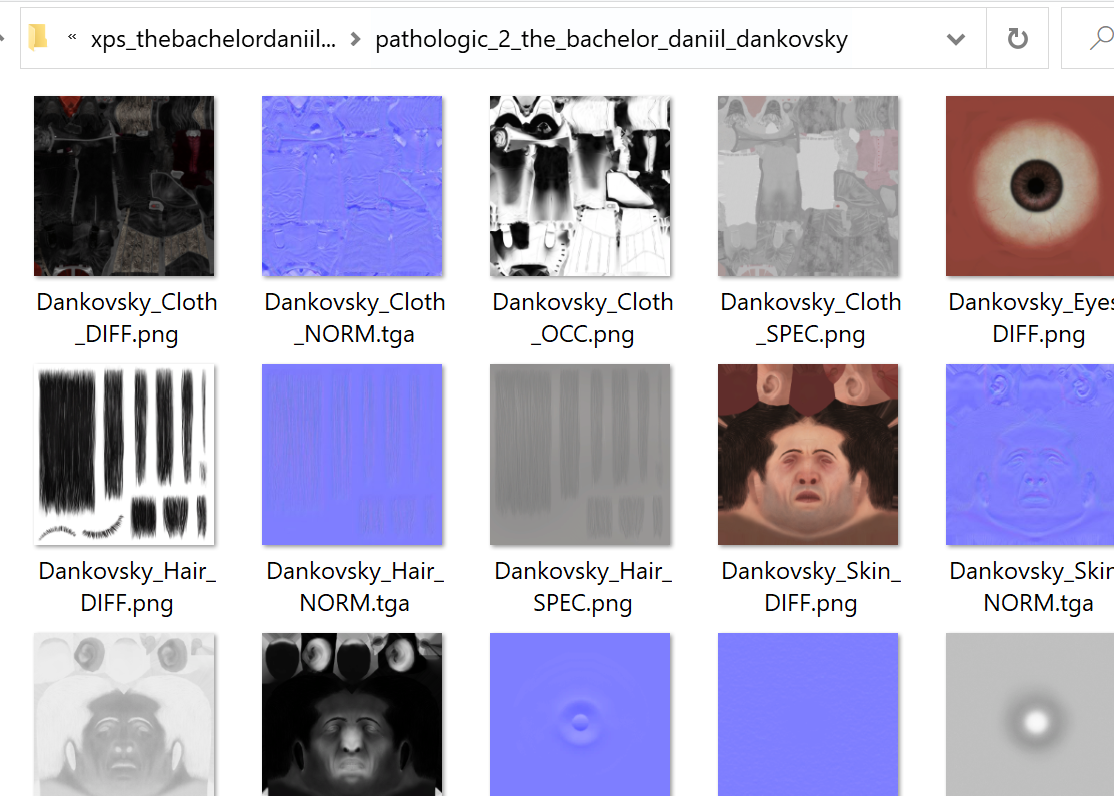
The .rar file will be unpacked into a series of nested folders. We only need the innermost one, which should begin with "pathologic_2", followed by the character's name. We don't need the outermost folder, or the one that begins with "xps".
You can rename the innermost folder to something shorter so it's easier to find in Blender's file view later on, and then you can drag it out to the main folder. Here, I've renamed it to "bachelor".
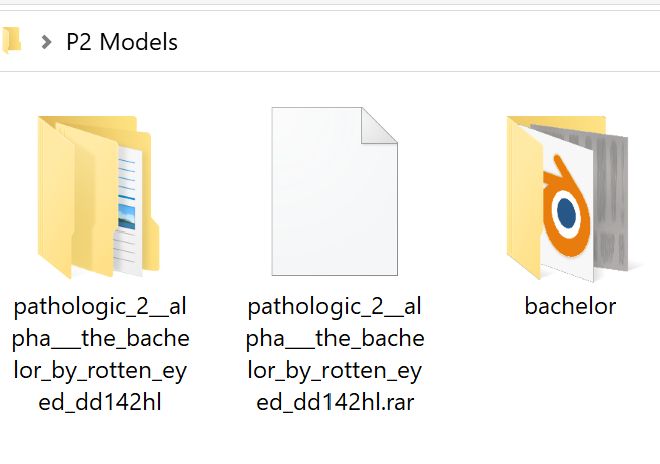
Now, we can set up the model in Blender.
Setting Up Models in Blender
Navigation
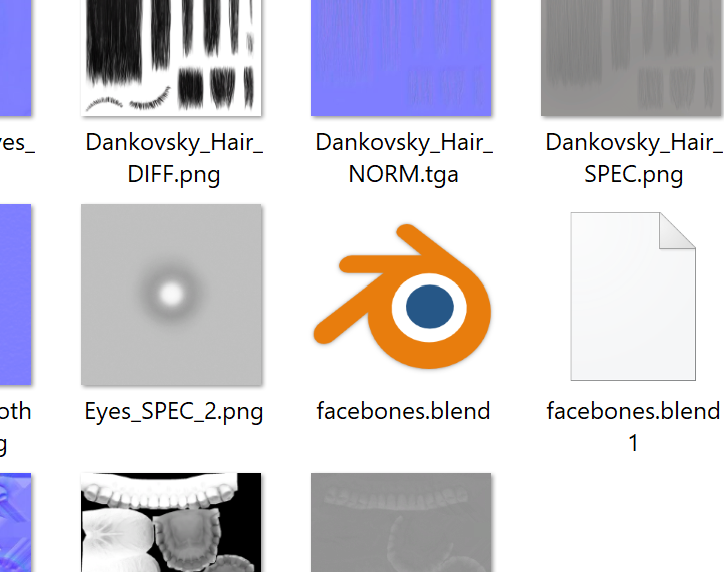
To open a model in Blender, you can double-click on the "facebones.blend" file inside of the character's folder.
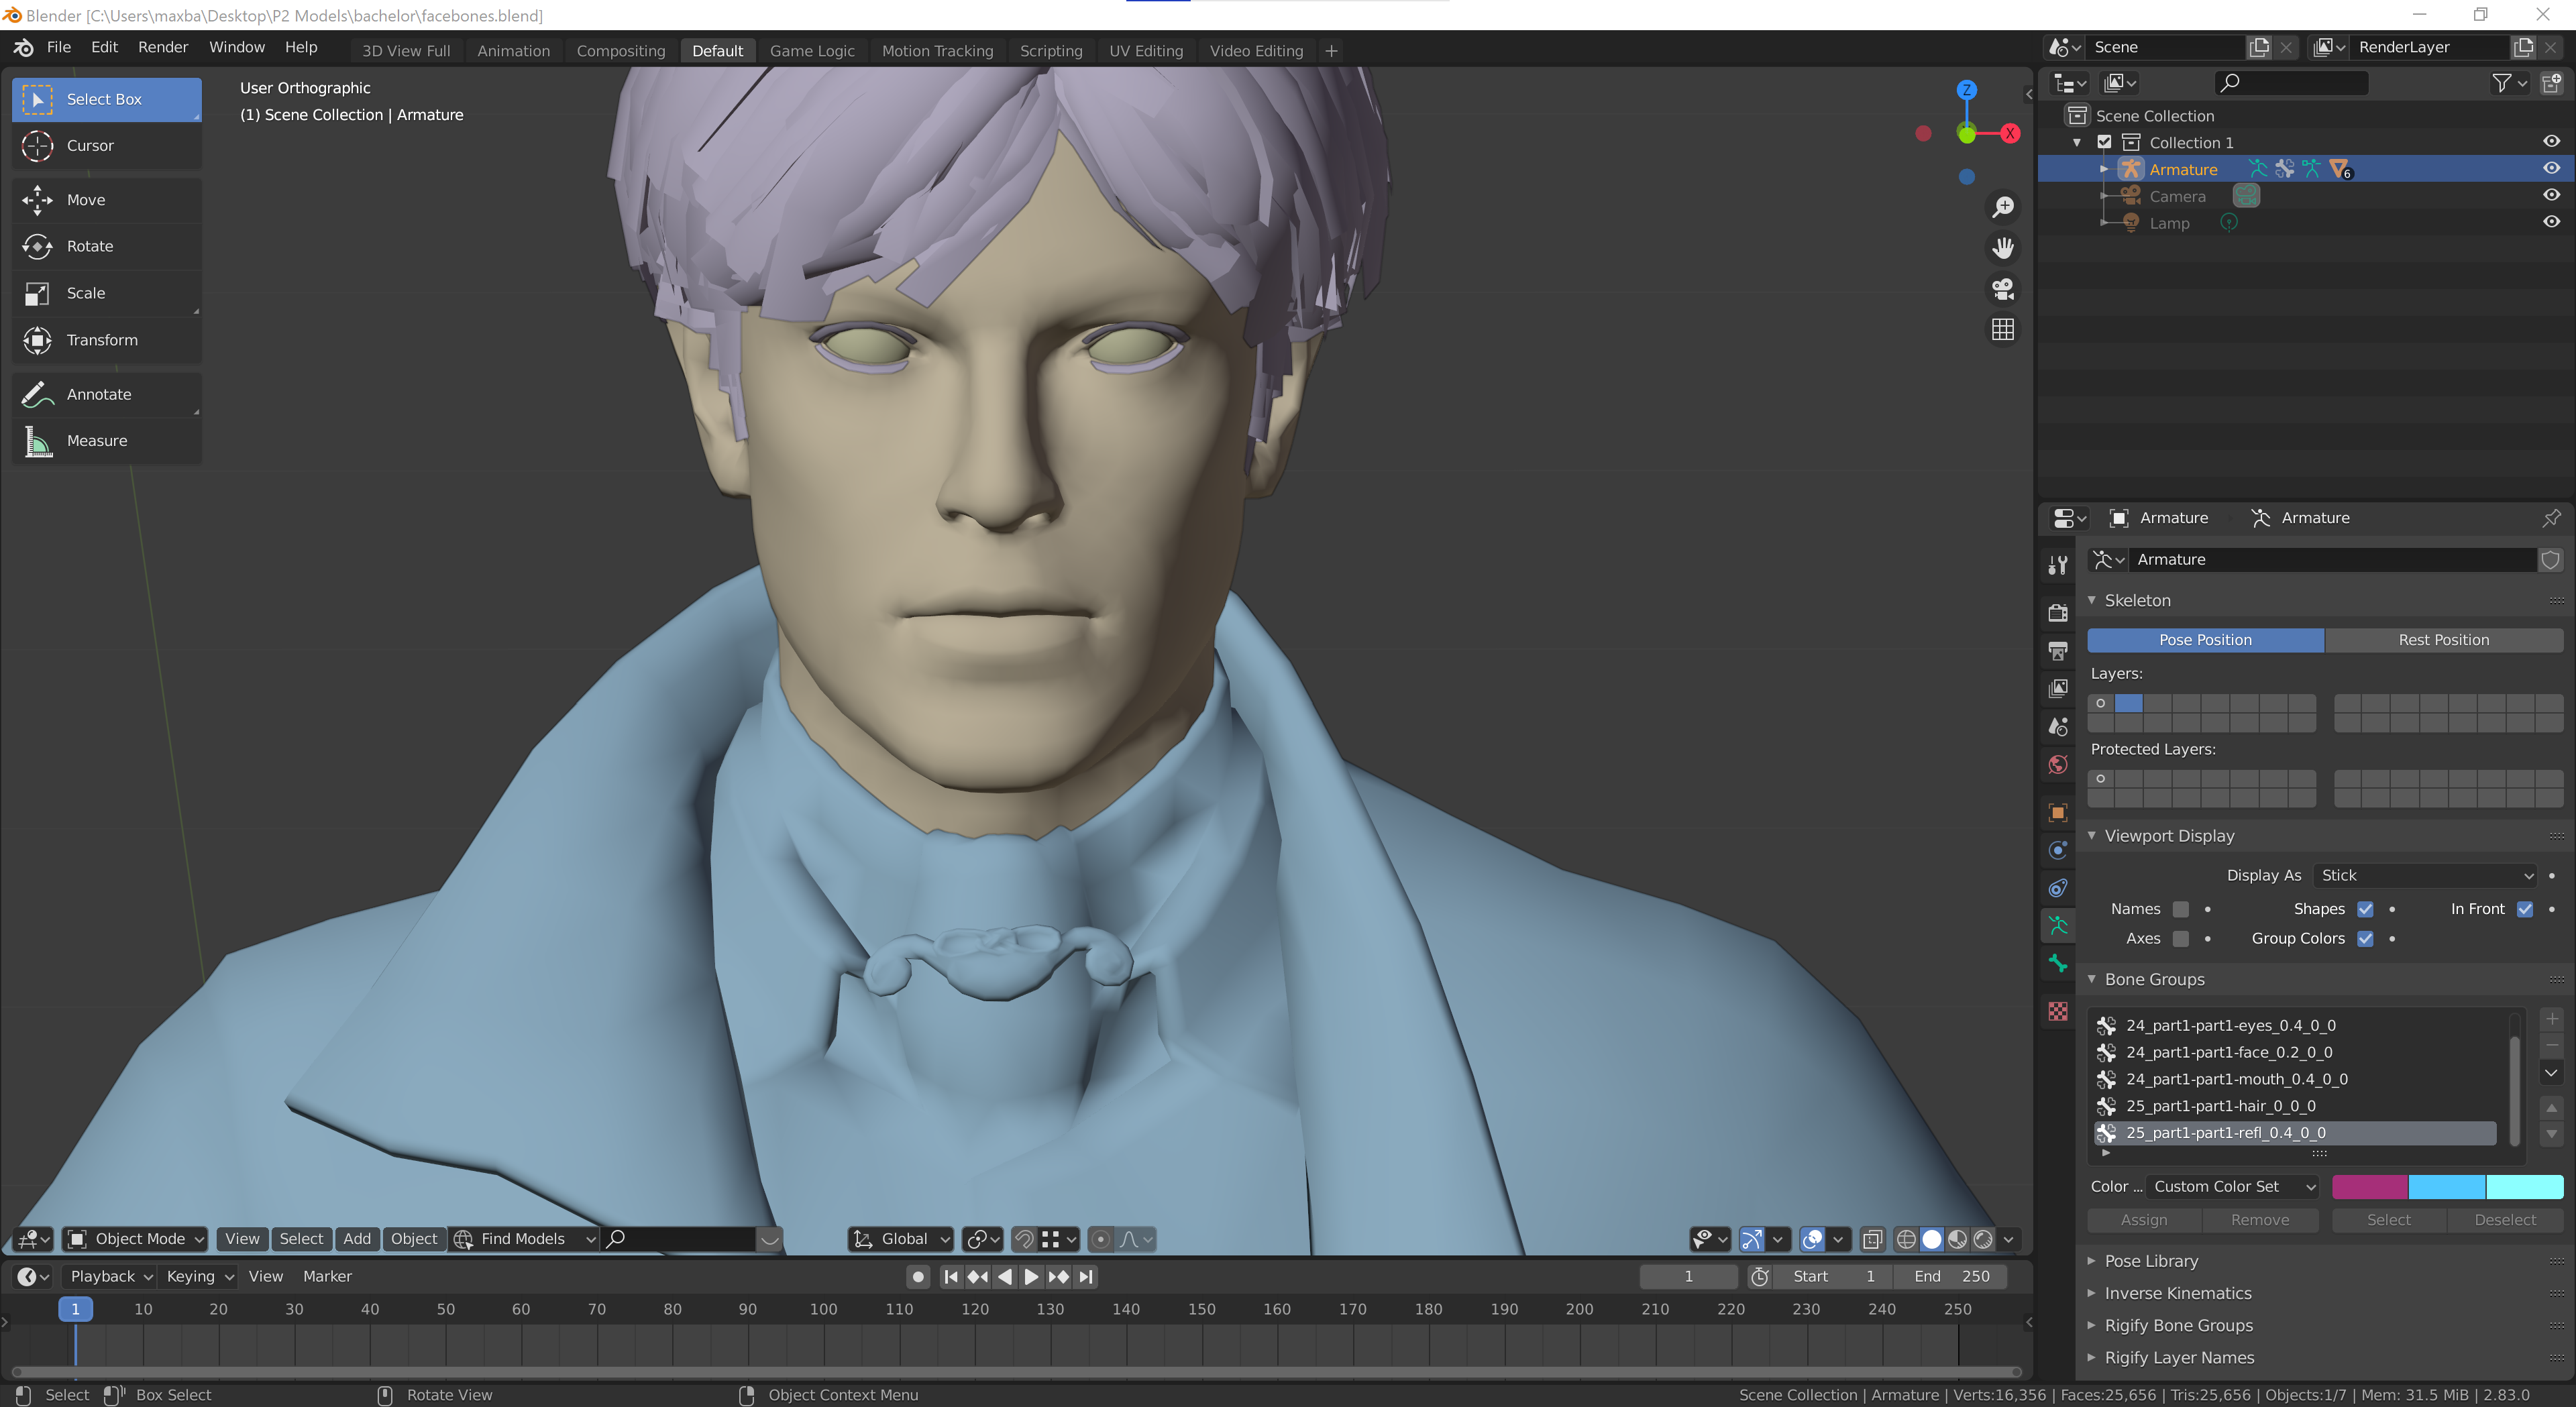
This is the scene you're greeted with. I'll do my best to explain how to navigate Blender to someone who has never used it.
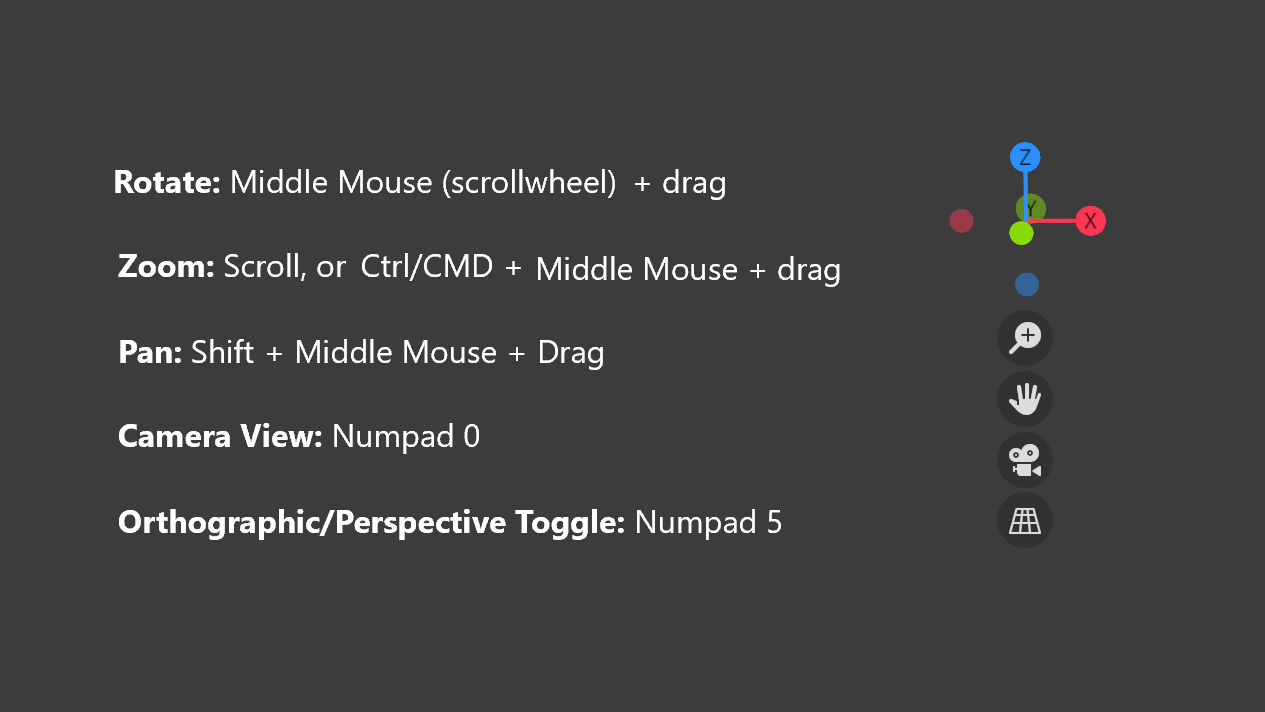
Blender uses all three mouse buttons to navigate, so trackpad users may want to use the gizmos at the top-right of the 3D viewport to navigate the scene.
The three main navigation controls, as well as the two main camera controls, are:
Rotate: Middle Mouse (Scrollwheel) + drag. You can click on the circle buttons in the gizmo to snap to a certain view. You can also snap to different views by using the tilde key (`/~, top left of some keyboards), and selecting a view on the popup radial menu.
Zoom: Scroll, or Middle Mouse + Ctrl (Windows, Linux) / CMD (Mac) + drag
Pan: Shift + Middle Mouse + drag
Camera View: Numpad 0. Switches the view to the active camera, which has a highlighted green camera icon in the Scene Collection.
Orthographic/Perspective Toggle: Numpad 5. Toggles between Orthographic and Perspective view.
If you'd like, you can also watch Grant Abbitt's Complete Beginner's Guide To Blender 2.8 - Interface video for help. His tutorials are my favorite... They're the way I finally learned how to use Blender, along with CGMatter / Default Cube's Tutorials.
Materials: Clothing and Skin
To texture the models, we have to hook up three different textures to the different parts of the model.
The three textures are:
Diffuse / DIFF (base colors)
Specular / SPEC (shinyness)
Normal Map / NORM (additional 3D height information applied to a more simple 3D model.)
Generally, the different parts of the models are as follows:
Hair (Textures for hair are on one sheet, but the eyelashes and head hair models may be split up.)
Eyes
Mouth (Not visible when jaw is in resting closed position.)
Skin
Cloth (Textures for shirts, shoes, and jackets are on one sheet, but some jacket models are separate.)
With the exception of the hair, which I'll cover in the section below, the rest of these parts are hooked up in the Shading workspace the same way.
The model does not come with the workspace we need to hook these up. To get to this workspace, you can click the plus button on the top toolbar, then go to General / Shading
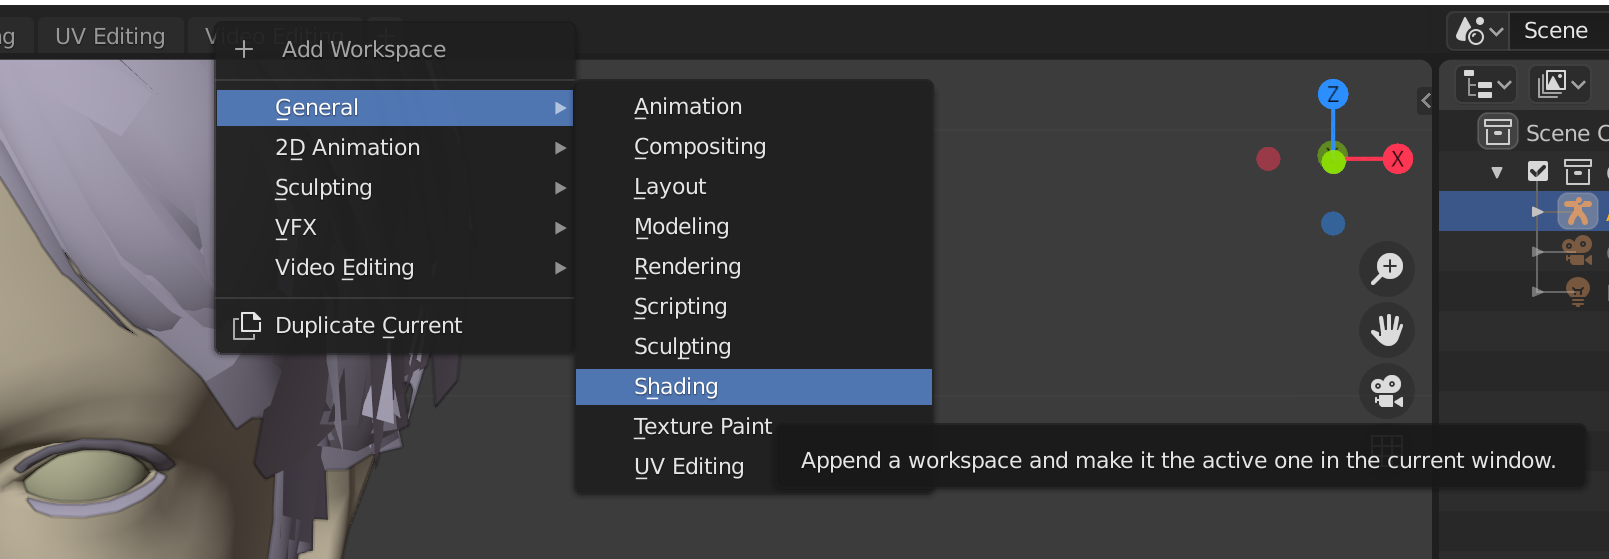
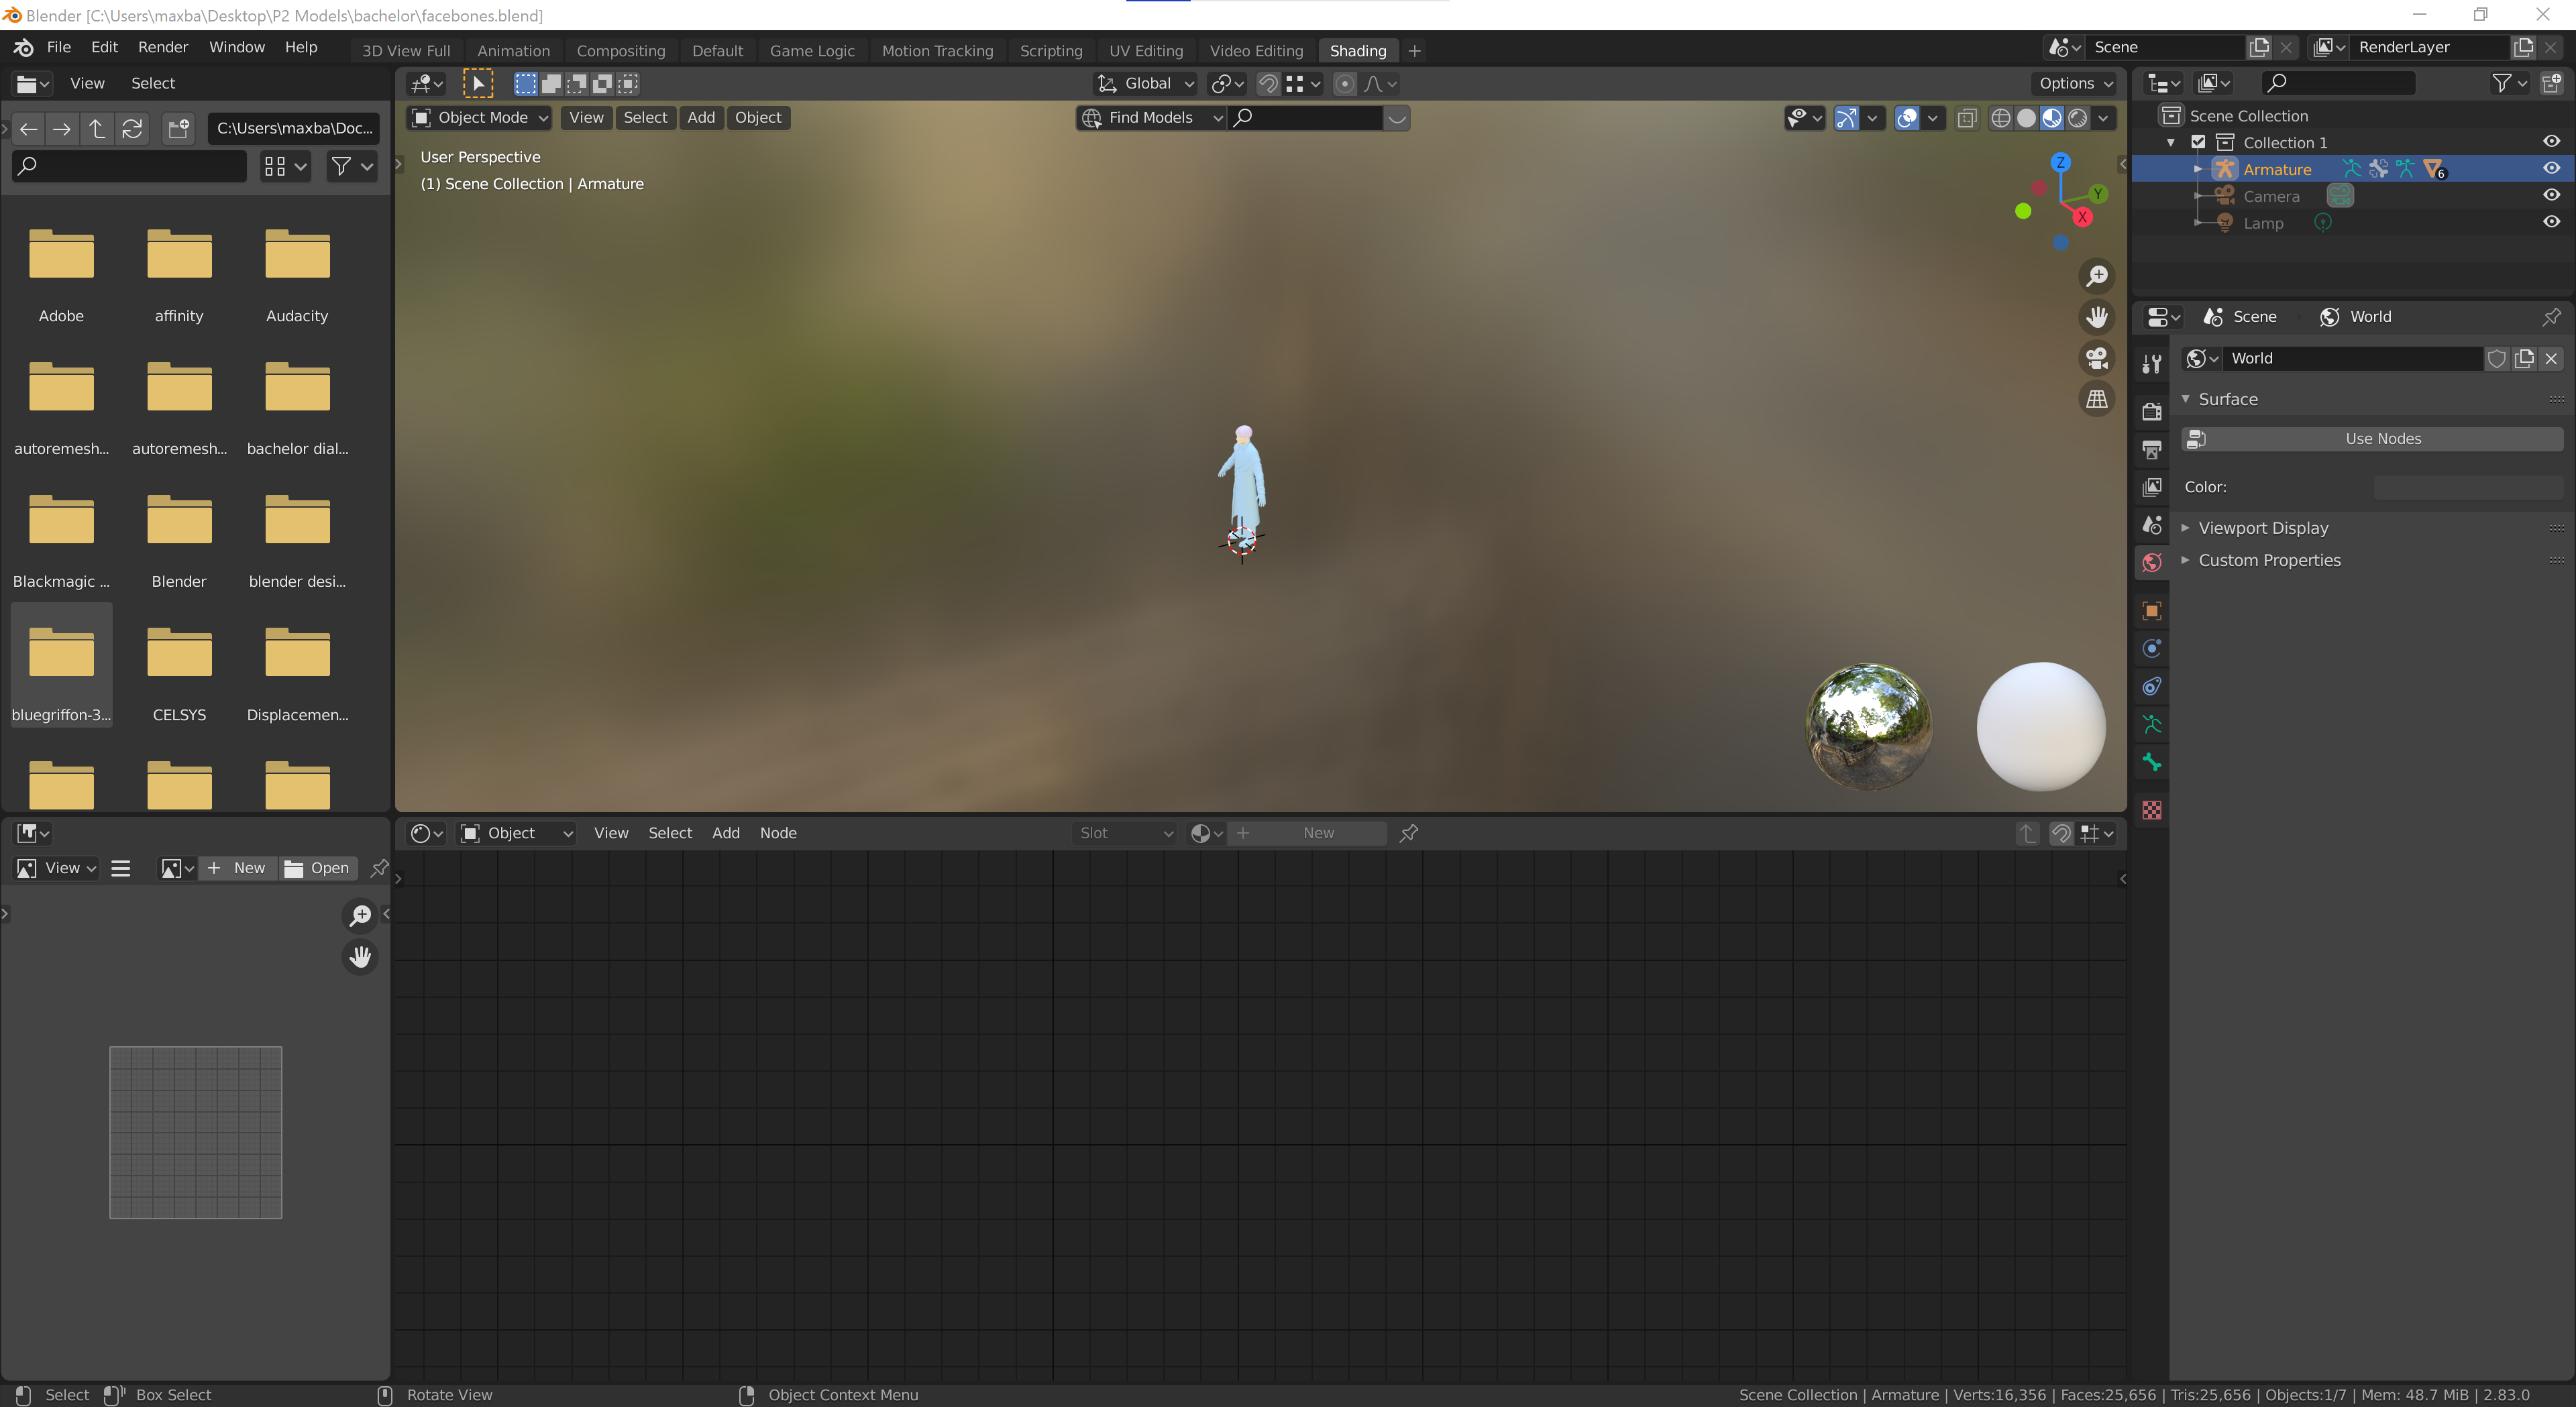
Now, we can start setting up the materials for each part of the character. You can see the different parts by clicking the down arrow on the "Armature" object in the Scene collection (top-right side of screen.)
You can also left click on different parts of the model in the 3D view. The Scene Collection just makes it easier to click on things sometimes, especially if they're hidden, like in the case of the mouth or the eyes.
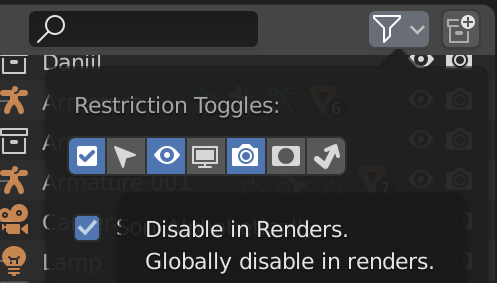
While you're here, you may want to hide or delete the eye reflection object, since we won't be using it. To hide the reflection object in both the viewport and renders, click the funnel icon on the top right, and select the camera icon under Restriction toggle. Then, hide both the eye and camera icon for the last object, "25_part1_-part1-refl_0.4_0_..."
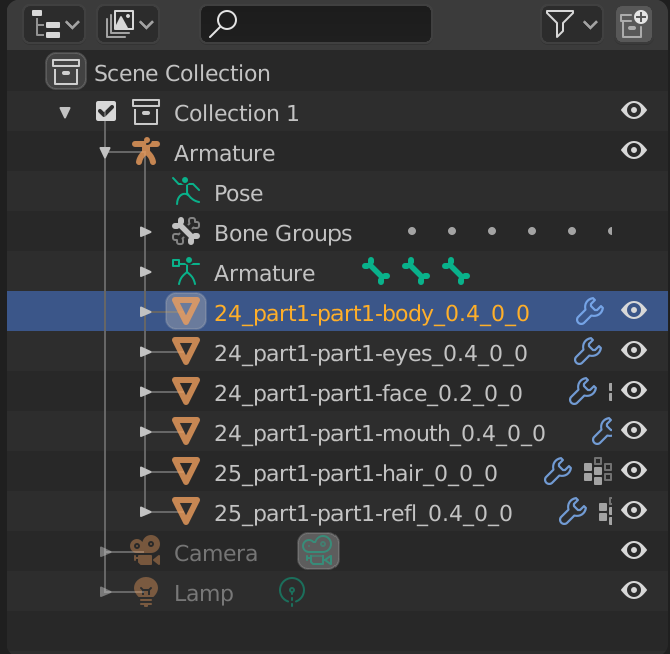
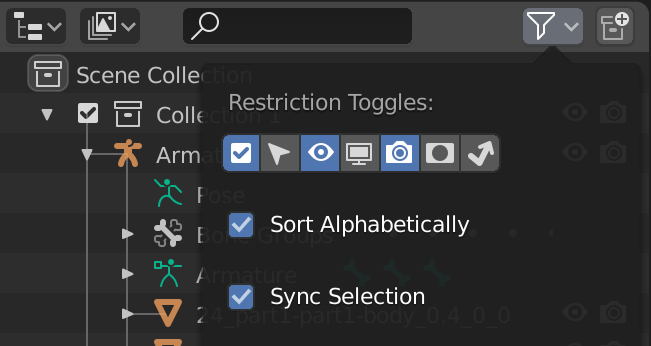
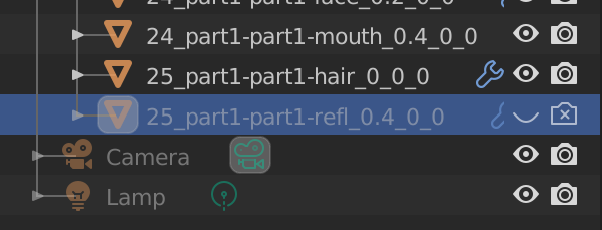
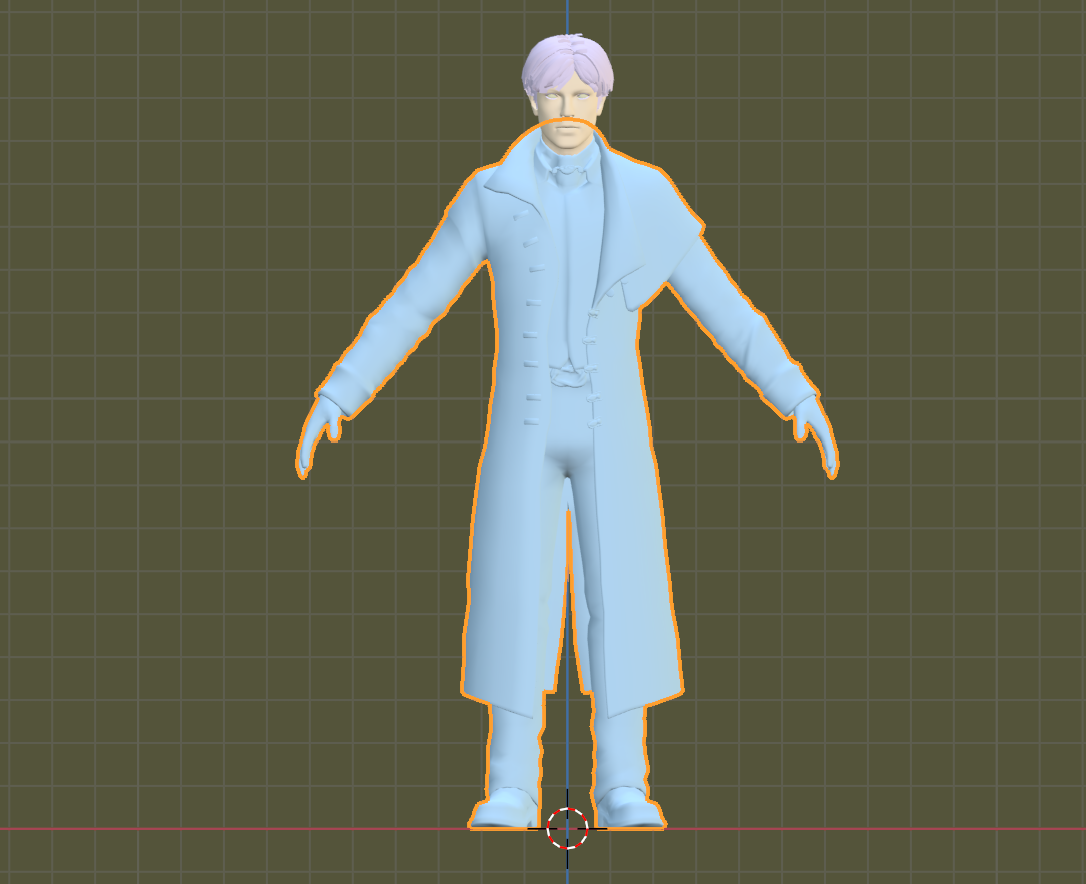
After clicking on the first model part ("24_part1_part1-body_0.4_0_0..."), you'll see that the body is highlighted. In the Bachelor's case, this is his coat.
To start hooking up materials, we need to navigate to the Materials tab. This is found in an area underneath the Scene Collection, to the bottom right. There are several tabs here, but the one you want right now is the tab with the pink icon that looks like a sphere with a checkerboard pattern inside of it.
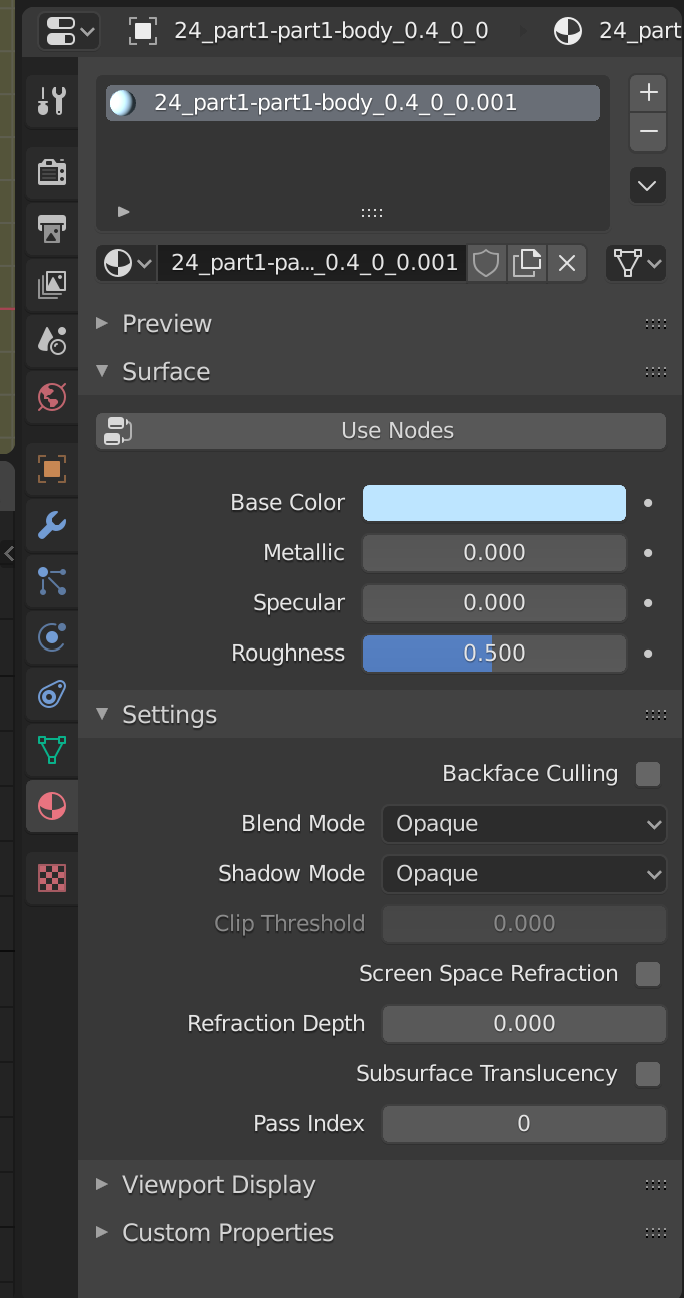
Under the Surface menu, you'll see a "Use Nodes" button. When you click this, you'll notice that the materials tab changes, as well as the bottom half of the Shading workspace. Blender has set up a Principled BSDF that we can start hooking up image textures and other data to.
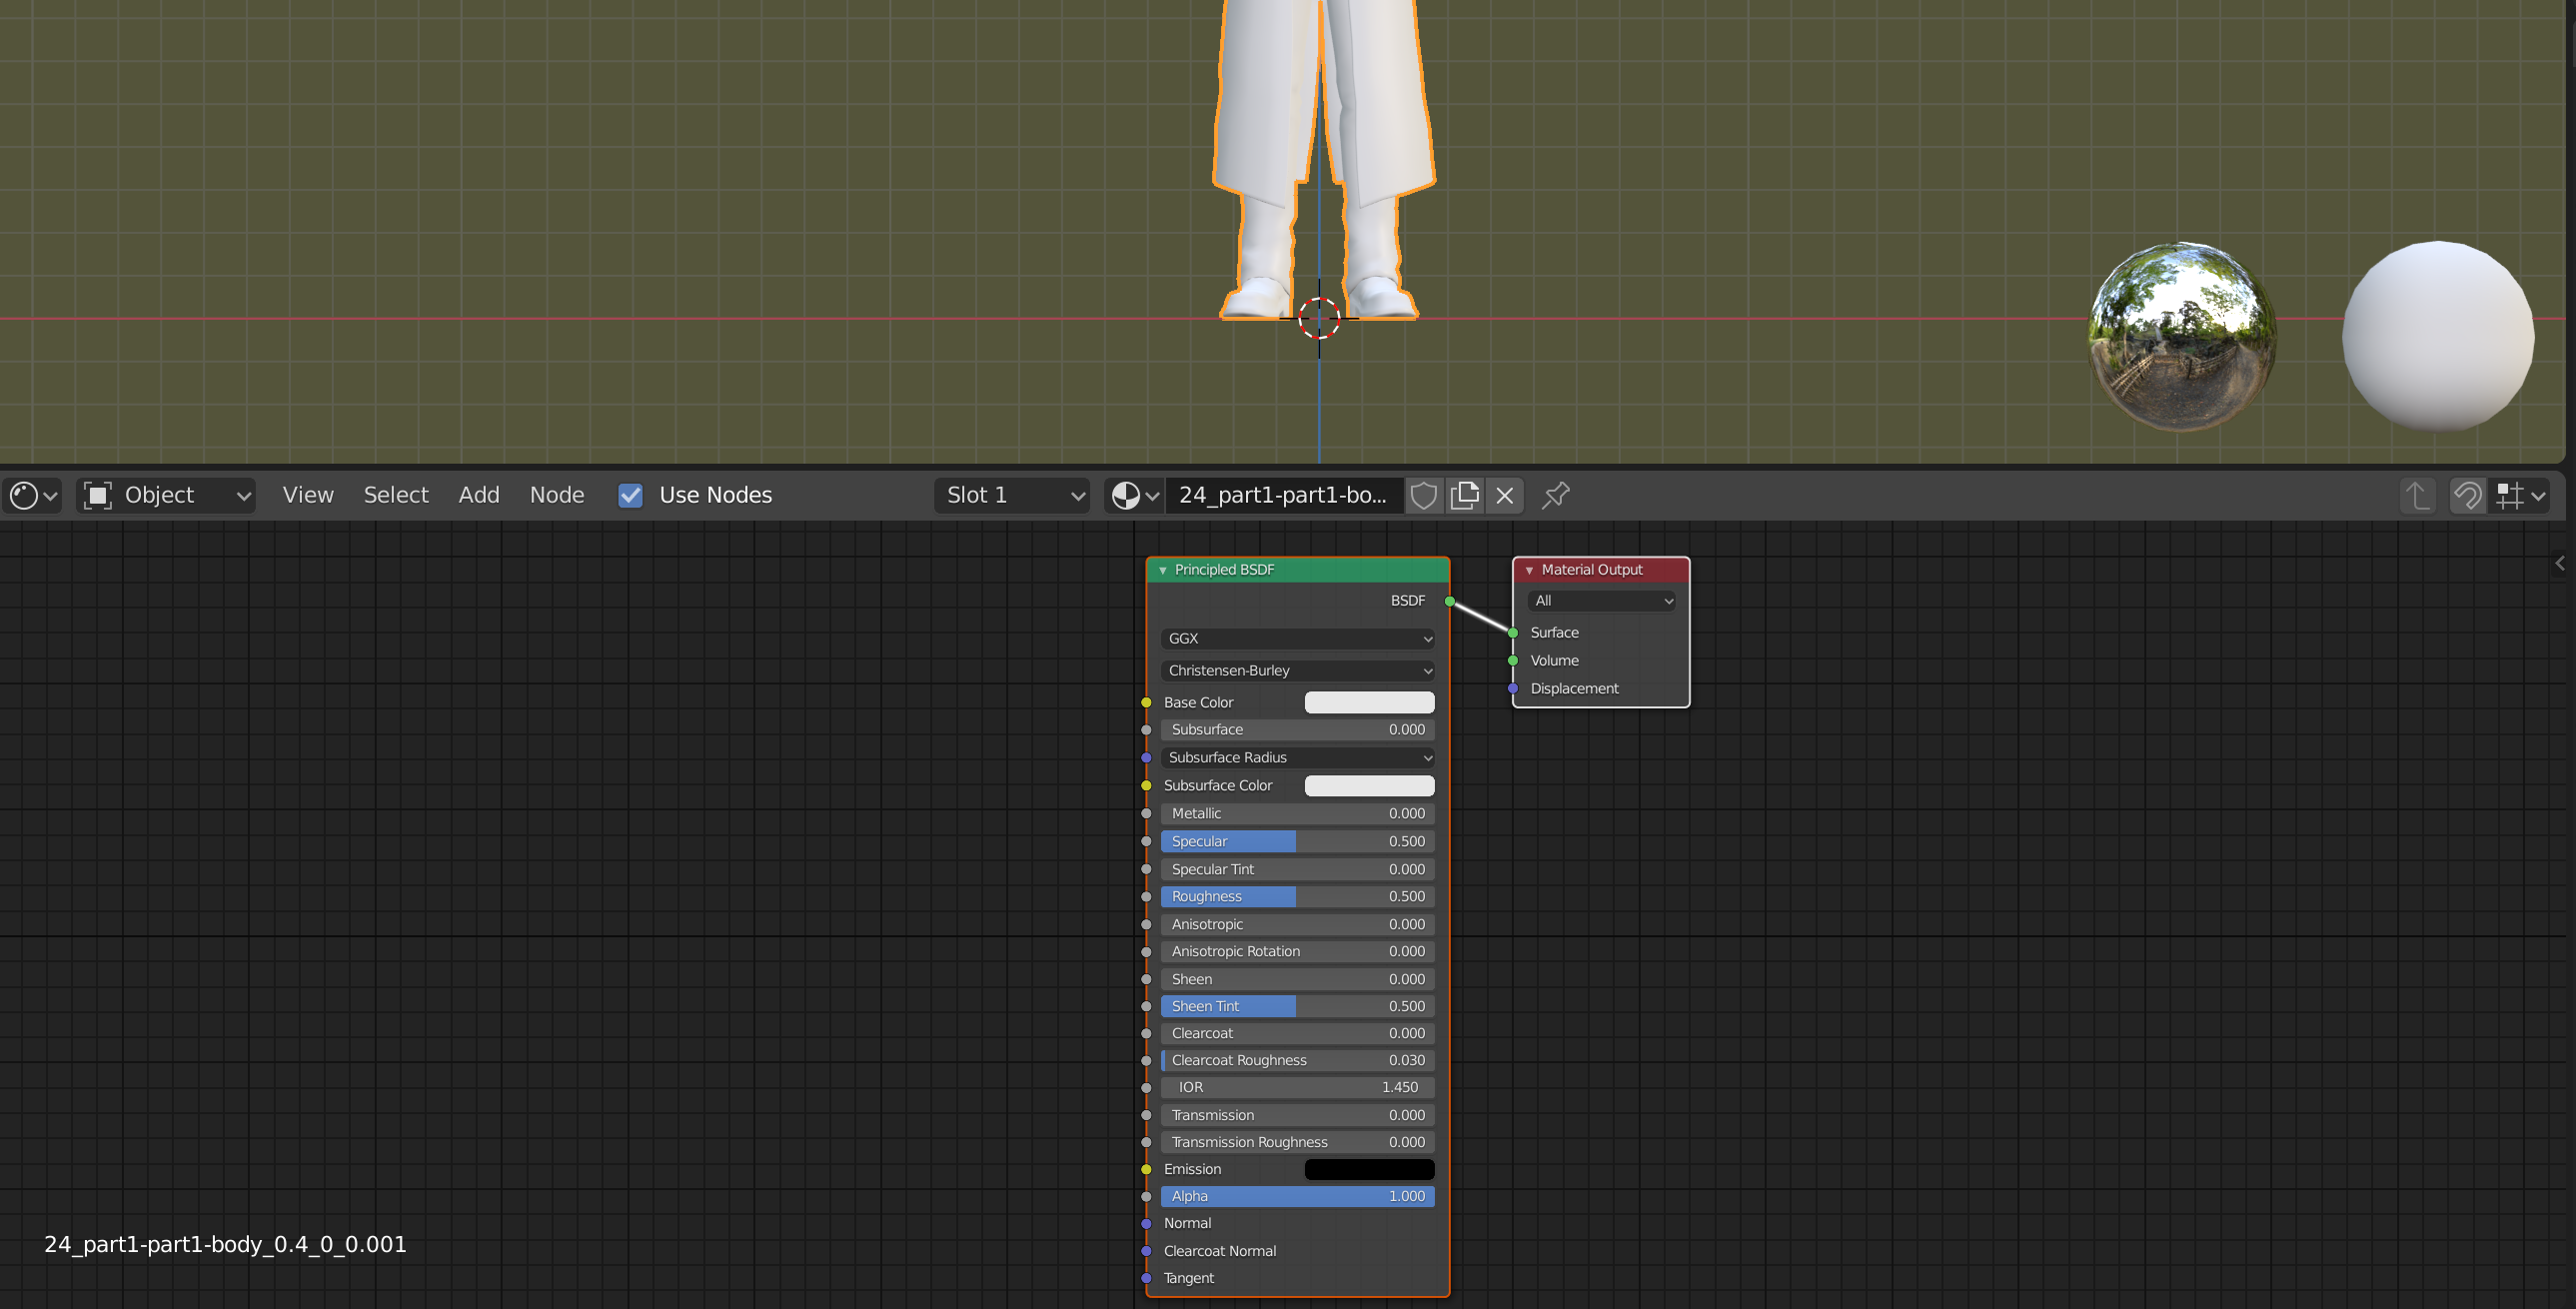
The first thing we'll want to do is to set up the three Image Texture nodes we'll need, as well as one Normal Map node that we'll pass one of these textures through.
To add a node, you can press Shift + A, and in the popup menu, click on Search. You can then type out the name of the nodes, and position them like this:
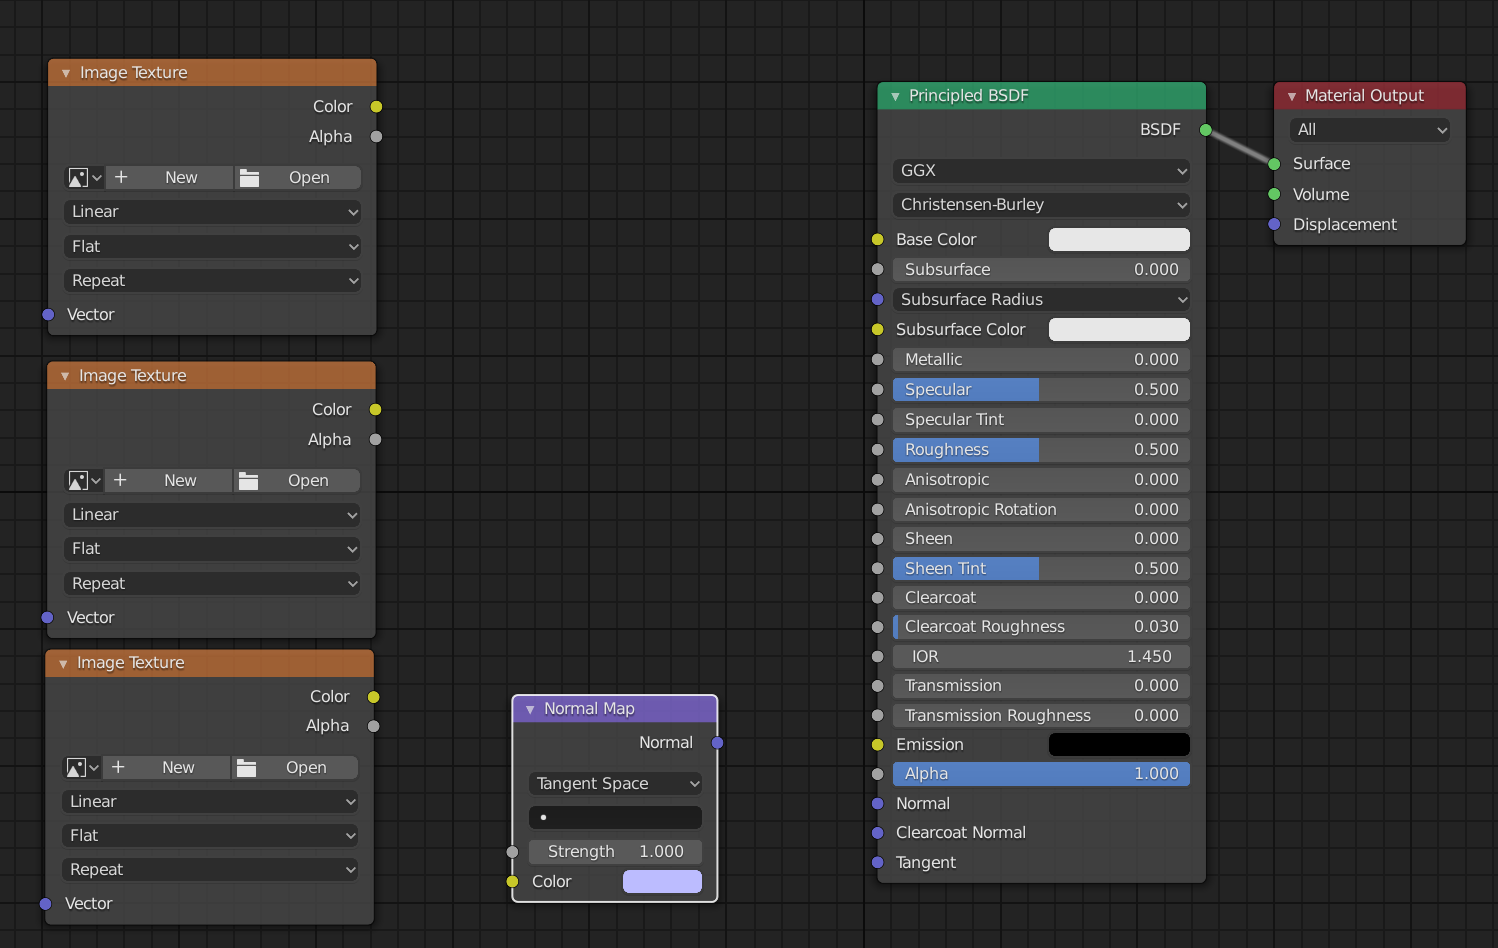
You can also place one Image Texture node, click on the node box, press ctrl/CMD + C to copy it, and ctrl/CMD + V to paste. It will paste directly over the first box, so you need to drag it down in order to see the second one.
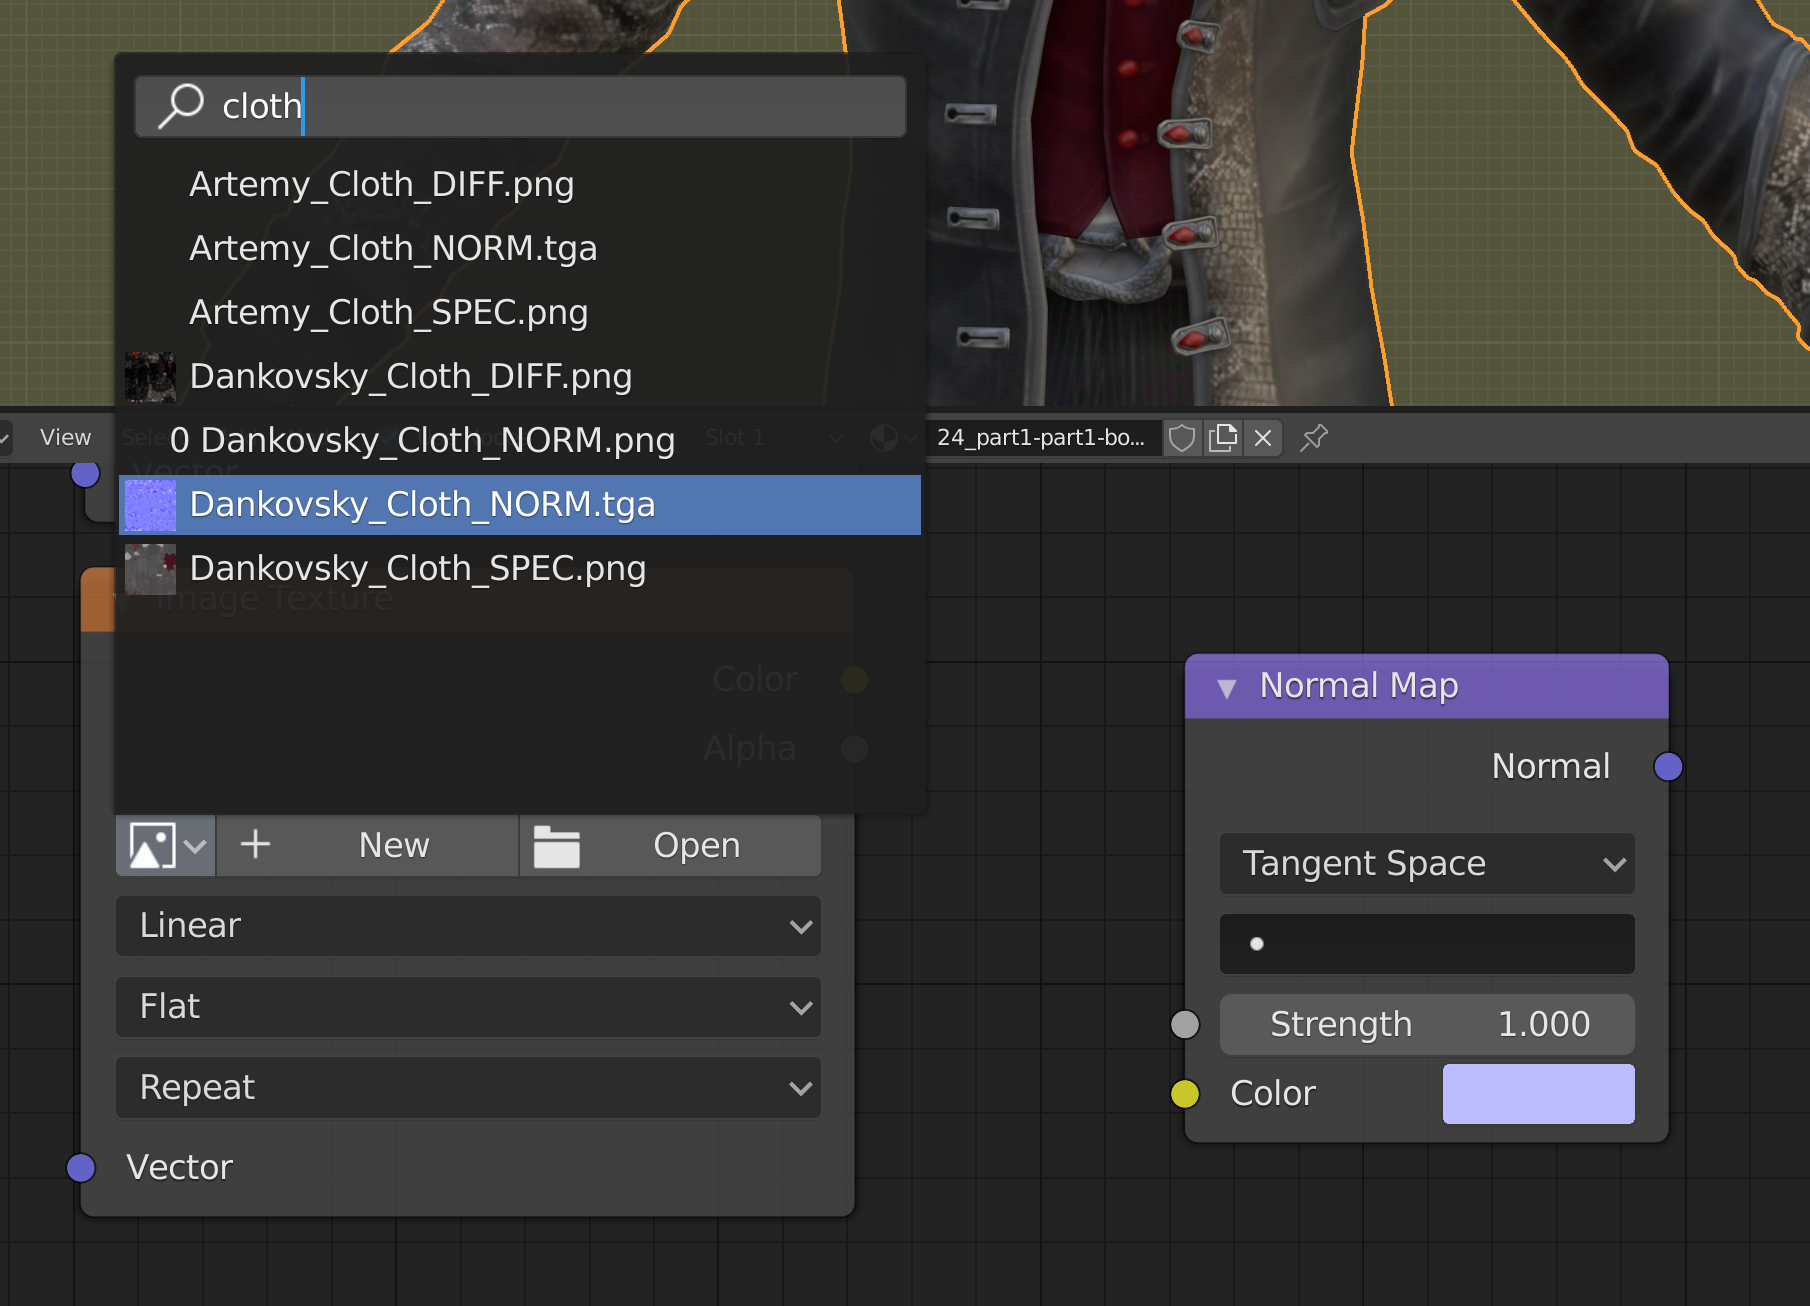
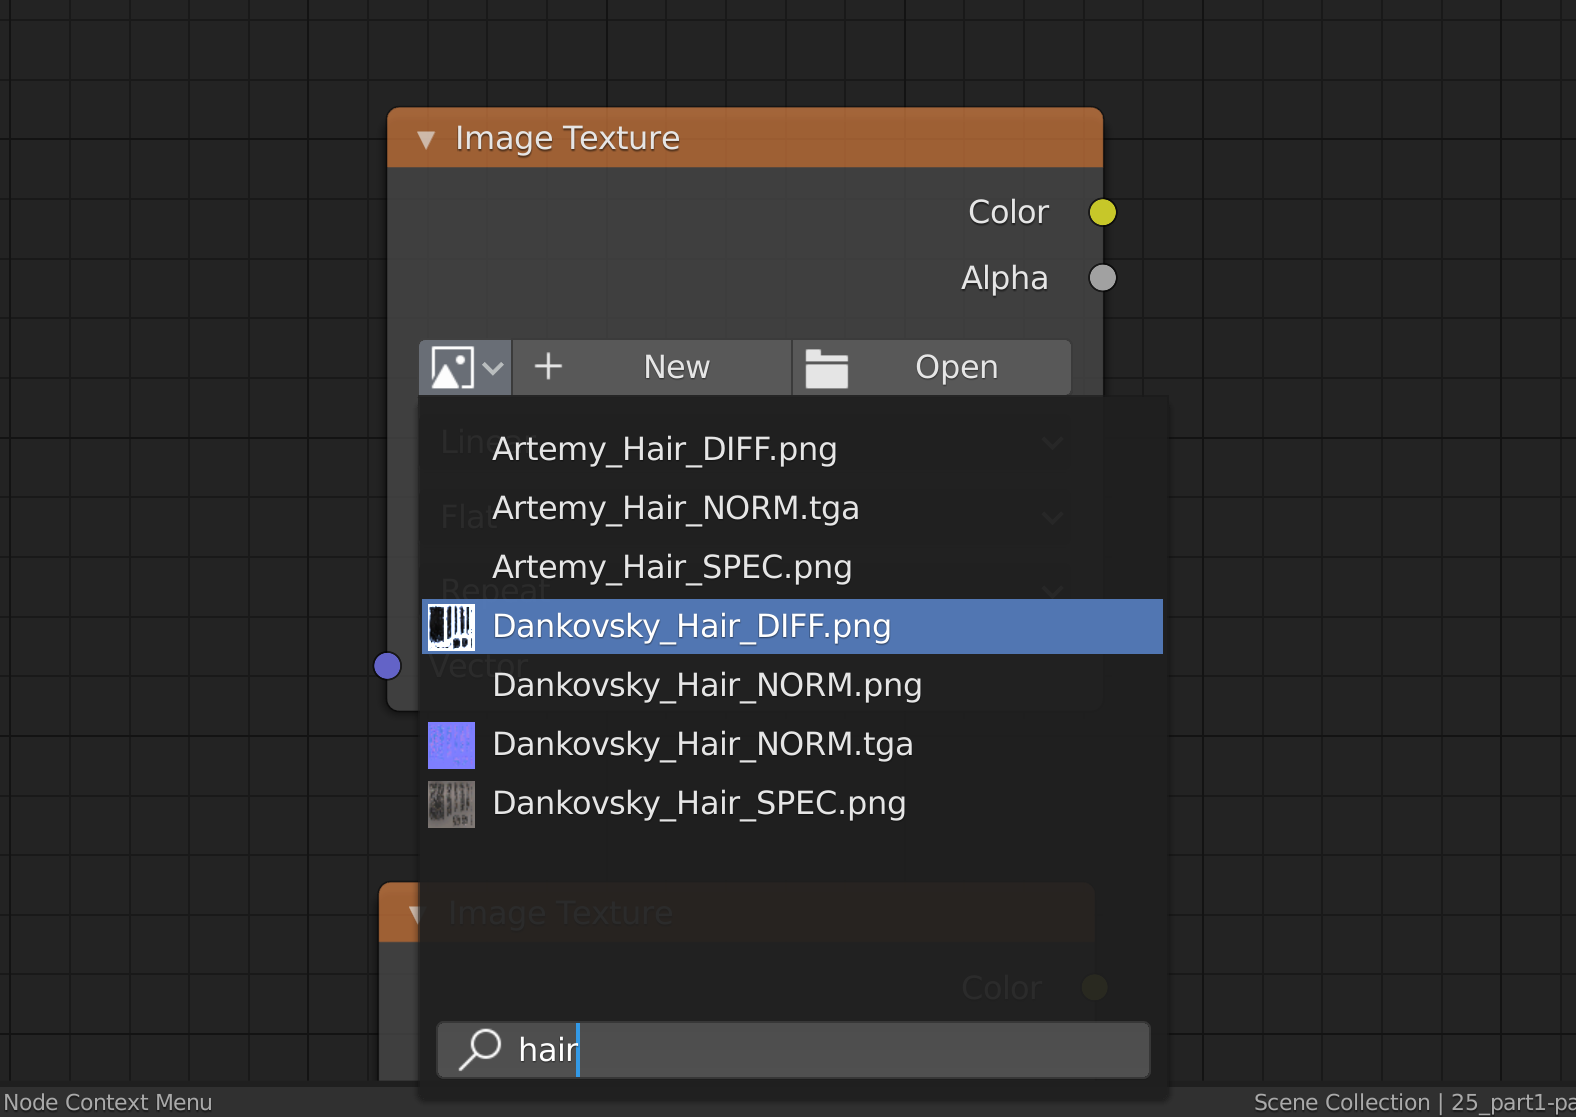
Now, we can start adding the different textures. I'll start with the diffuse. If you click on the first, smaller icon in the Image Texture node (square with dropdown arrow next to it), you'll get a list of textures in the folder we unpacked. If the textures you're looking for don't show up here, you maybe have to use the "Open" button to the right.
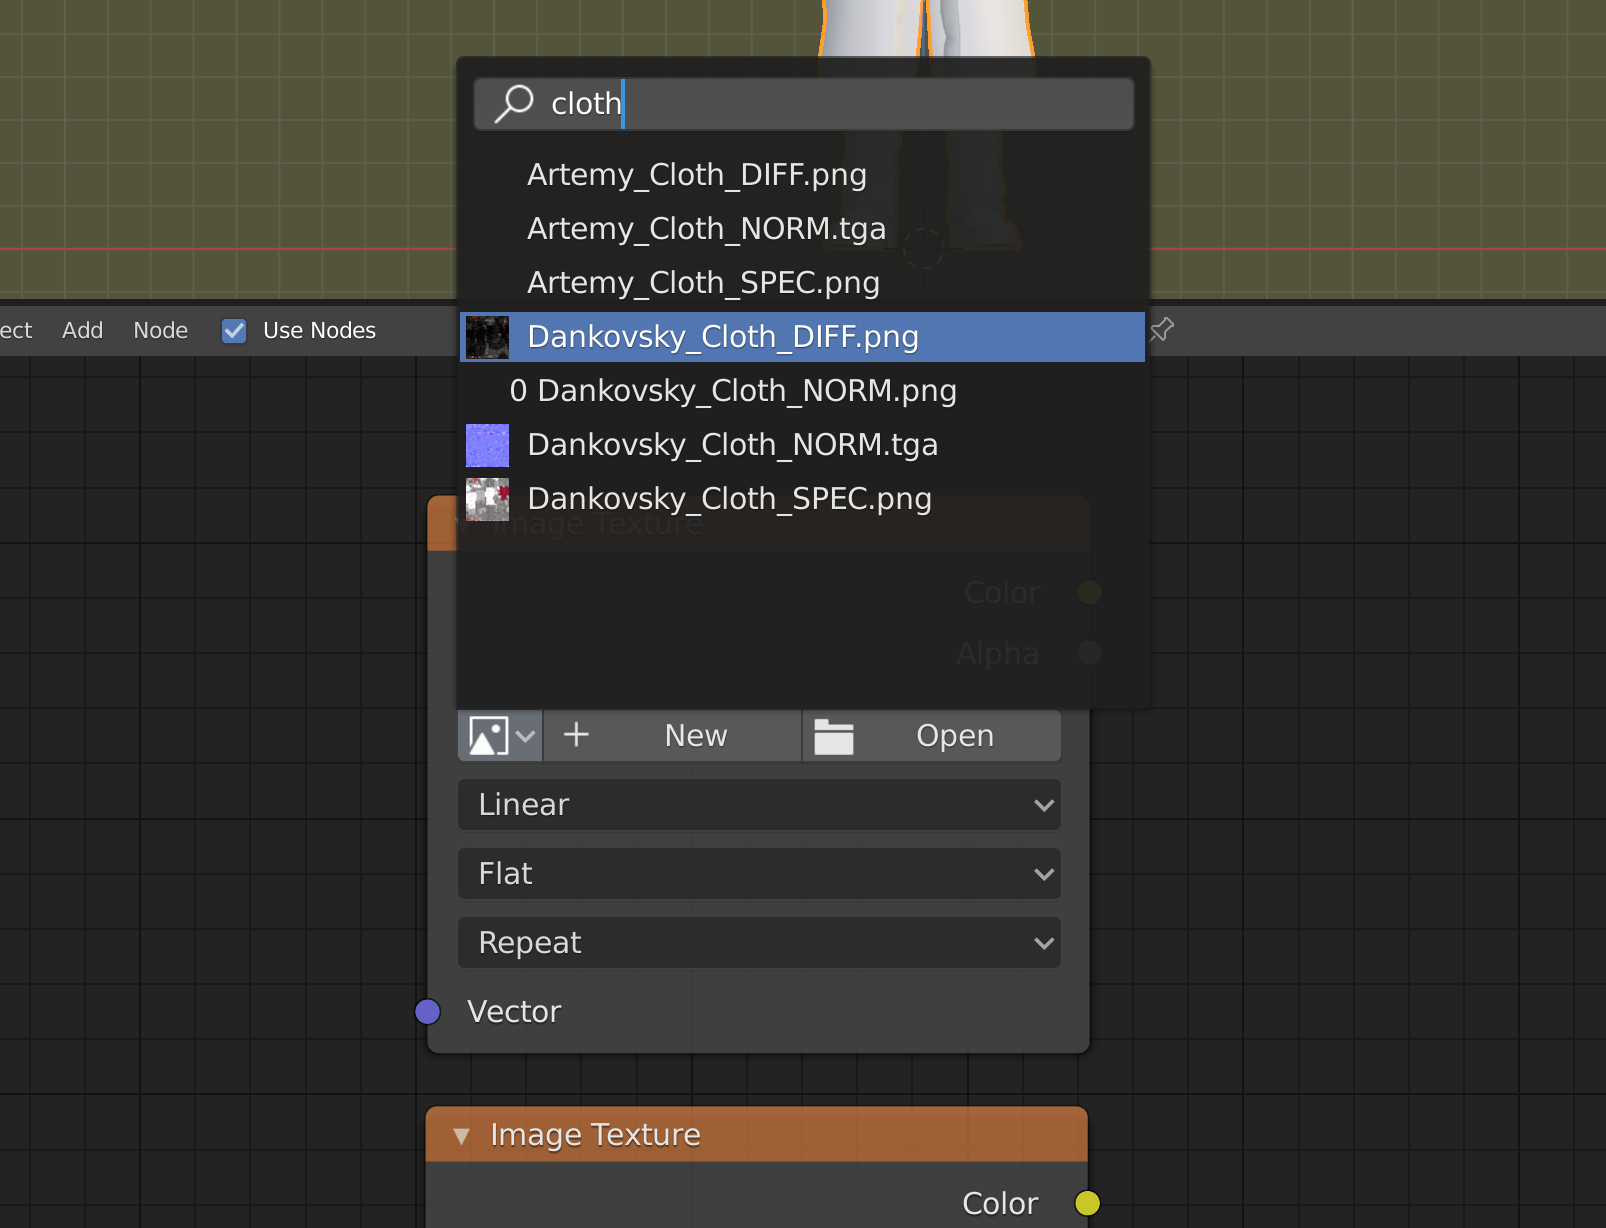
If you search "cloth" in this menu, you well get all of the textures associated with a character's clothing. You can select "Dankovsky_Cloth_DIFF.png" for the diffuse texture, and then you can drag the yellow Color output from the Image Texture node over to the yellow Base Color input on the BSDF.
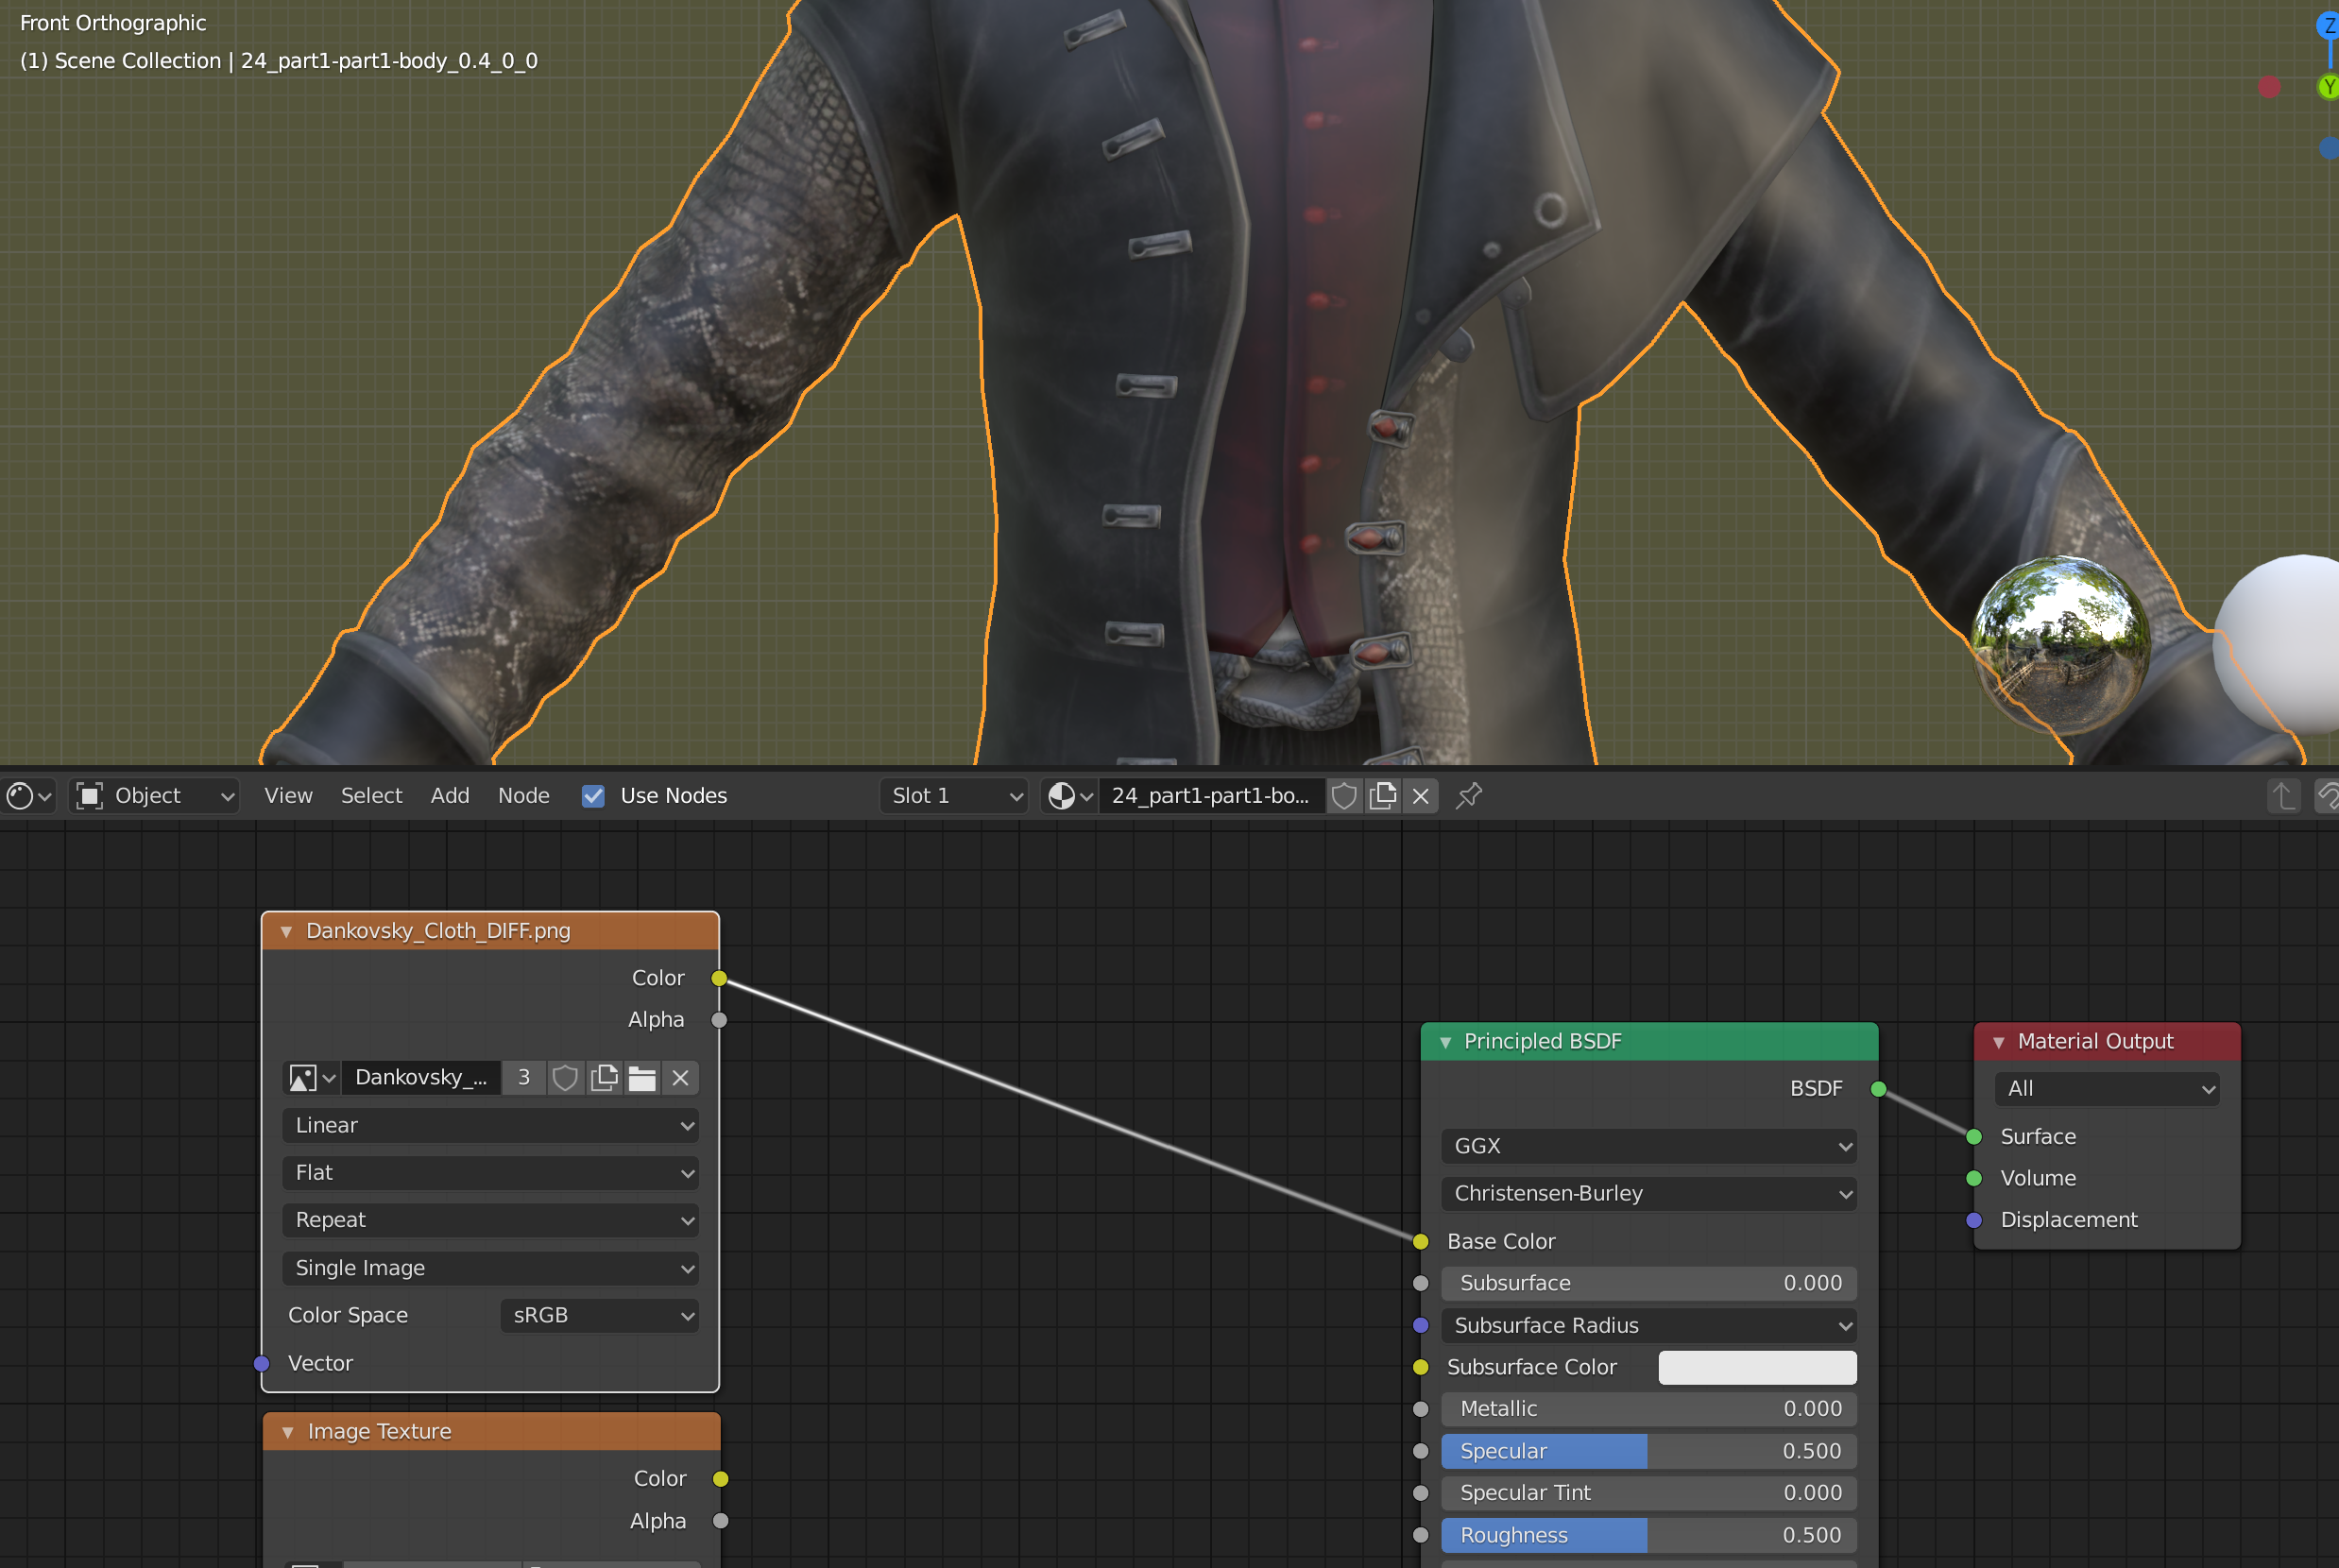
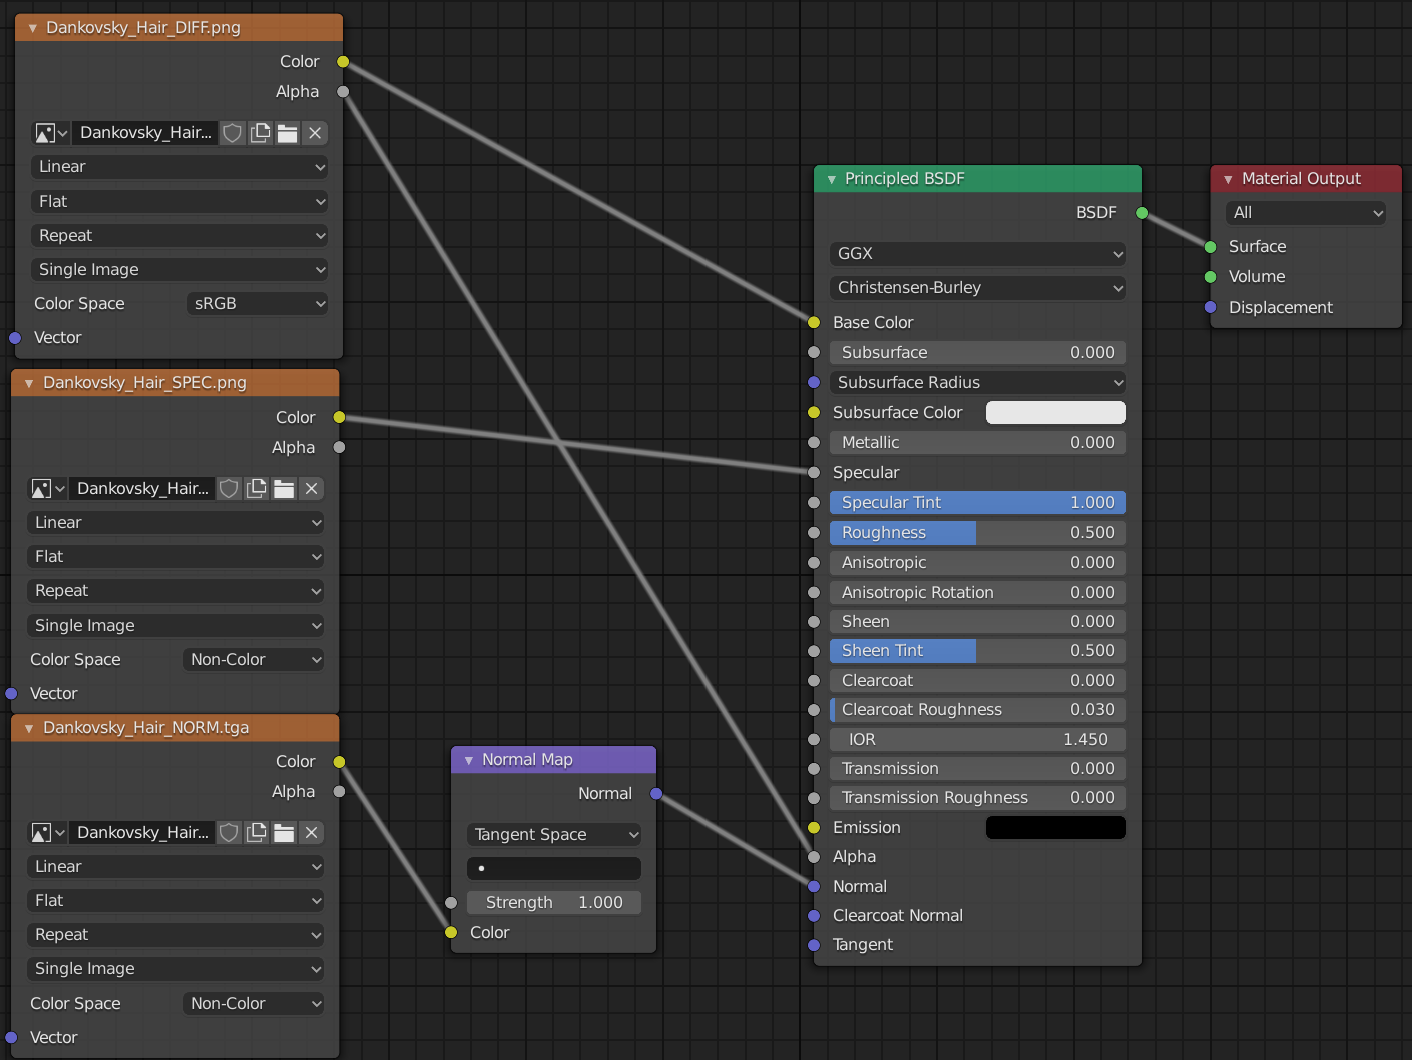
The specular texture is next. You can find it the same way as the diffuse, except this one is called "Dankovsky_Cloth_SPEC.png". You'll also want to set this to Non-Color in the Color Space section. Then, connect the yellow Color output to the to the gray Specular input in the BSDF.
You can raise the Specular Tint all the way to 1. You can also mess around with the Metallic and Rougness values if you'd like. If you need a model to be matte, you can change roughness to 1. You can also raise the Metallic value to 1 for more contrasting colors.
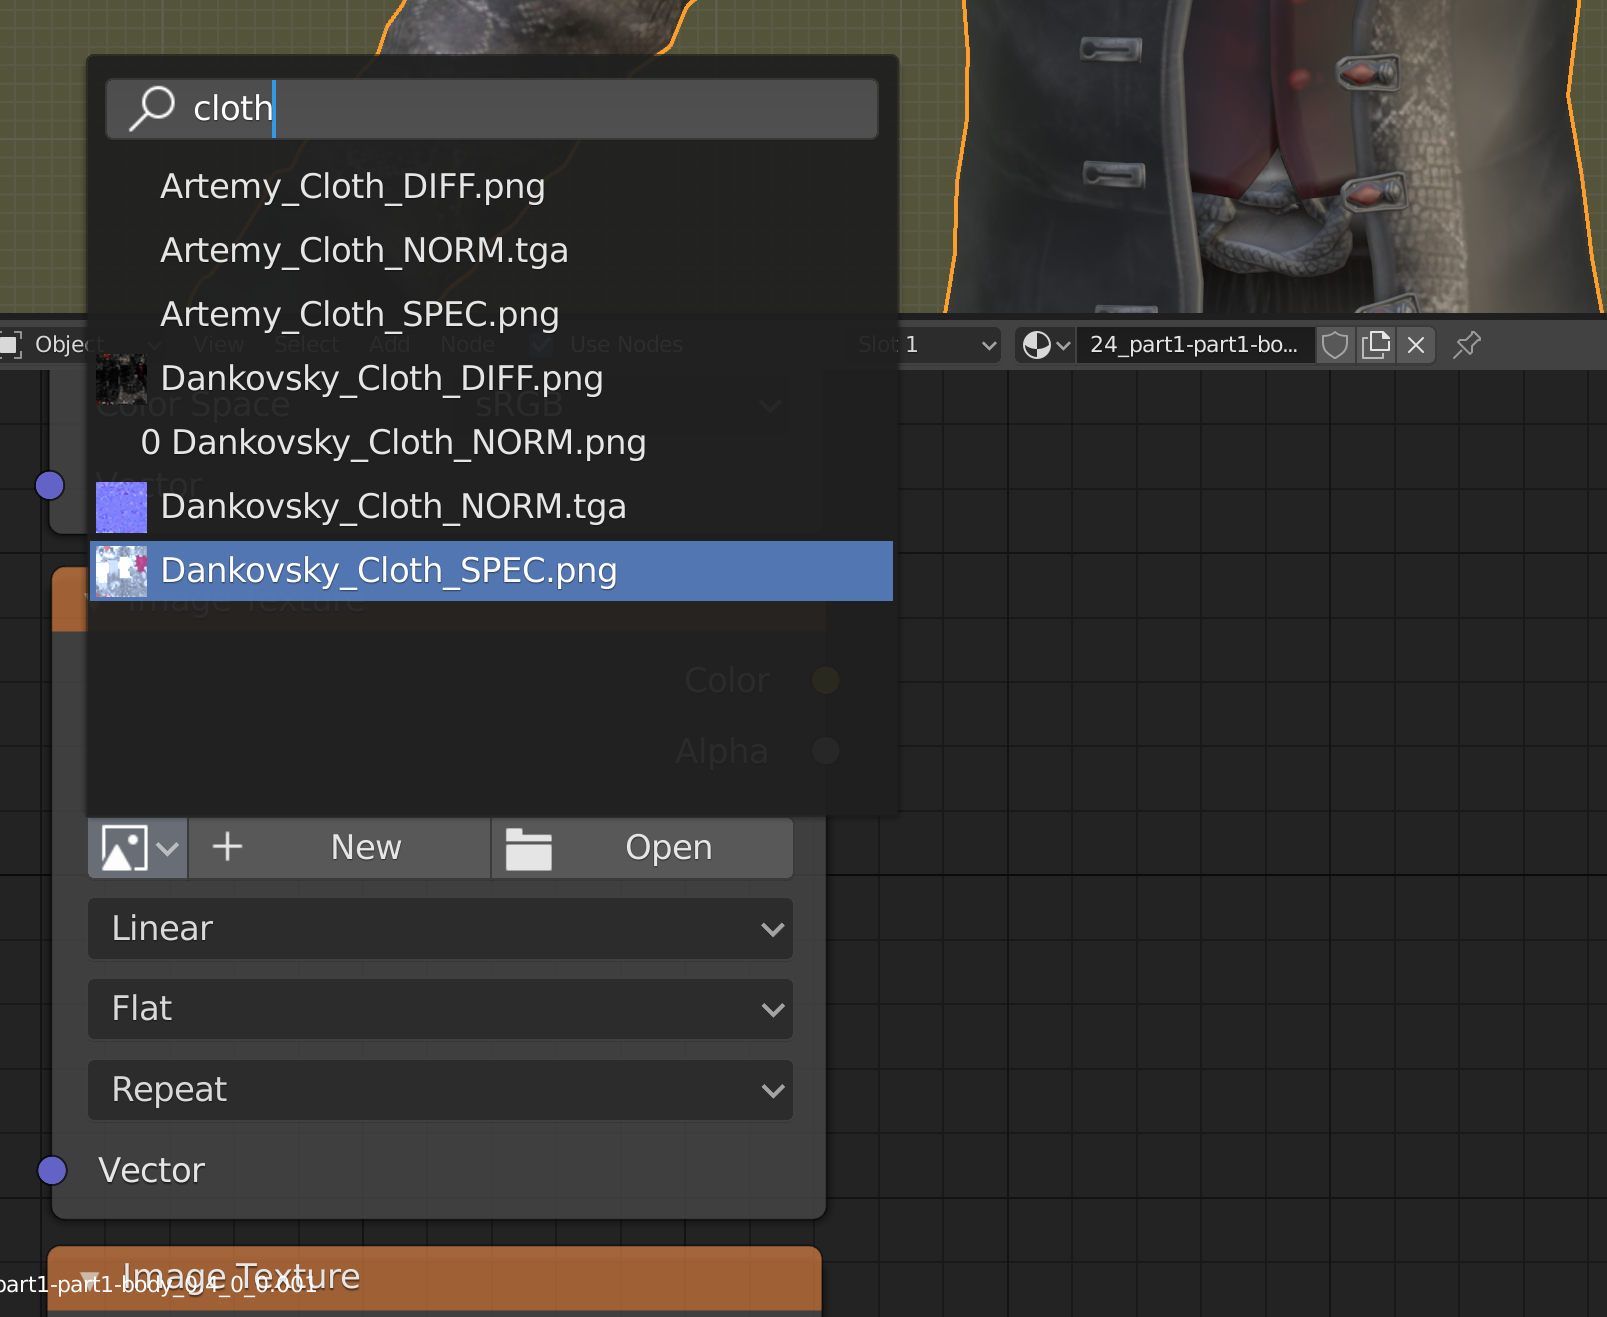
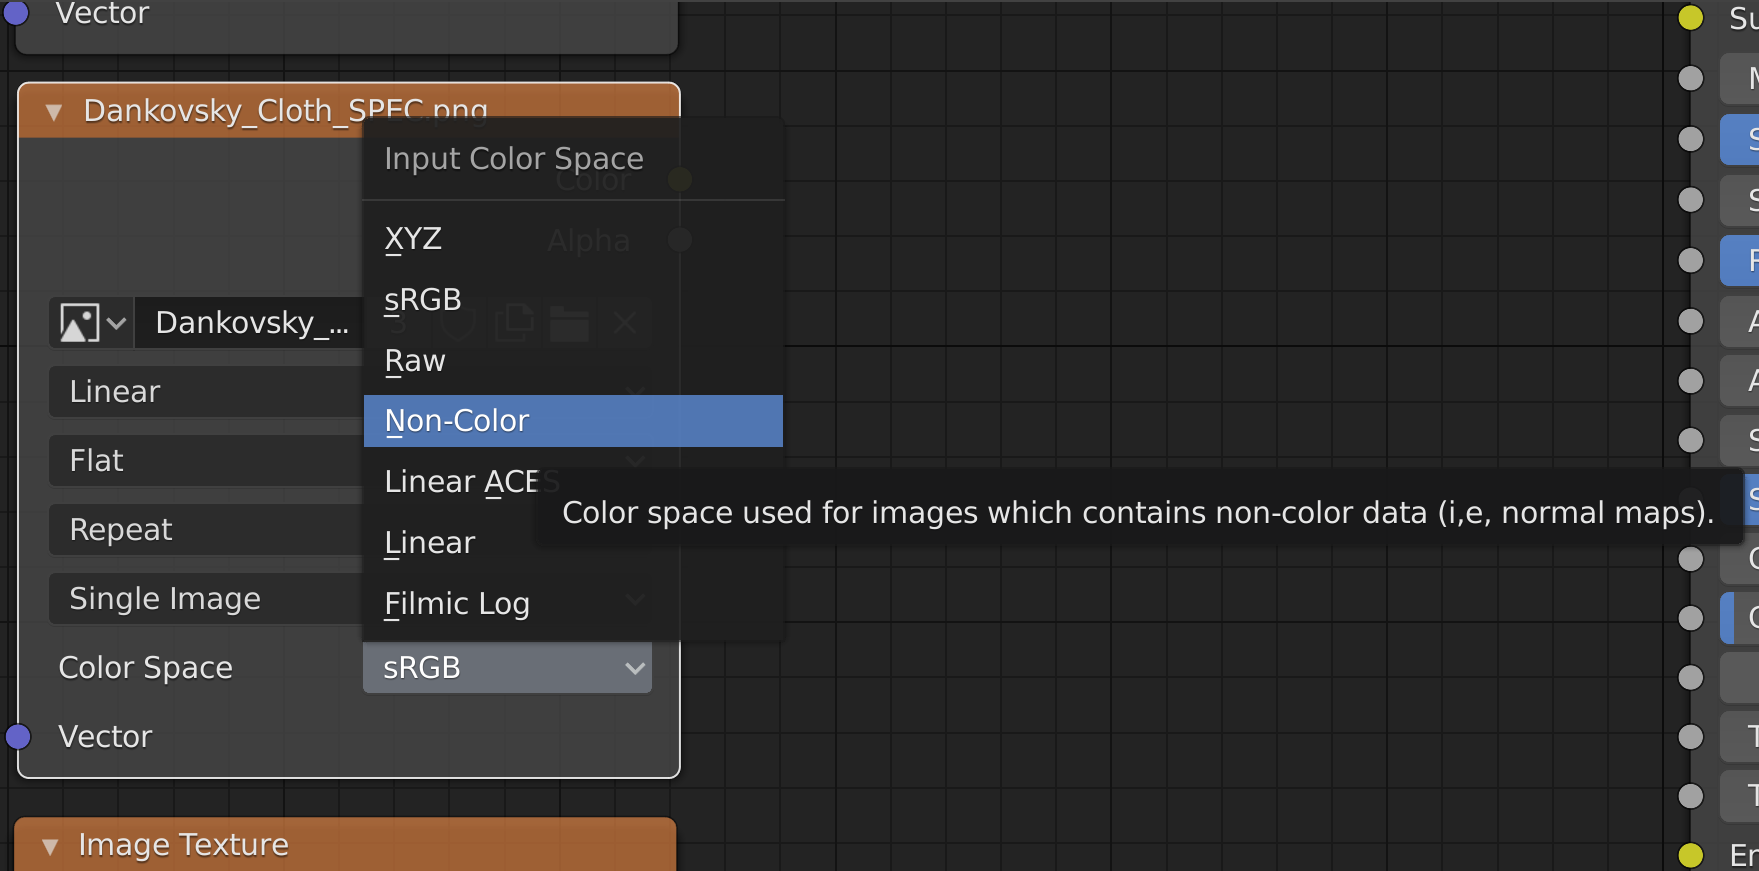
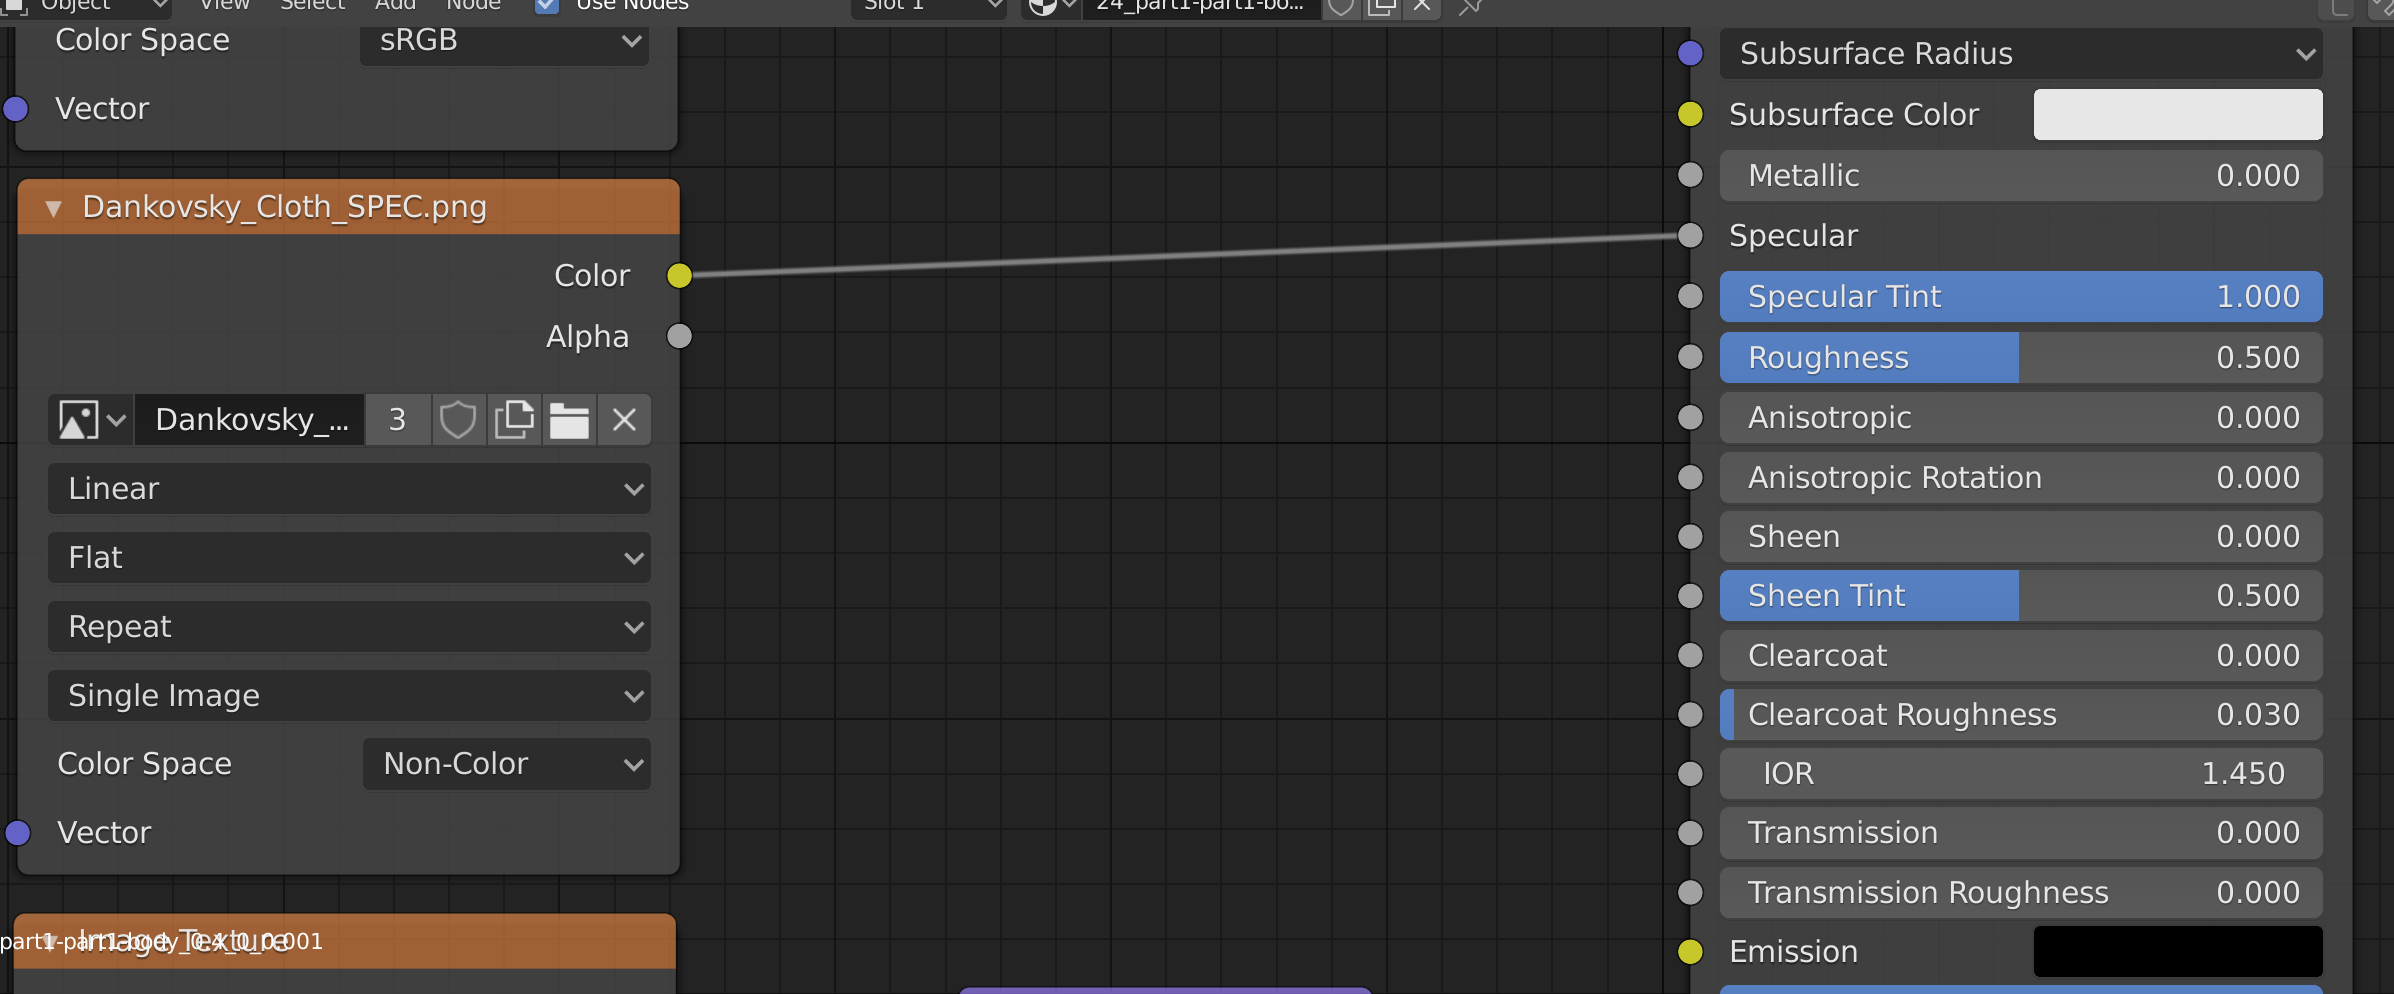
The last one we'll add is the normal map. You can find this one the same way as the last two textures, except this file is called "Dankovsky_Cloth_NORM.tga". I use the .tga file for the Pathologic 2 models, not the .png file. Set this texture to Non-Color, and connect the yellow Color output to the yellow Color input in the Normal Map. Then, connect the purple Normal output from the Normal Map to the Normal input in the BSDF.
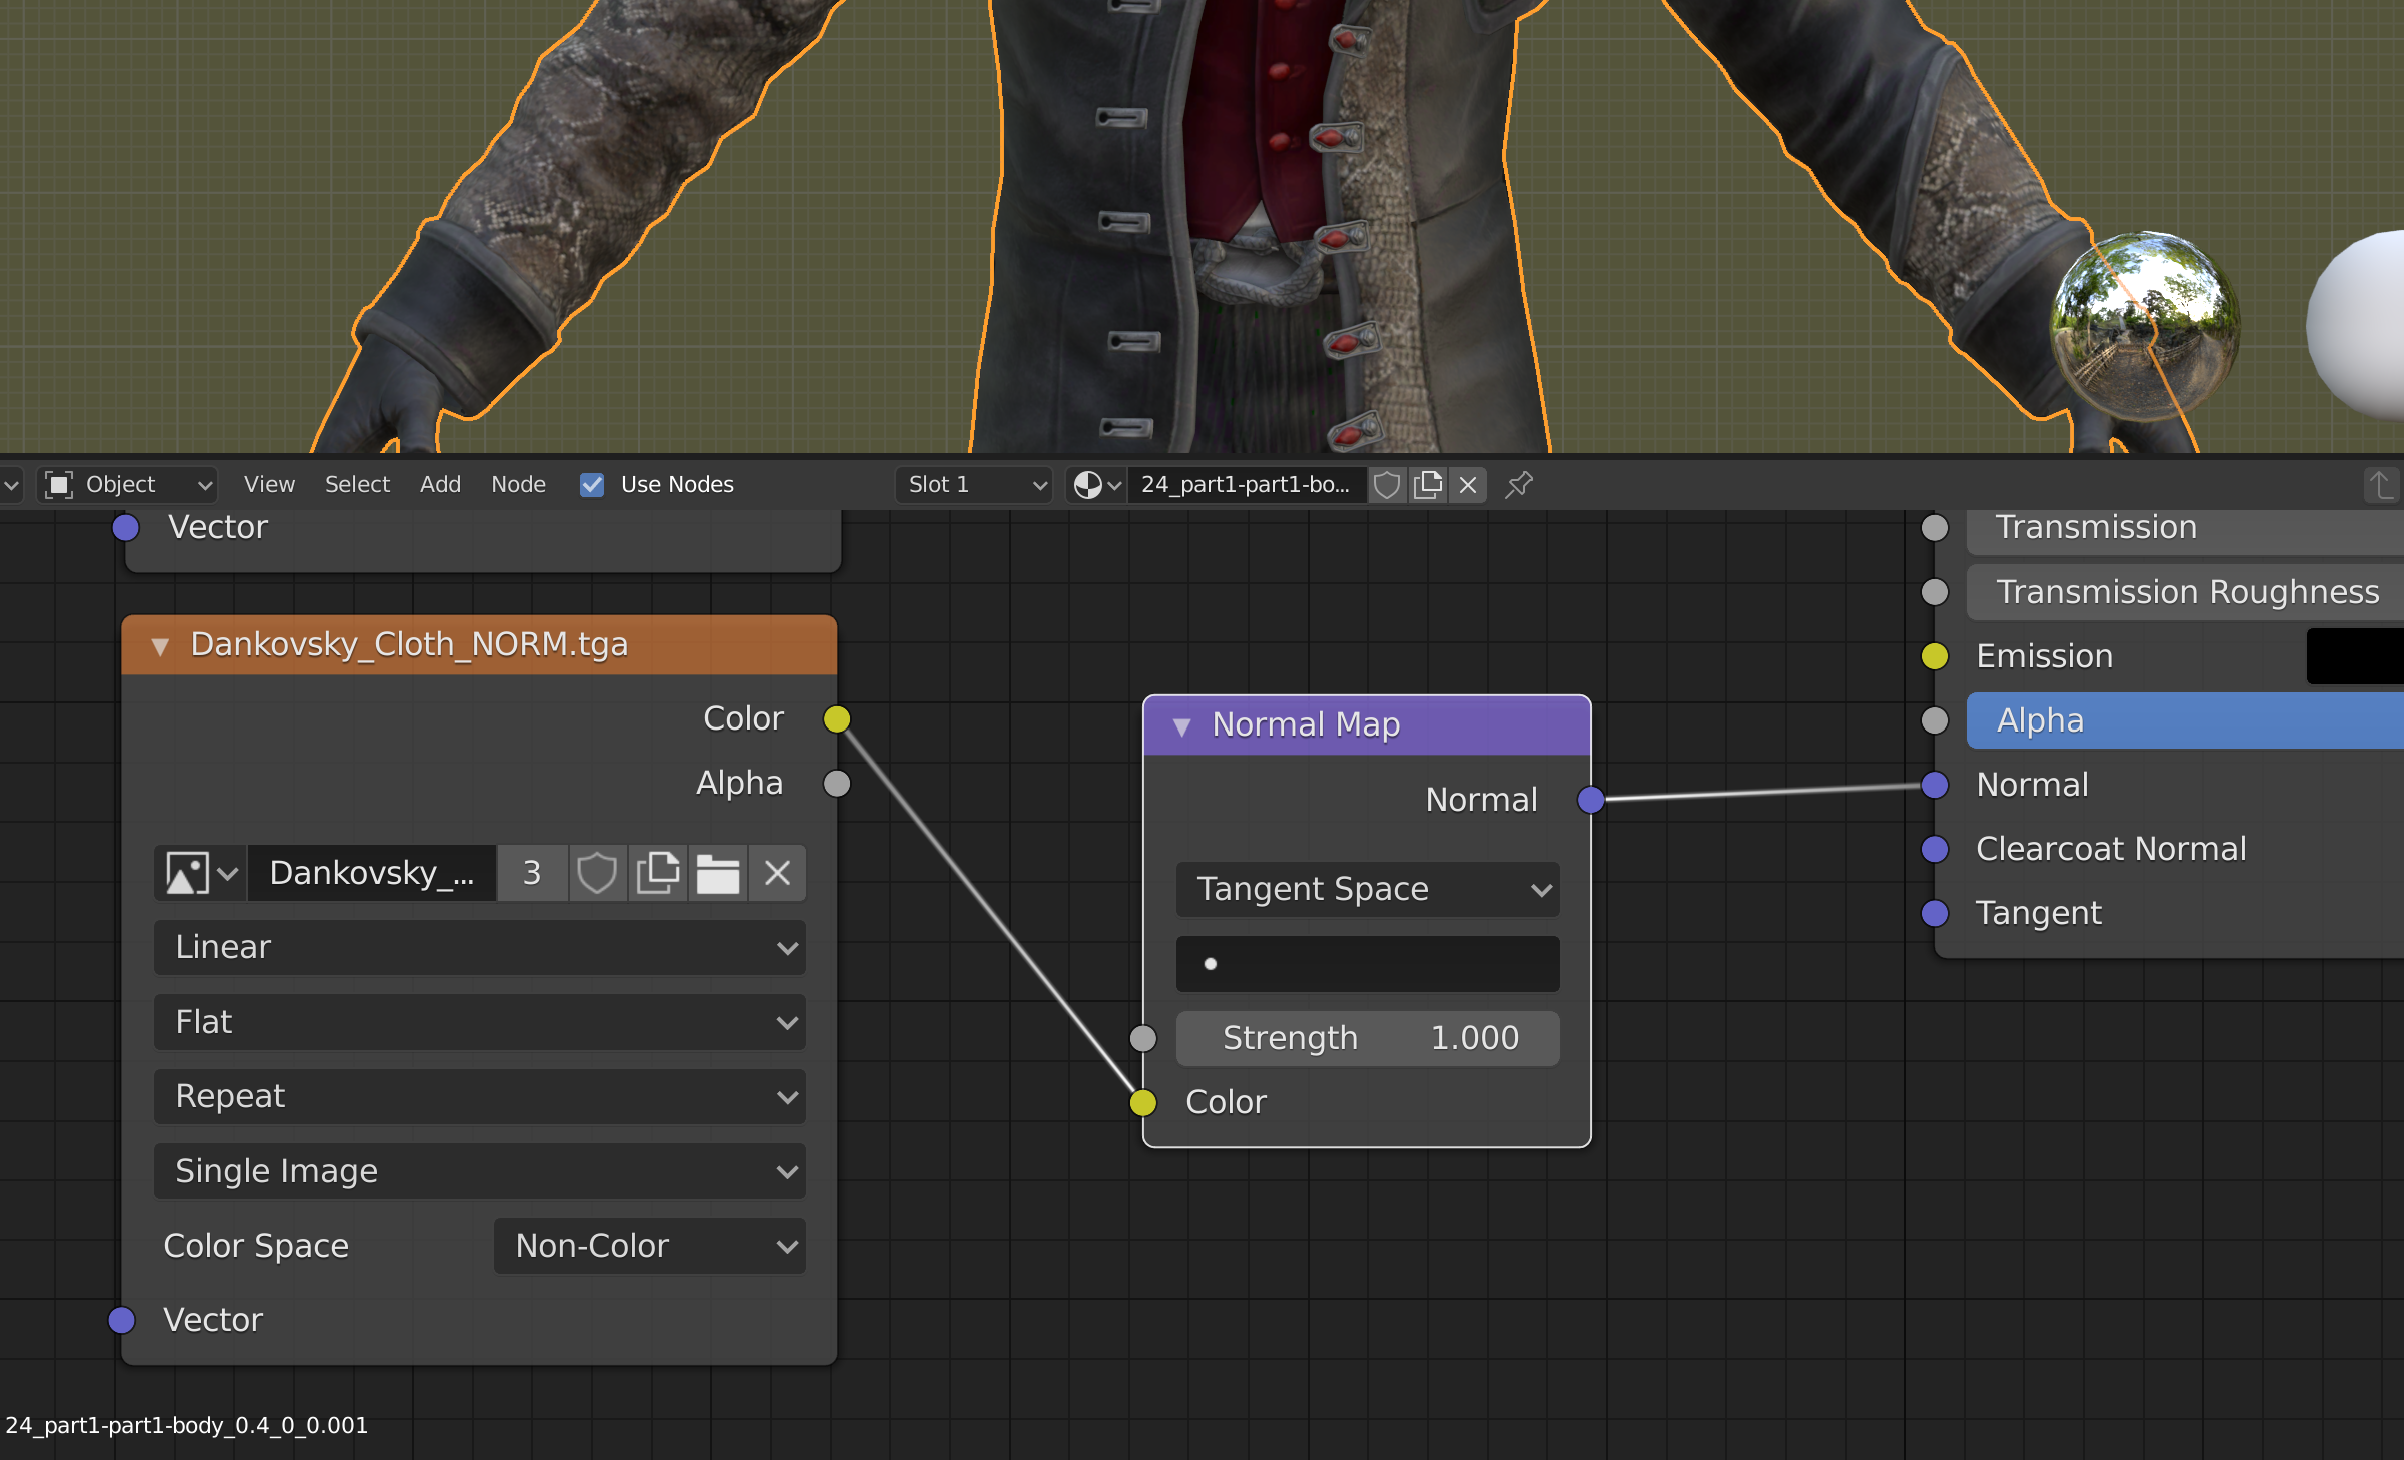
Great! Now the coat is all set up. You can do the same thing for the skin, eyeballs, and mouth.
Some characters don't have specular or normal textures for each part. Others, like Andrey, Peter, and Clara, have additional parts like jackets or scarves. Some characters also have subsurface scattering and reflection textures for their skin and eyeballs, though it can be finnicky to get these to work.
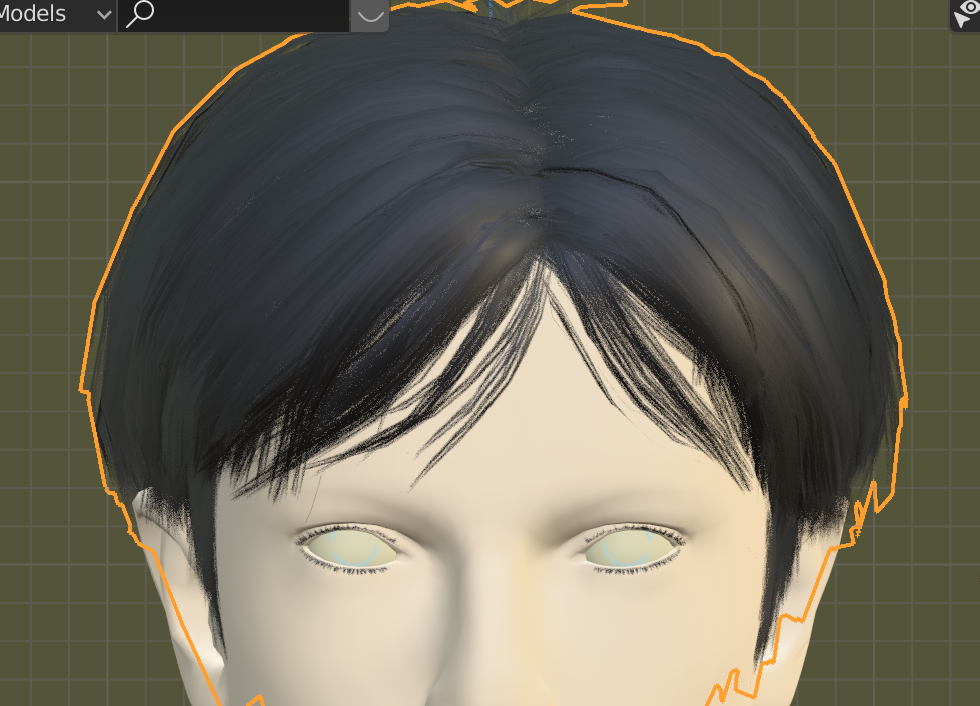
The hair is pretty similar, except that it's transparent. Blender 2.8 and above uses a renderer called "EEVEE" that by default does not allow transparency. Unless you decide to use the Cycles renderer intead, you have to activate transparency on a case by case basis in EEVEE. I'll show you how to do that below.
Materials: Hair
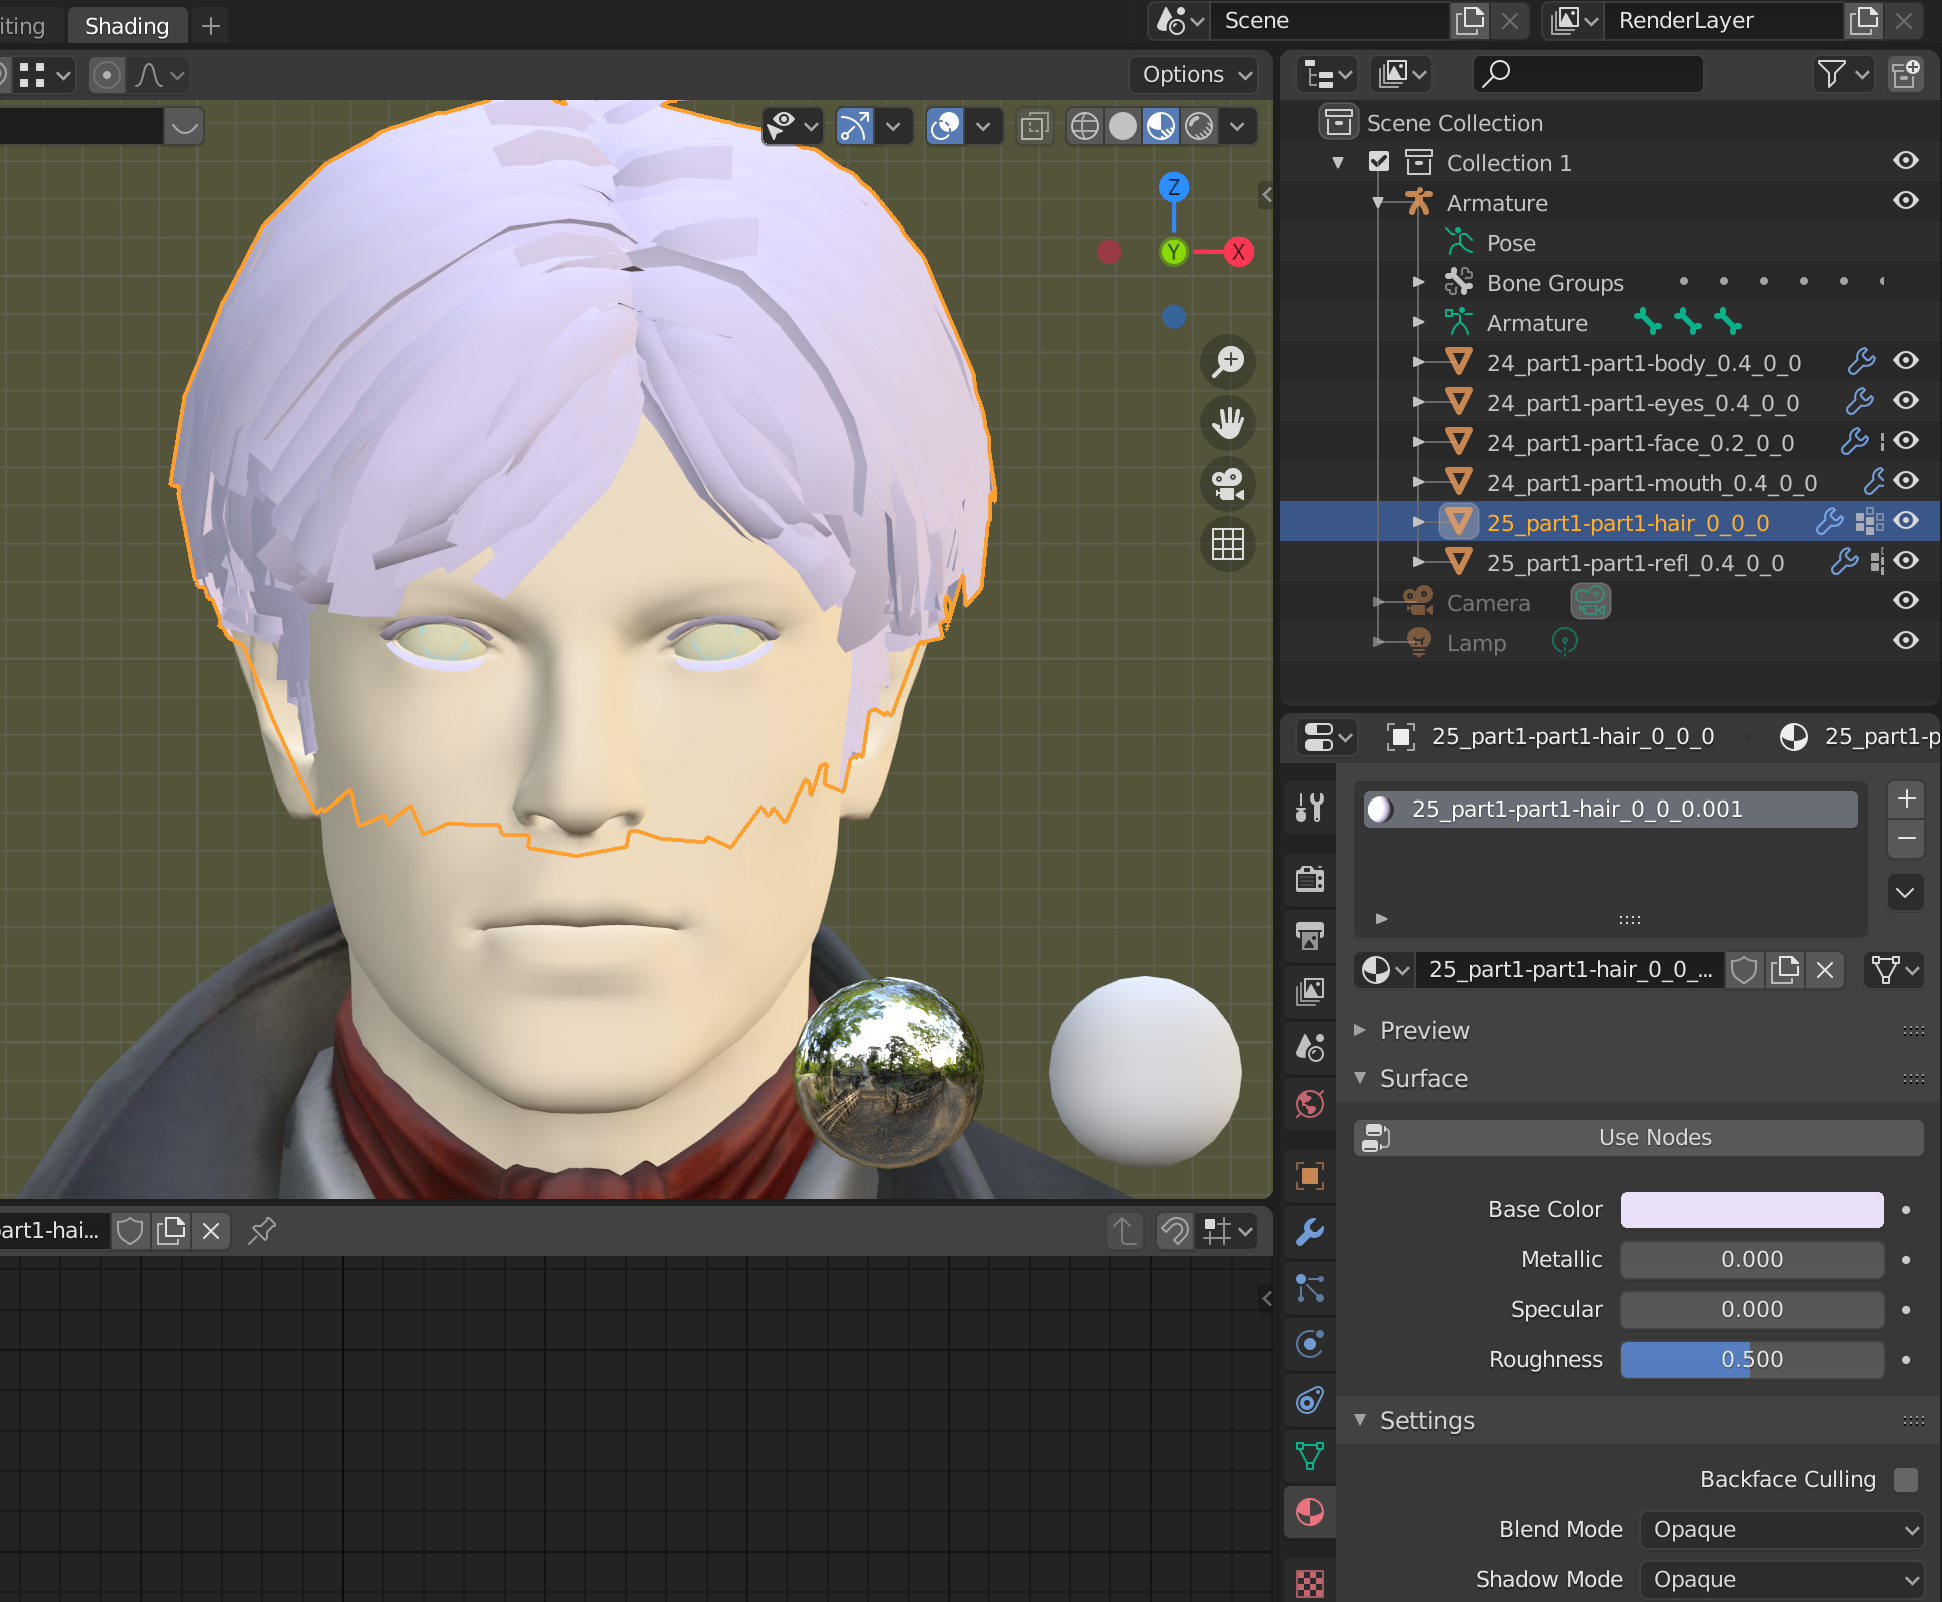
Some models includes the eyelash geometry along with the hair geometry, and on others, it is split across two parts. The Bachelor's eyelashes and hair are combined, and listed as "25_part1-part1-hair_0_0_0...". You can click the "Use Nodes" button, but before setting up the hair like we did for the jacket, we have to change something in the material settings.
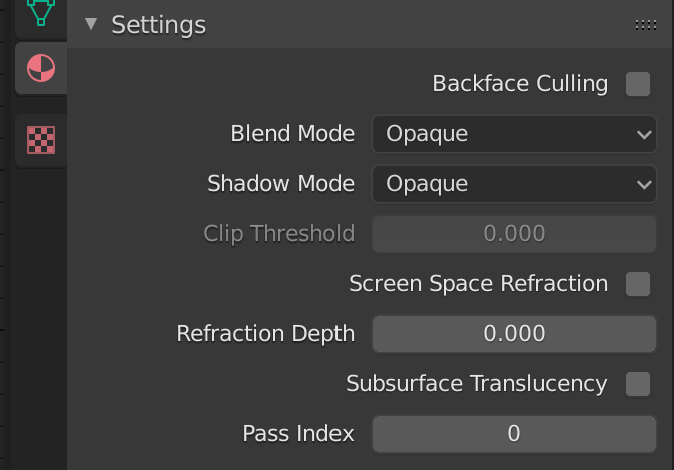
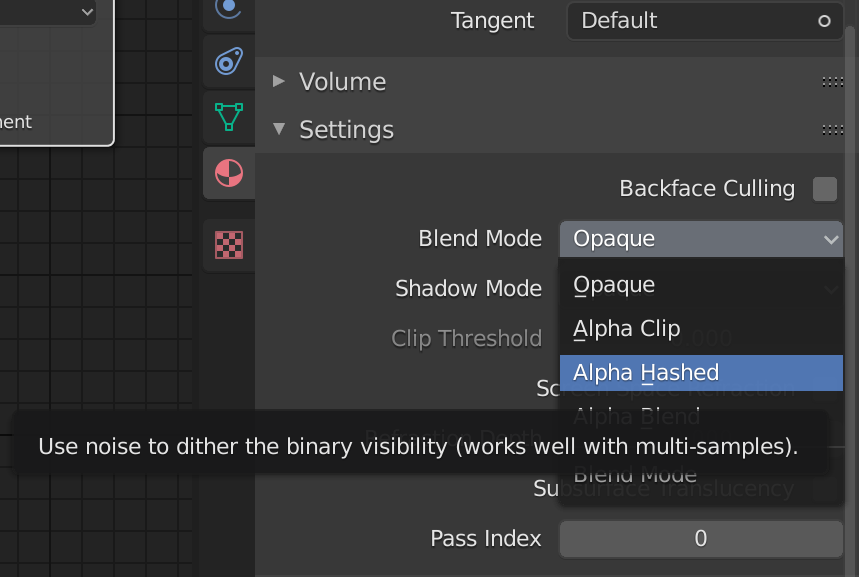
If you scroll down, you'll see a settings section that says "Blend Mode". By default, it is set to Opaque. For the hair that comes with these models, it's best if we used Alpha Hashed.
Alpha Blend is better for semi-transparent objects like tinted glasses, and Alpha Clip sometimes creates a weird border at the edges of the hair strips.
Now, we can set up the hair diffuse, specular, and normal textures the same way we did for the jacket. The only difference is that we connect the gray Alpha output from the diffuse texture to the Alpha input in the BSDF.
Posing
Posing a Single Model
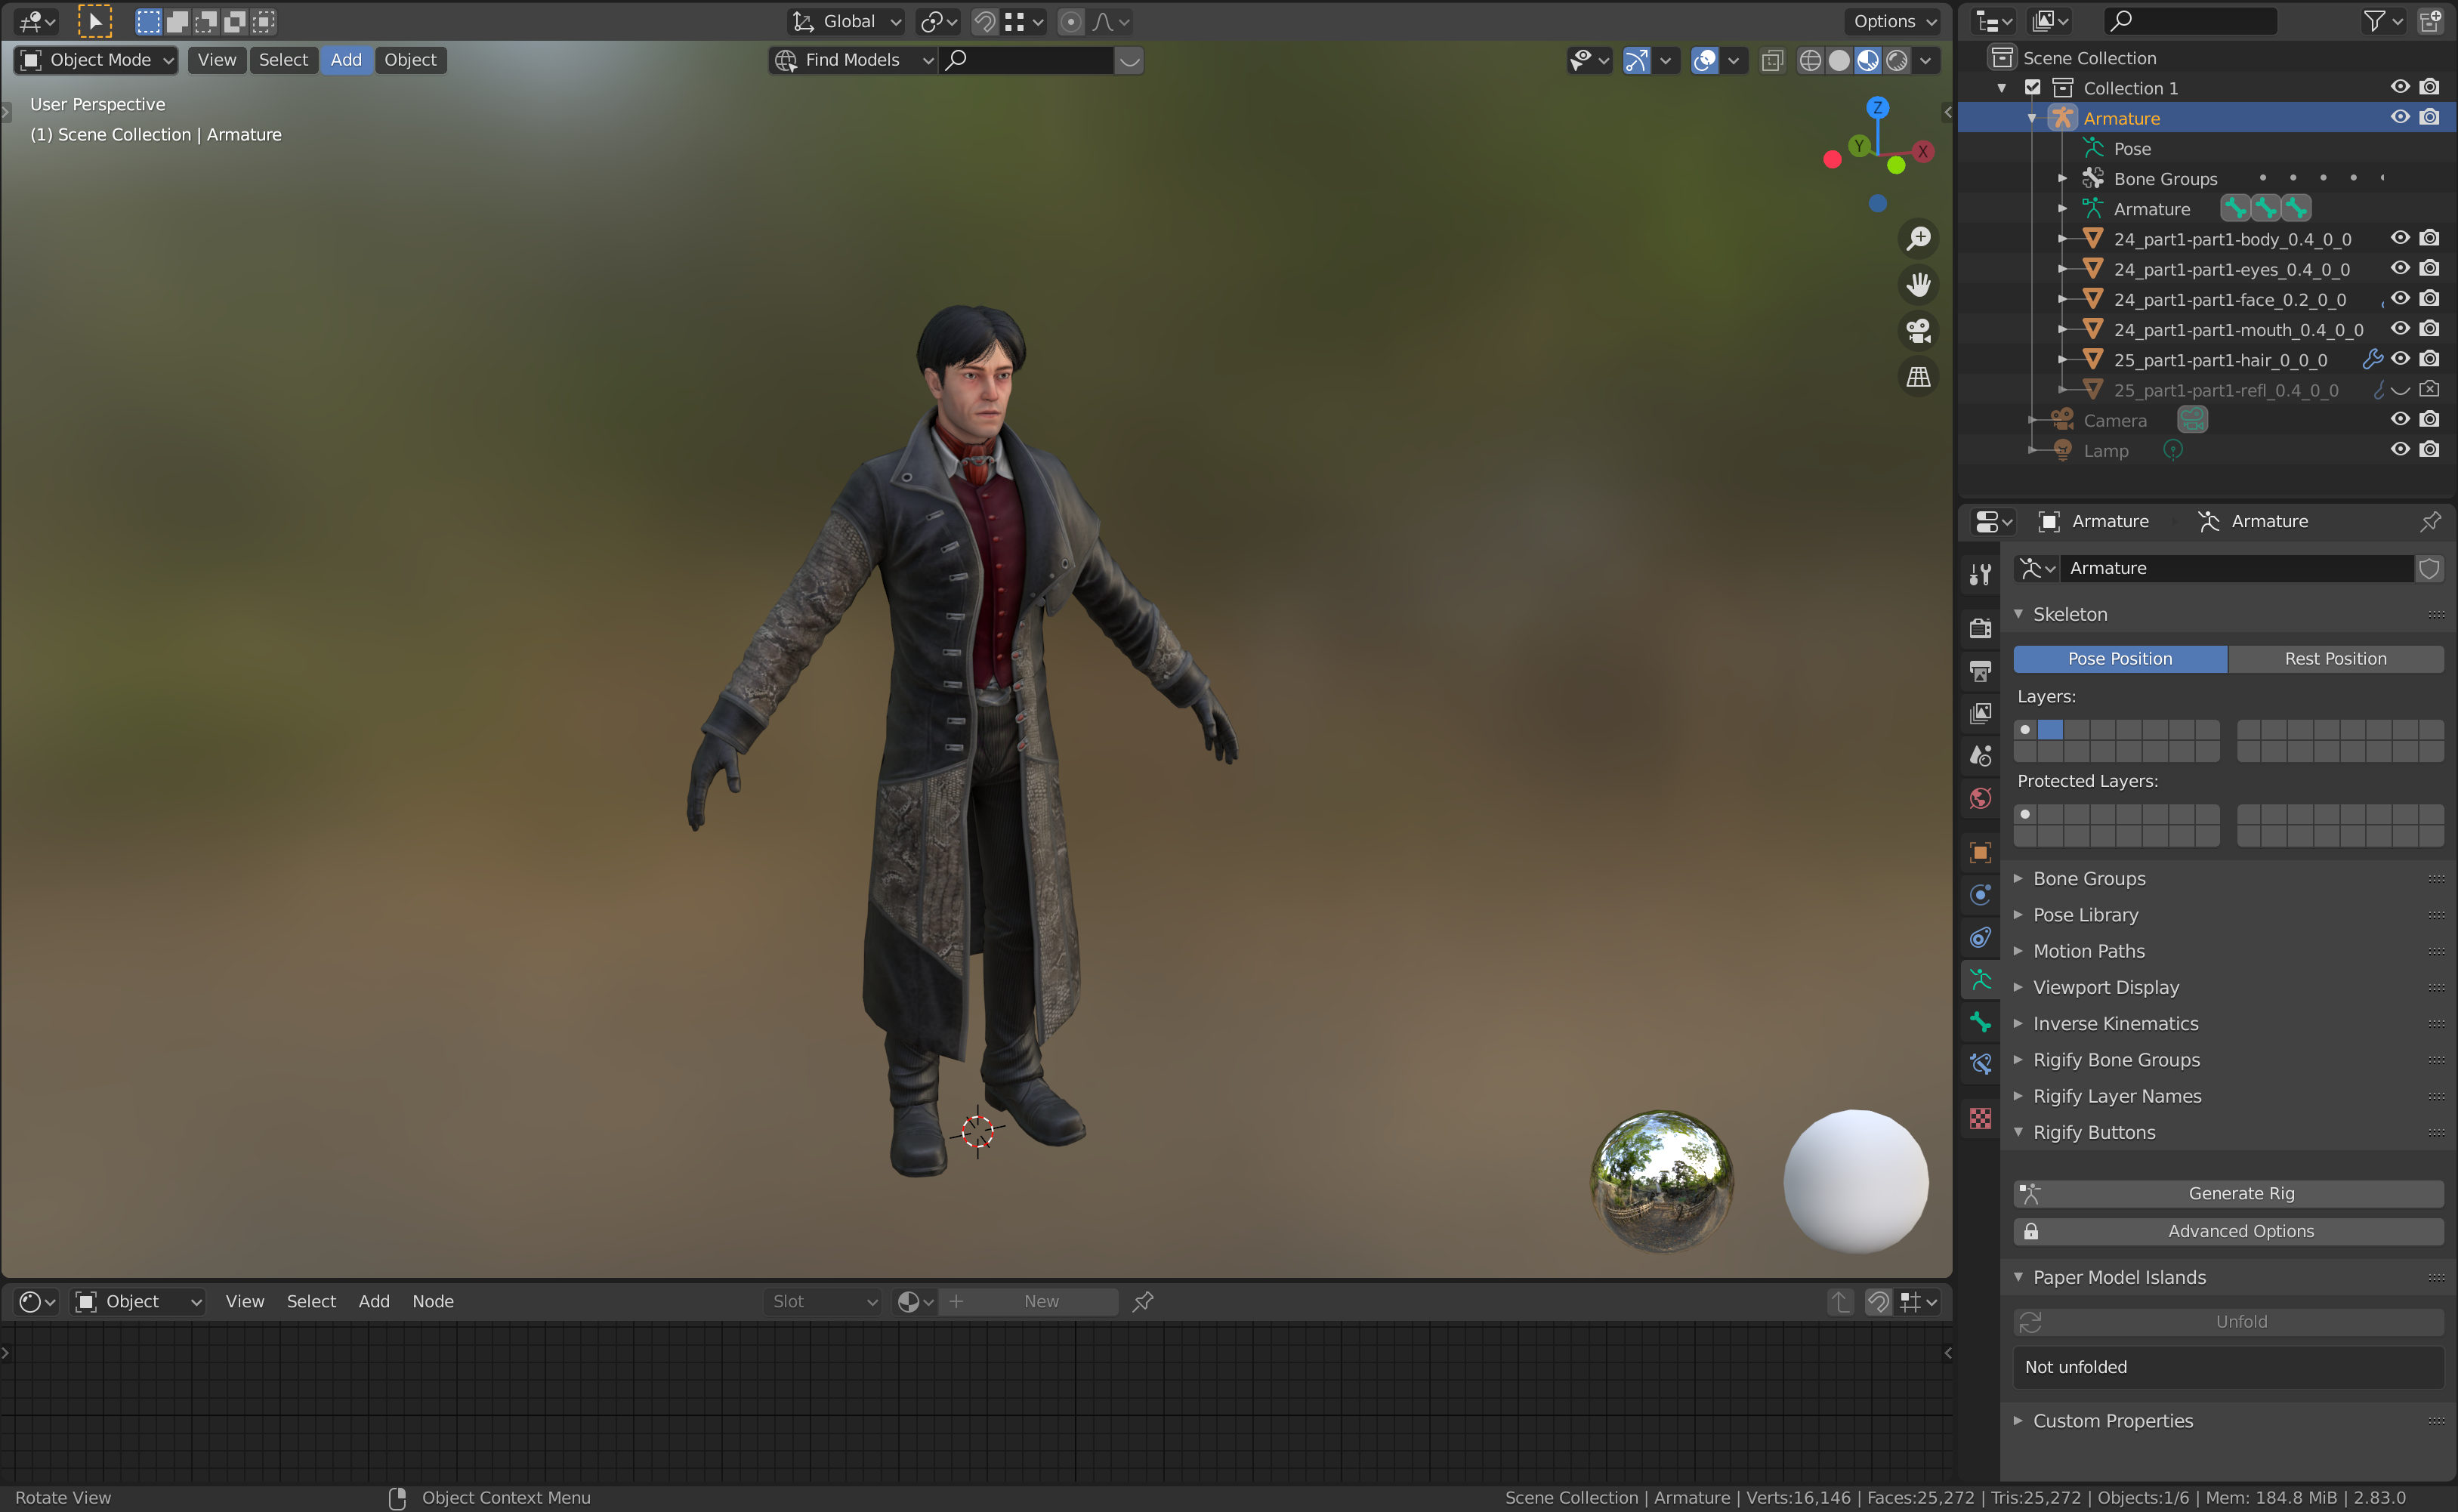
I've gone ahead and set up the rest of the textures for the Bachelor. Now, we can use the armature to pose the model. You can pose a model right in the Shading workspace. To give yourself more space in the 3D Viewport, you can drag down the divider between the viewport and the material nodes, making the viewport bigger.
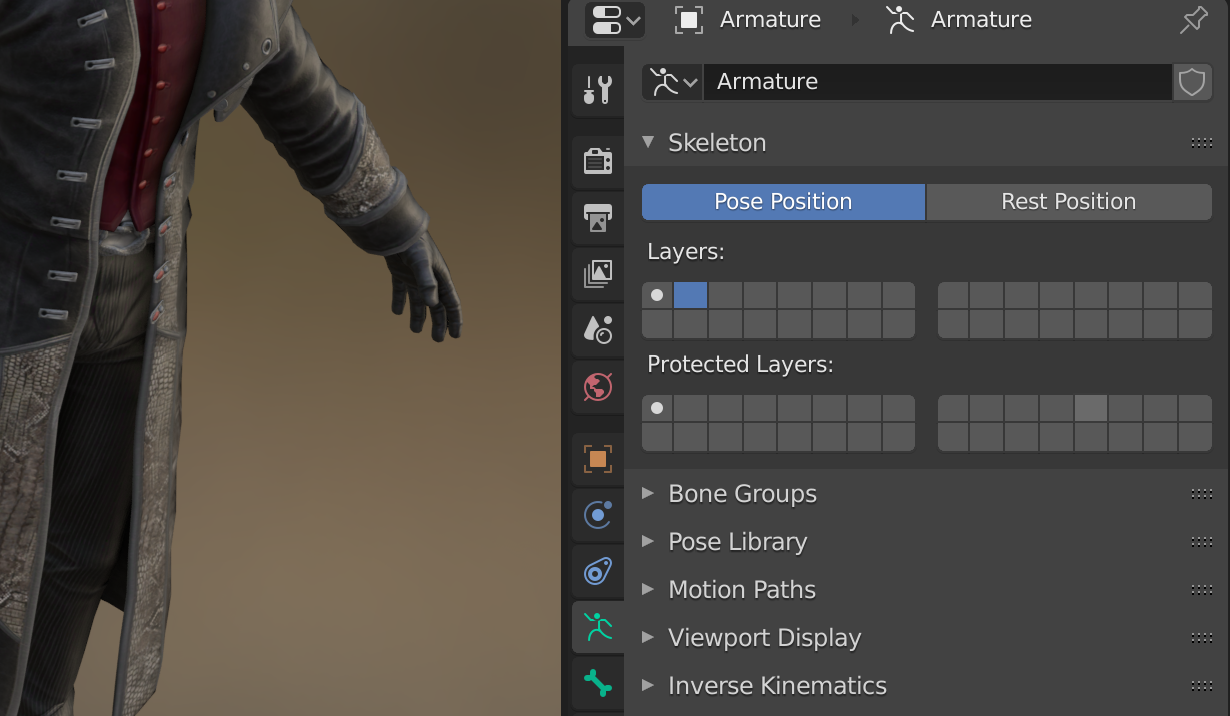
Usually, the Pathologic 2 models will have their armature visible when you first open them. If they're ever hidden, as in the case of the Bachelor, it's usually because a different Armature layer is selected. You can select the right one by first selecting the Armature in the Scene Collection, then navigating to the tab with the green stick figure icon. Under Skeleton / Layers, you can see which layer you're on. Select the first one with the dot in the cell. The highlighted armature should show up now.
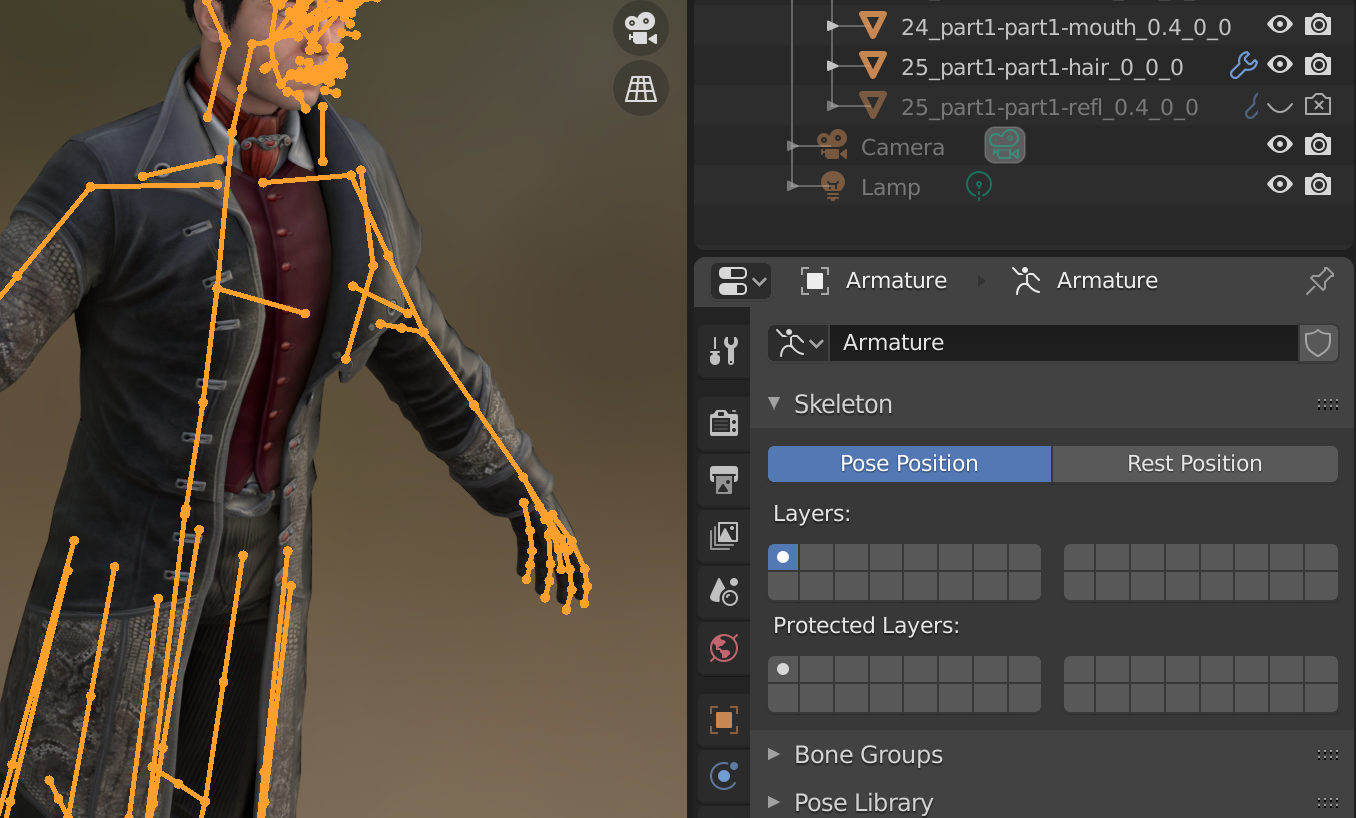
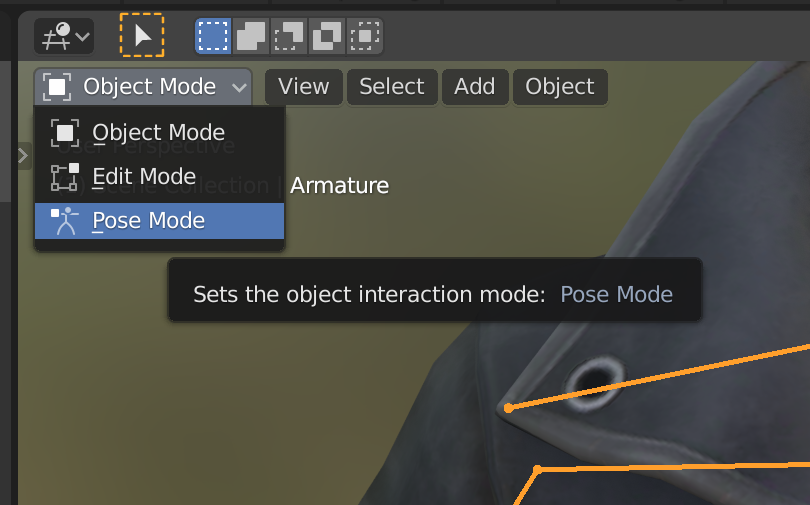
To enter Pose mode, go to the top left of the 3D Viewport. Click on the dropdown menu that is currently on Object Mode, and go into Pose Mode. The armature should turn gray, and you can select individual or multiple bones. To select multiple bones, press one, then press the others while holding shift.
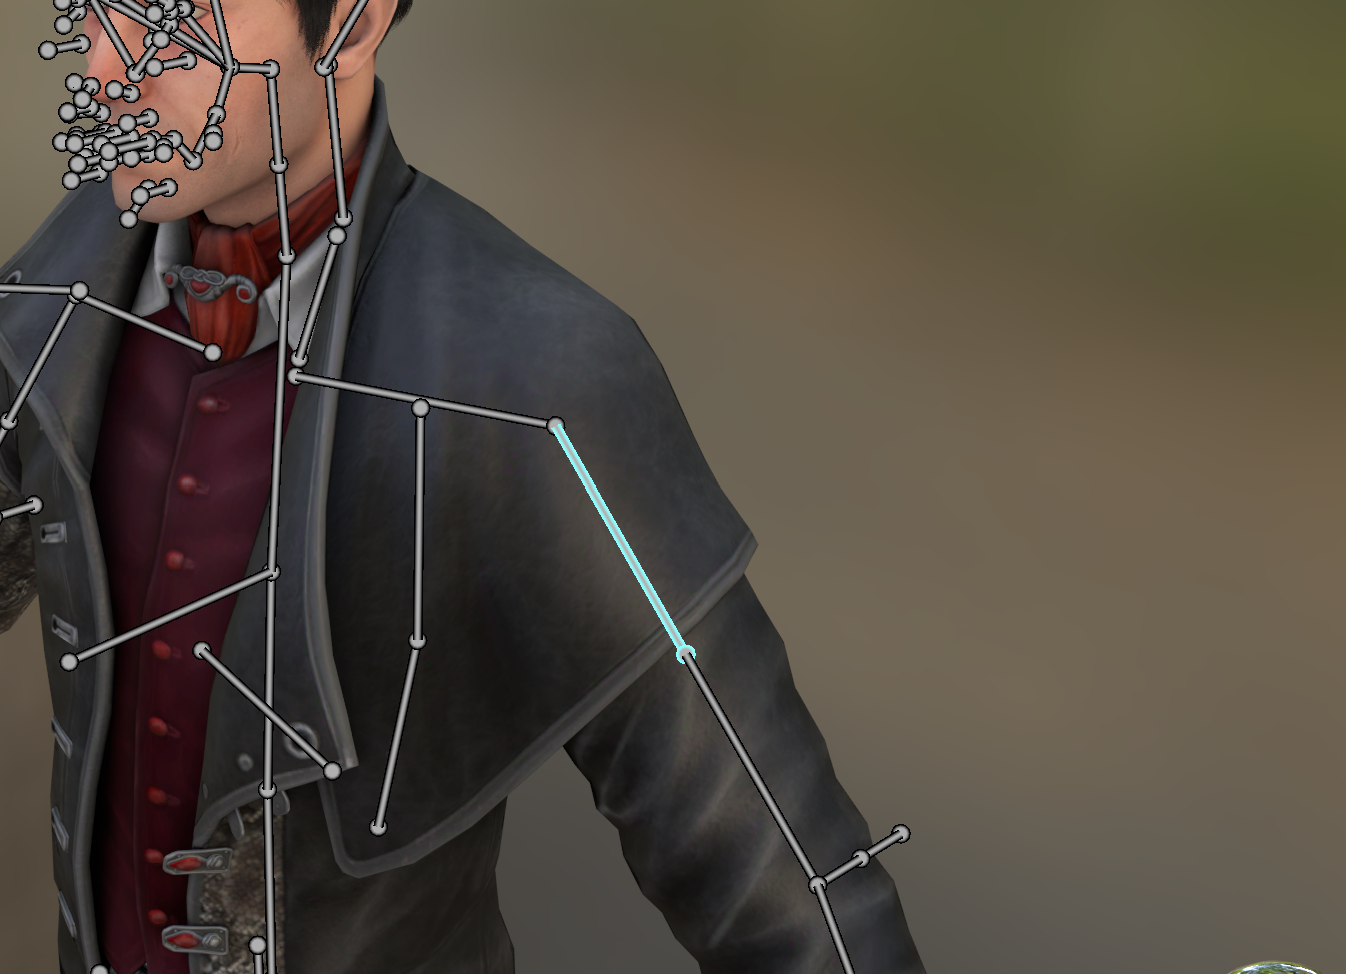
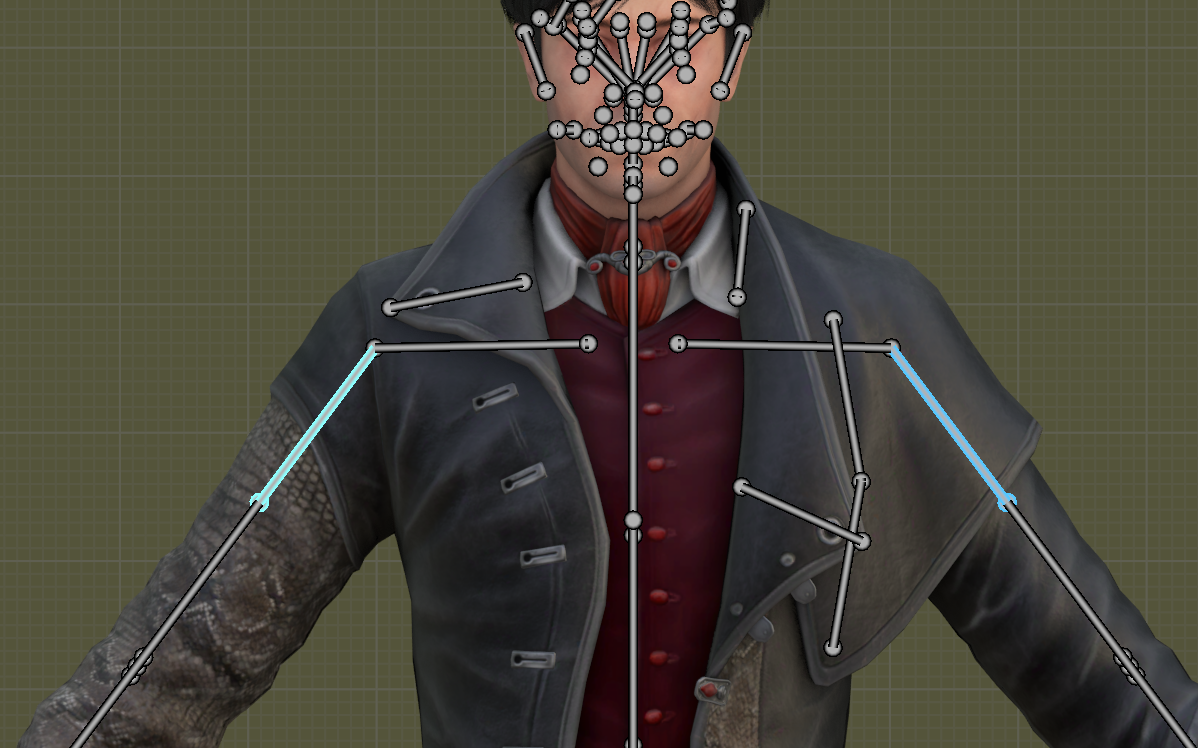
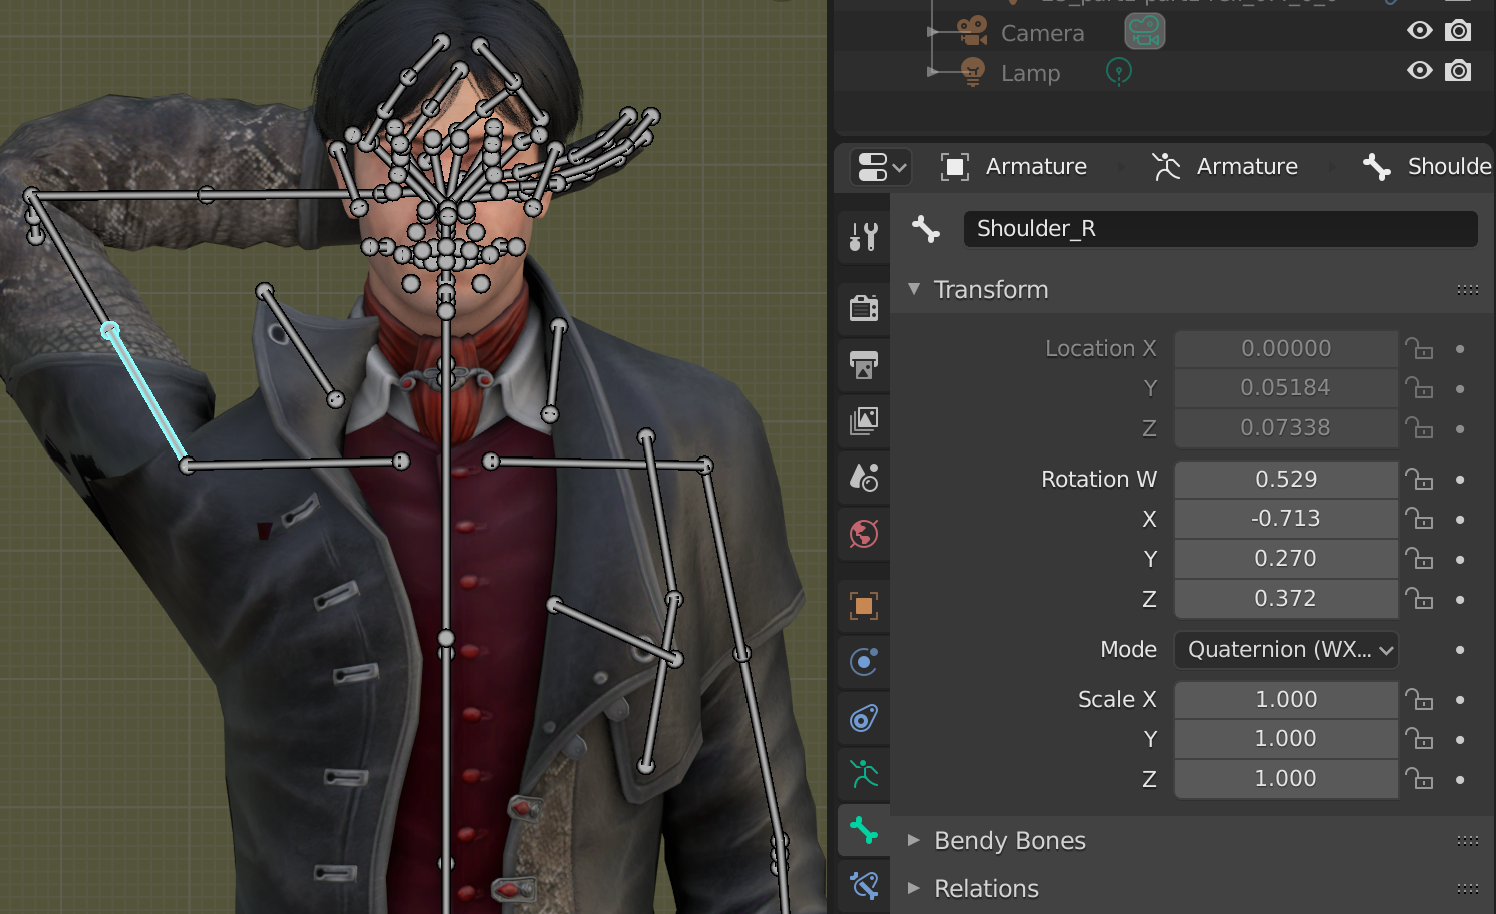
You have to be a little careful with these particular armatures, as you can accidentally rotate or drag limbs in an unnatural way. I've found that the best approach is to rotate individual bones around an axis.
To do this, you can hit R on your keyboard to rotate the bones you have selected. Then, to pick an axis, hit X, Y, or Z.
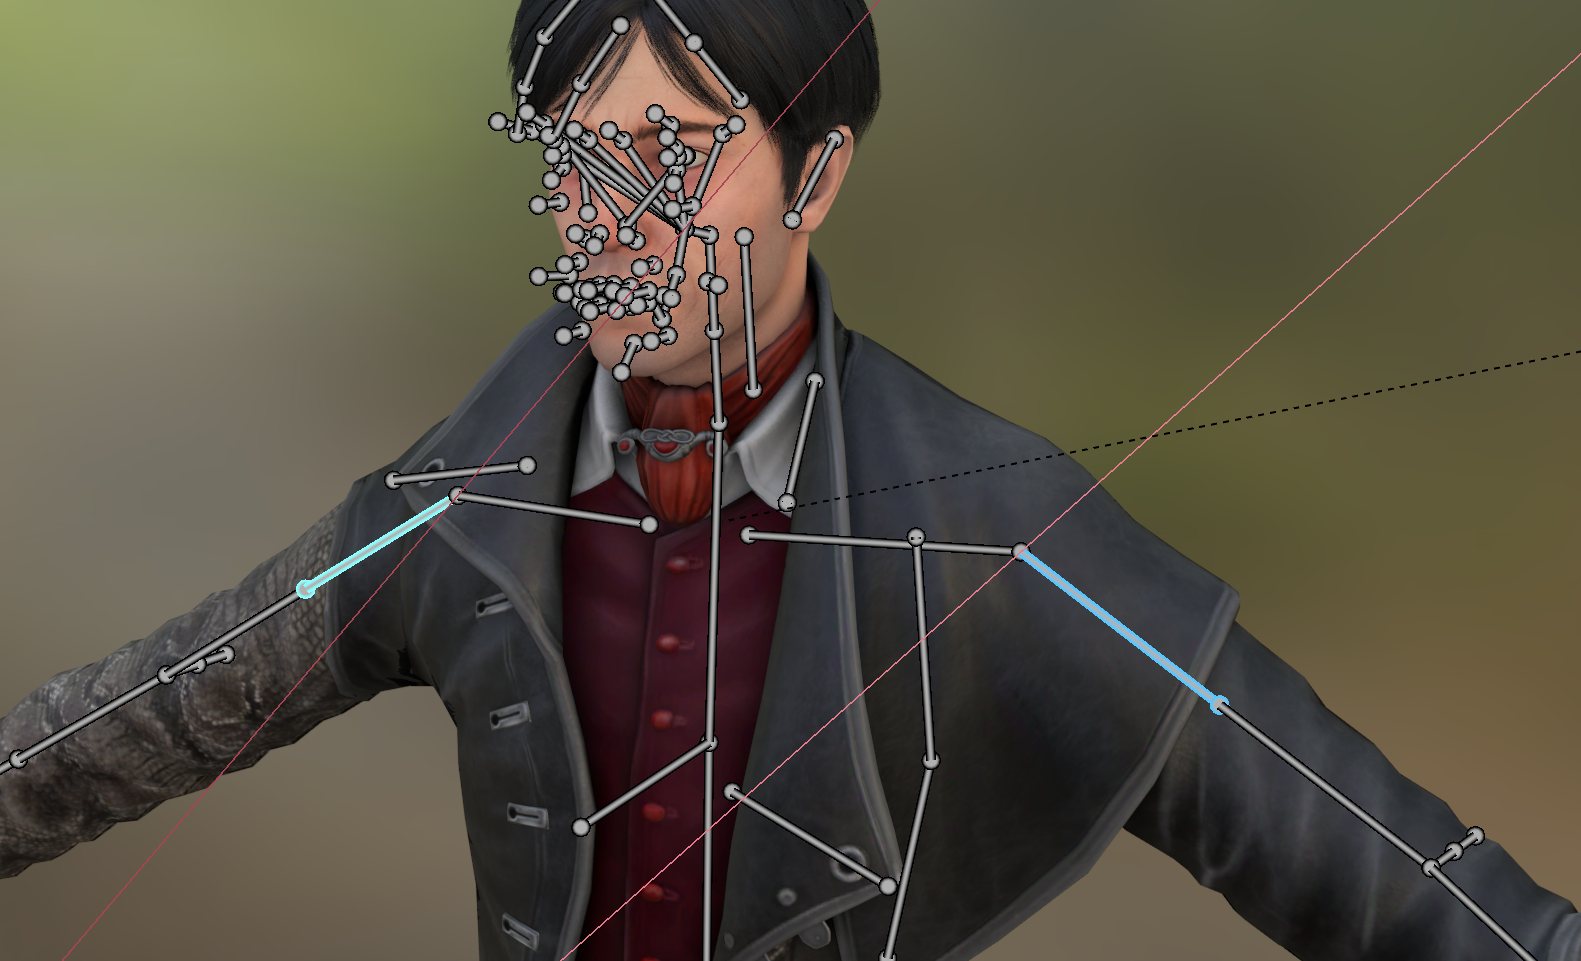
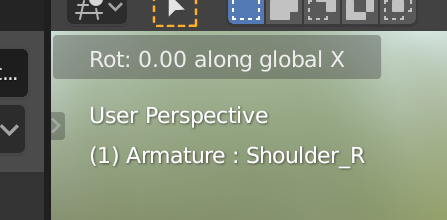
The first time you hit these keys, it will be rotating along a global axis, which is oriented in the way the axes in the top-right rotational gizmo are oriented. This might be what you want, but usually, rotating around a local axis (defined by the individual bones you have selected) produces more natural results.
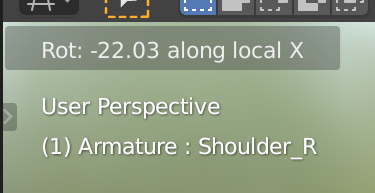
To enter local rotation, hit X, Y, or Z again. At the top-left of the 3D Viewport, you should see a message that says it's switched over from global to local rotation.
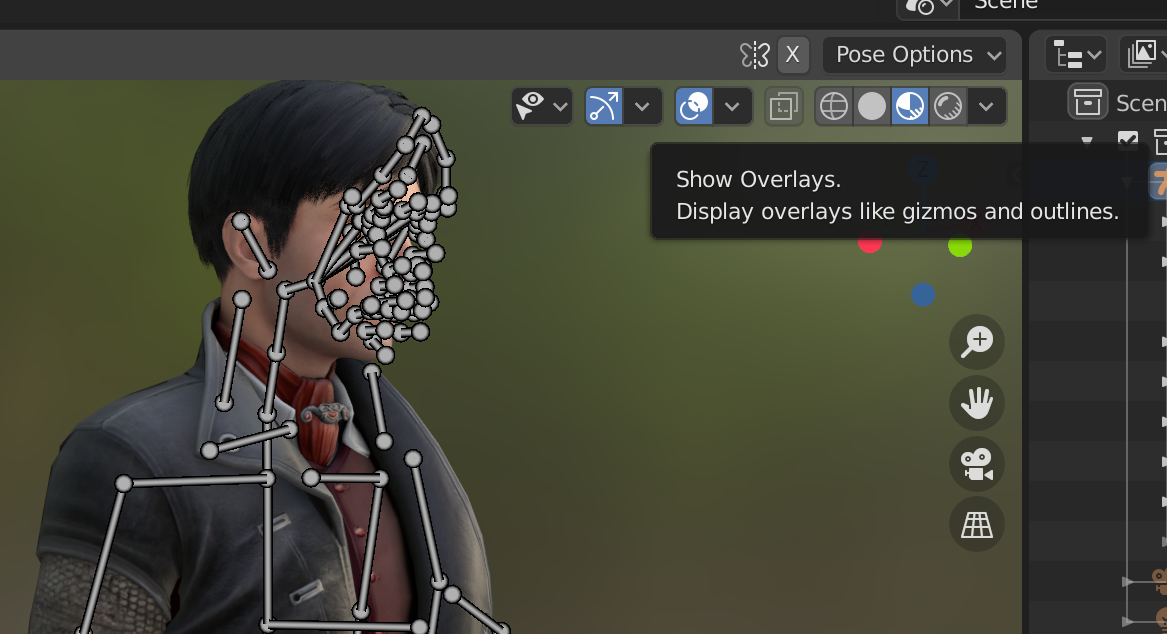
If you'd like to hide the Armature and other overlays, you can press the button with the two circles on the top-right bar in the 3D Viewport. Now, despite still being in Pose Mode, we can't see the armature.
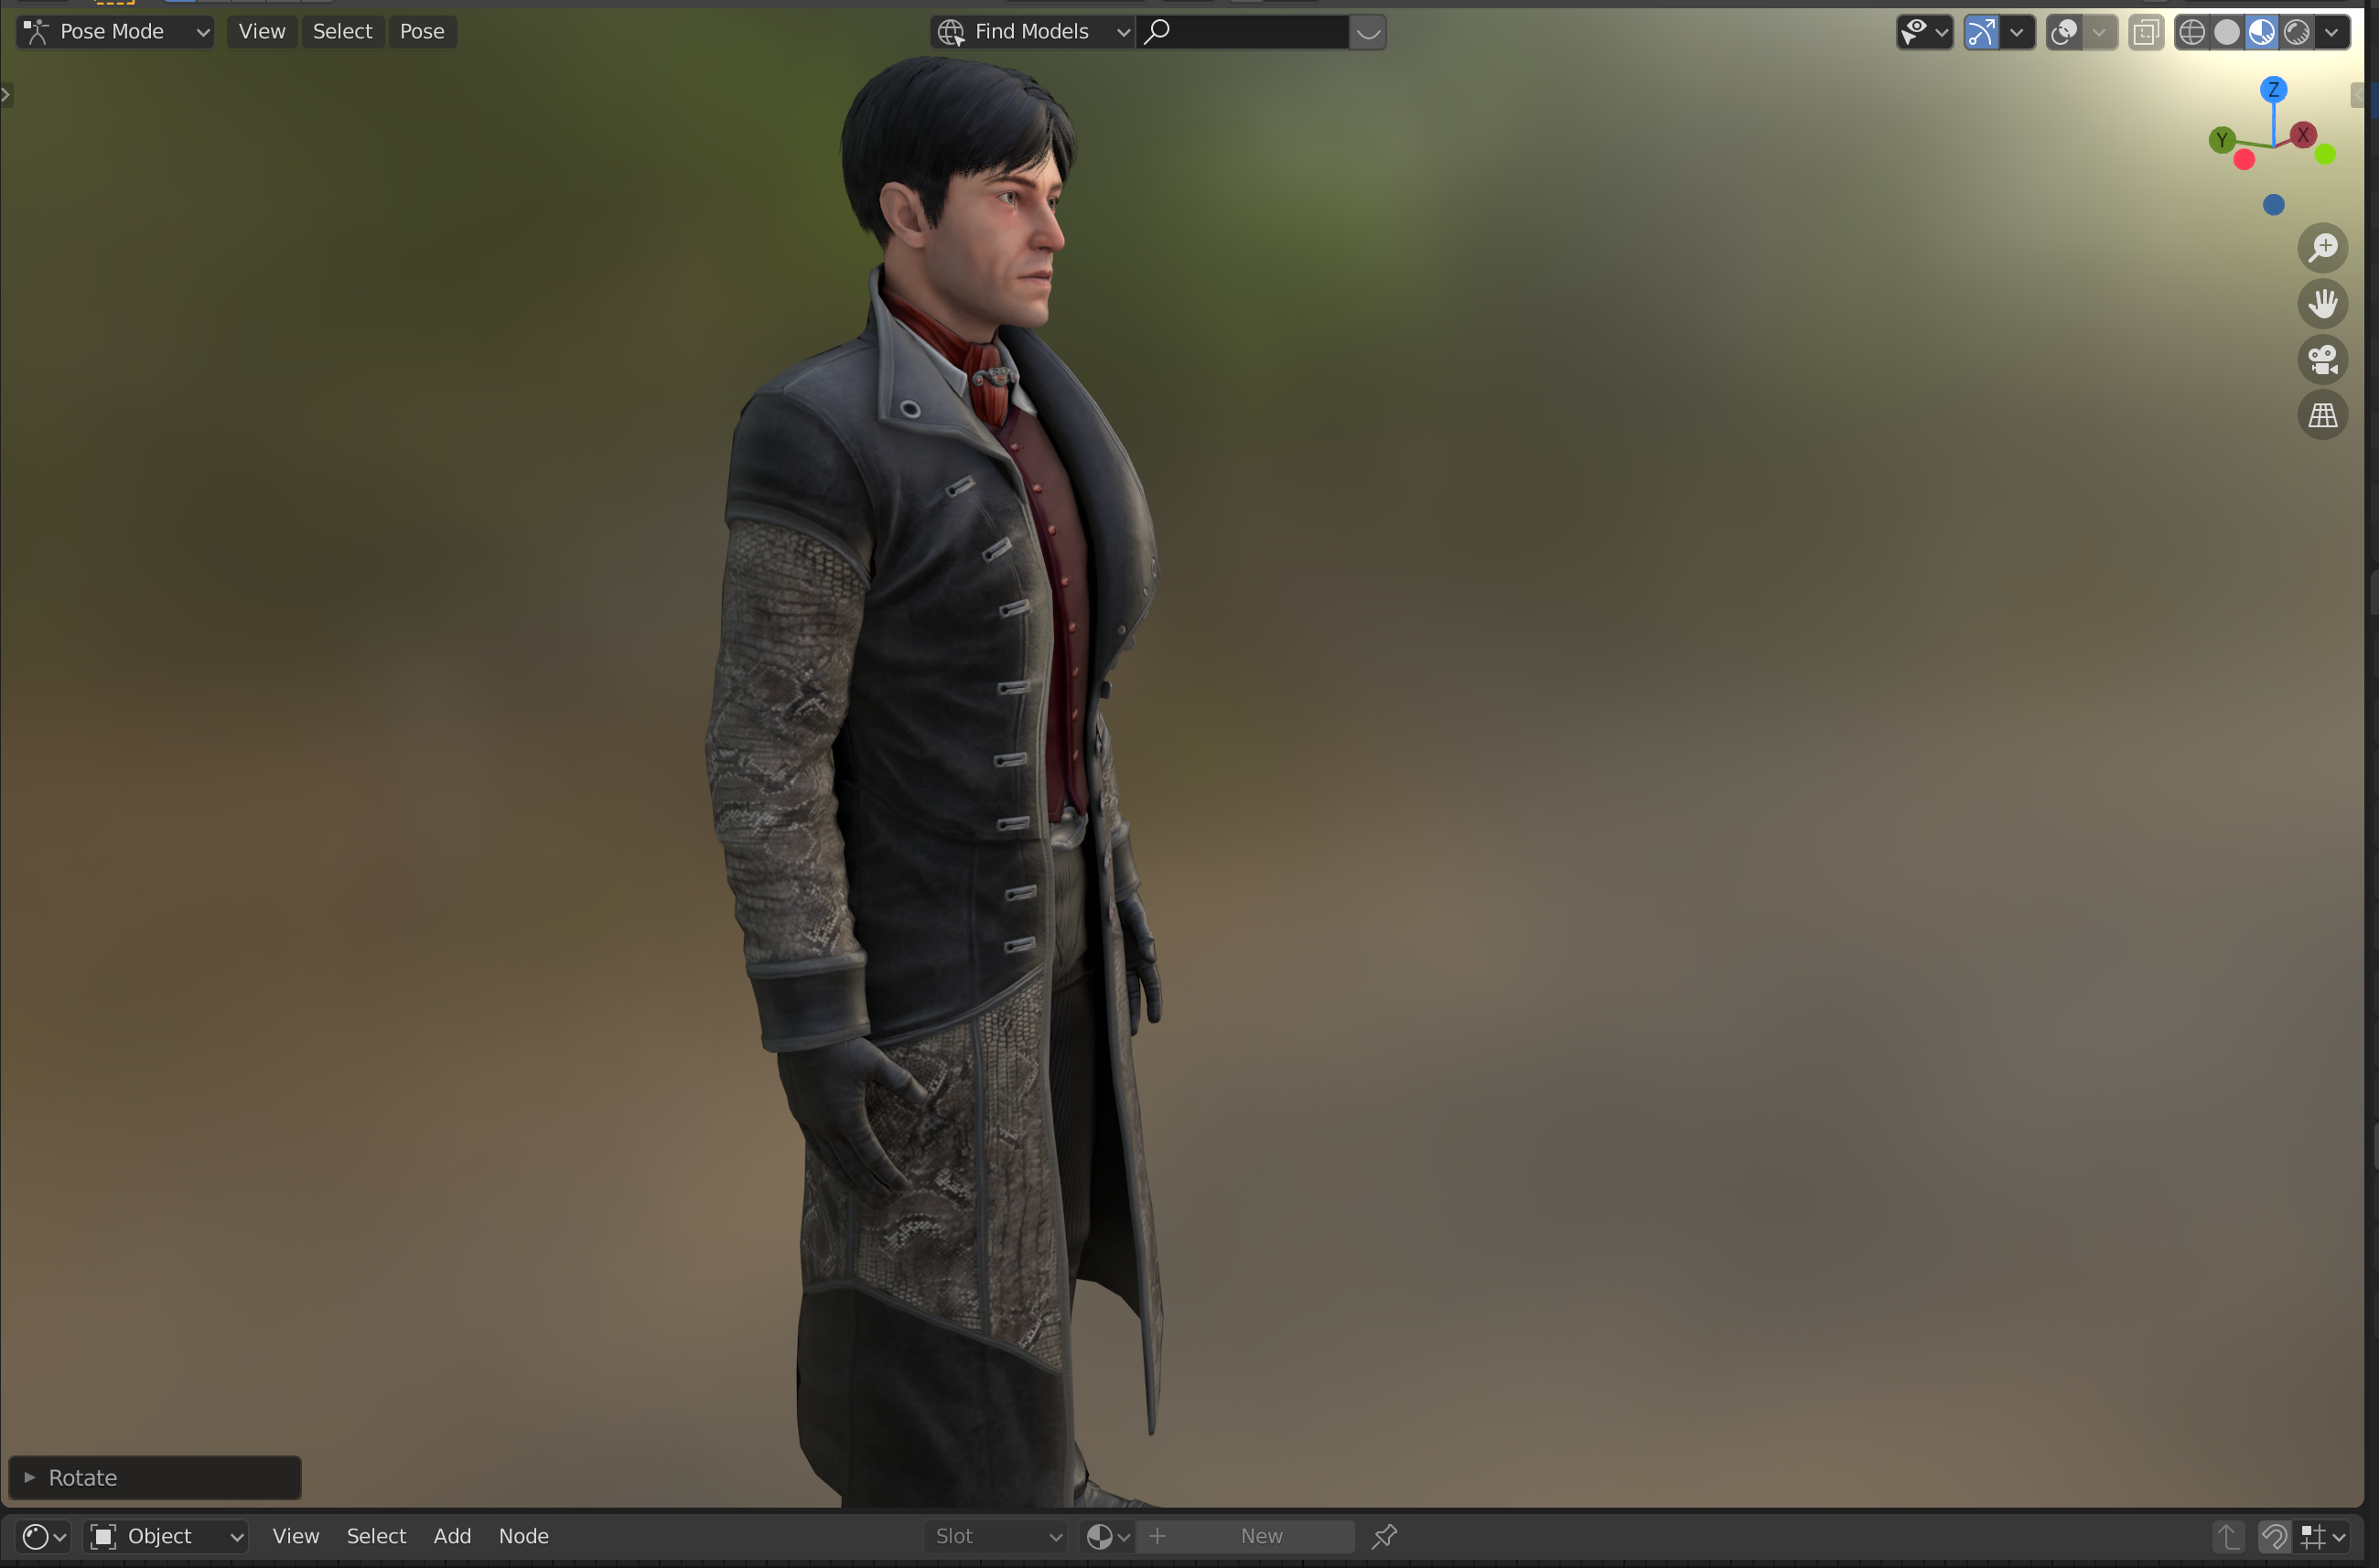
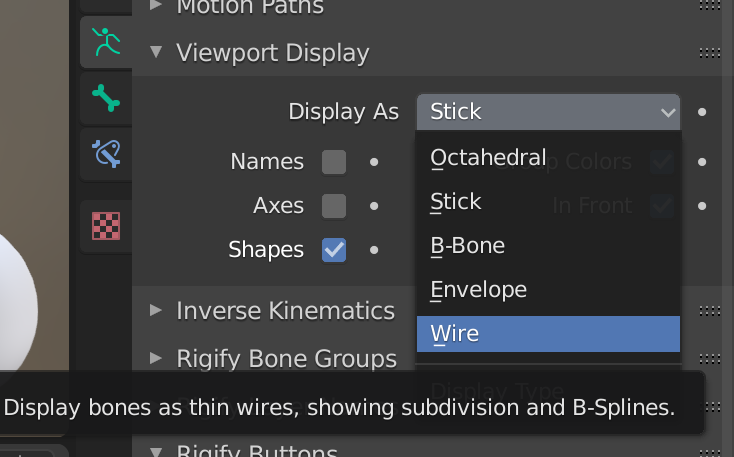
If you'd like to enlargen or shrink the bones, you can select different bone display types. Under the green stickfigure Armature tab, you can navigate to the Viewport display section, and switch between Octahedral, Stick, and Wire.
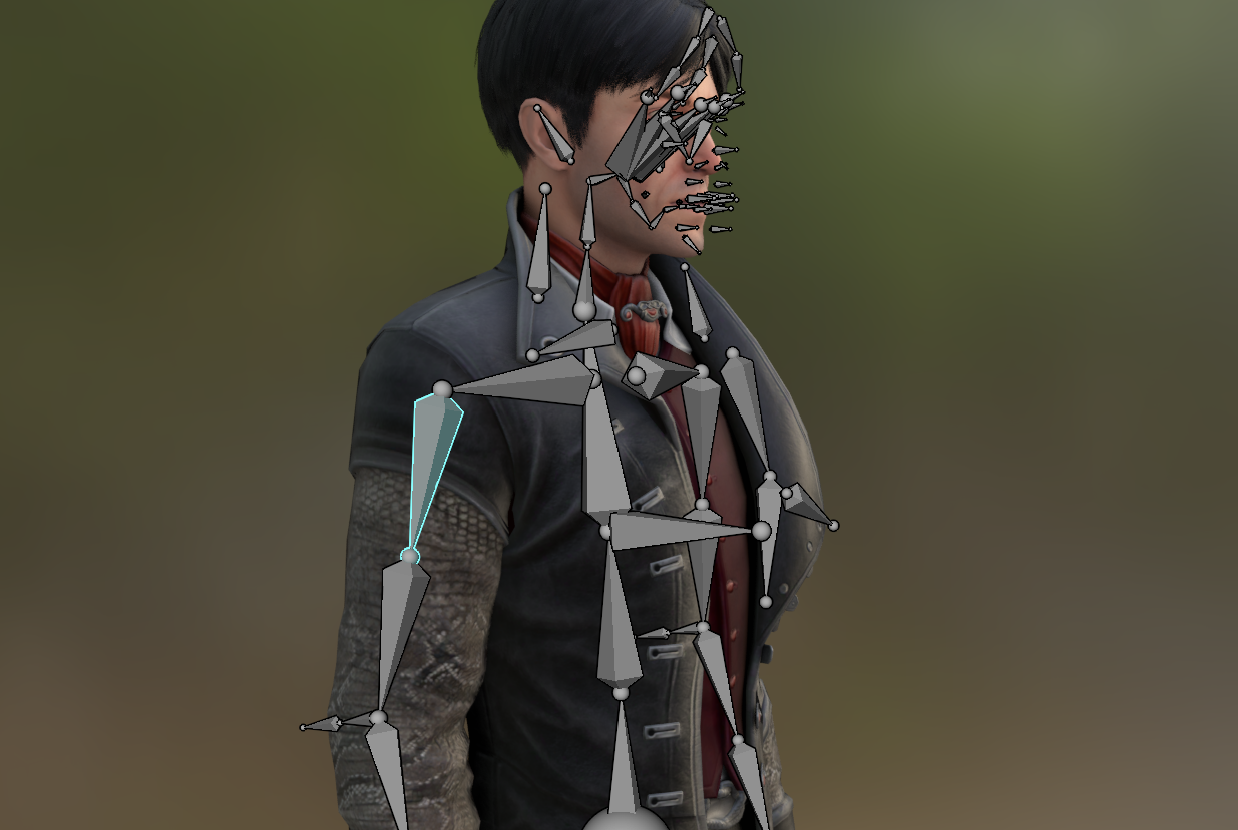
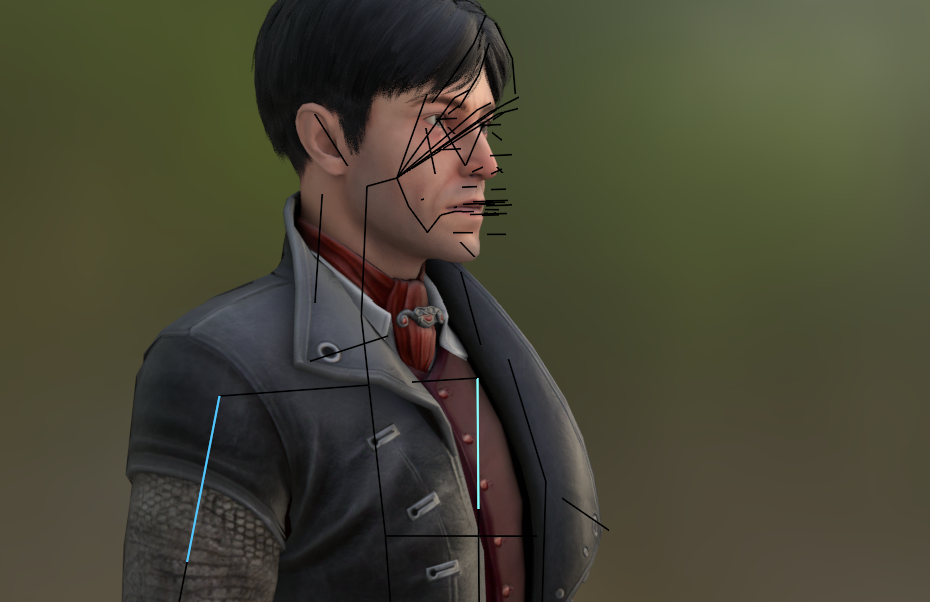
If you want to reset a bone or the whole armature back to the resting position, there are two things you can do.
For the whole armature, you can right click on a bone in Pose mode, and click "Clear User Transformation" at the bottom of the list. This resets every bone in the armature regardless of which bones you do or do not have selected.
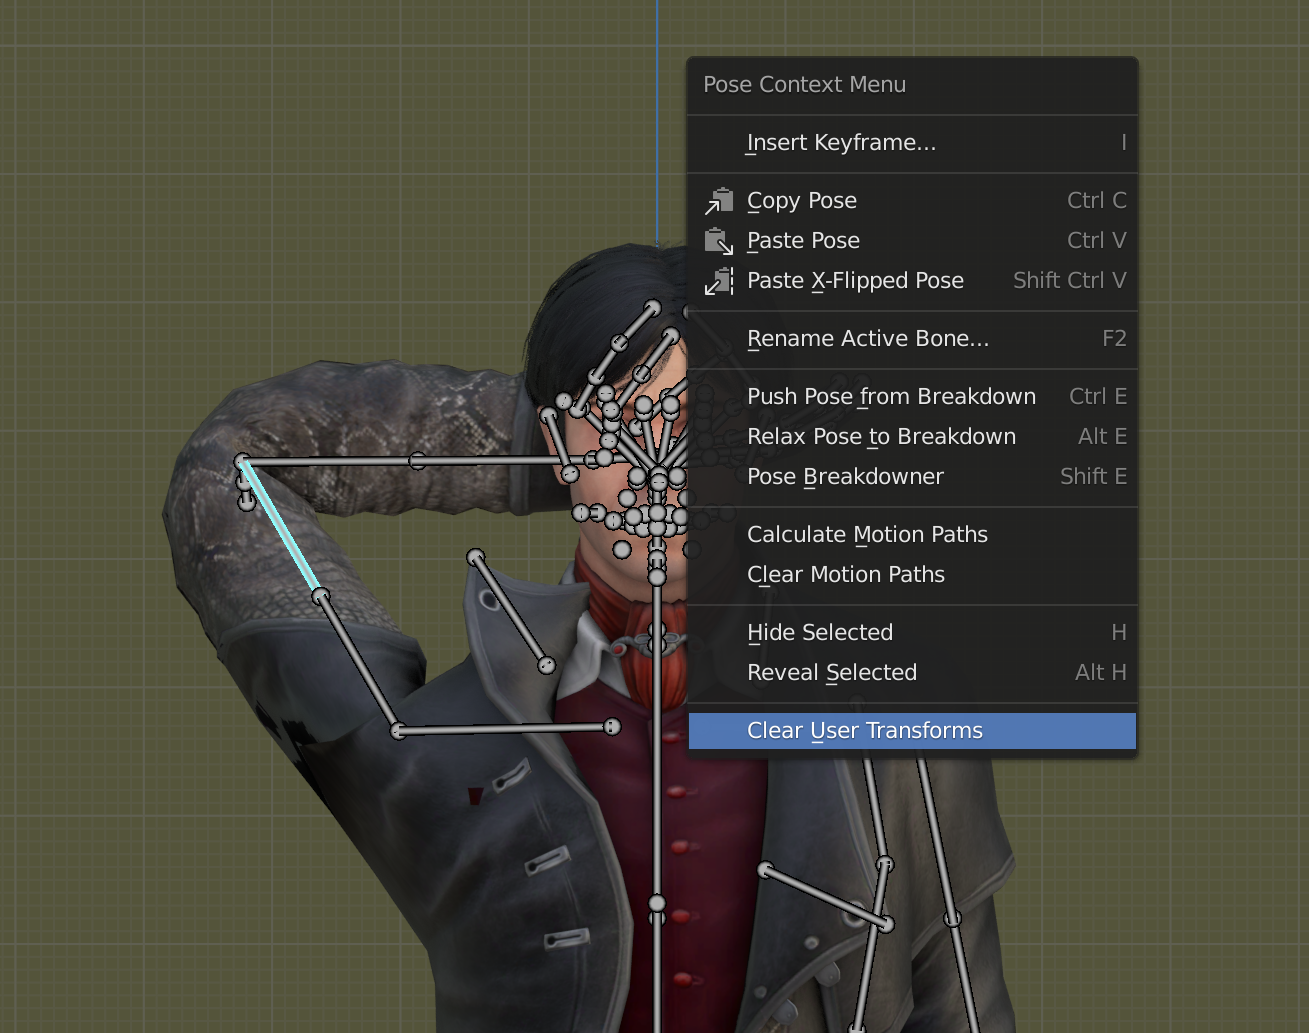
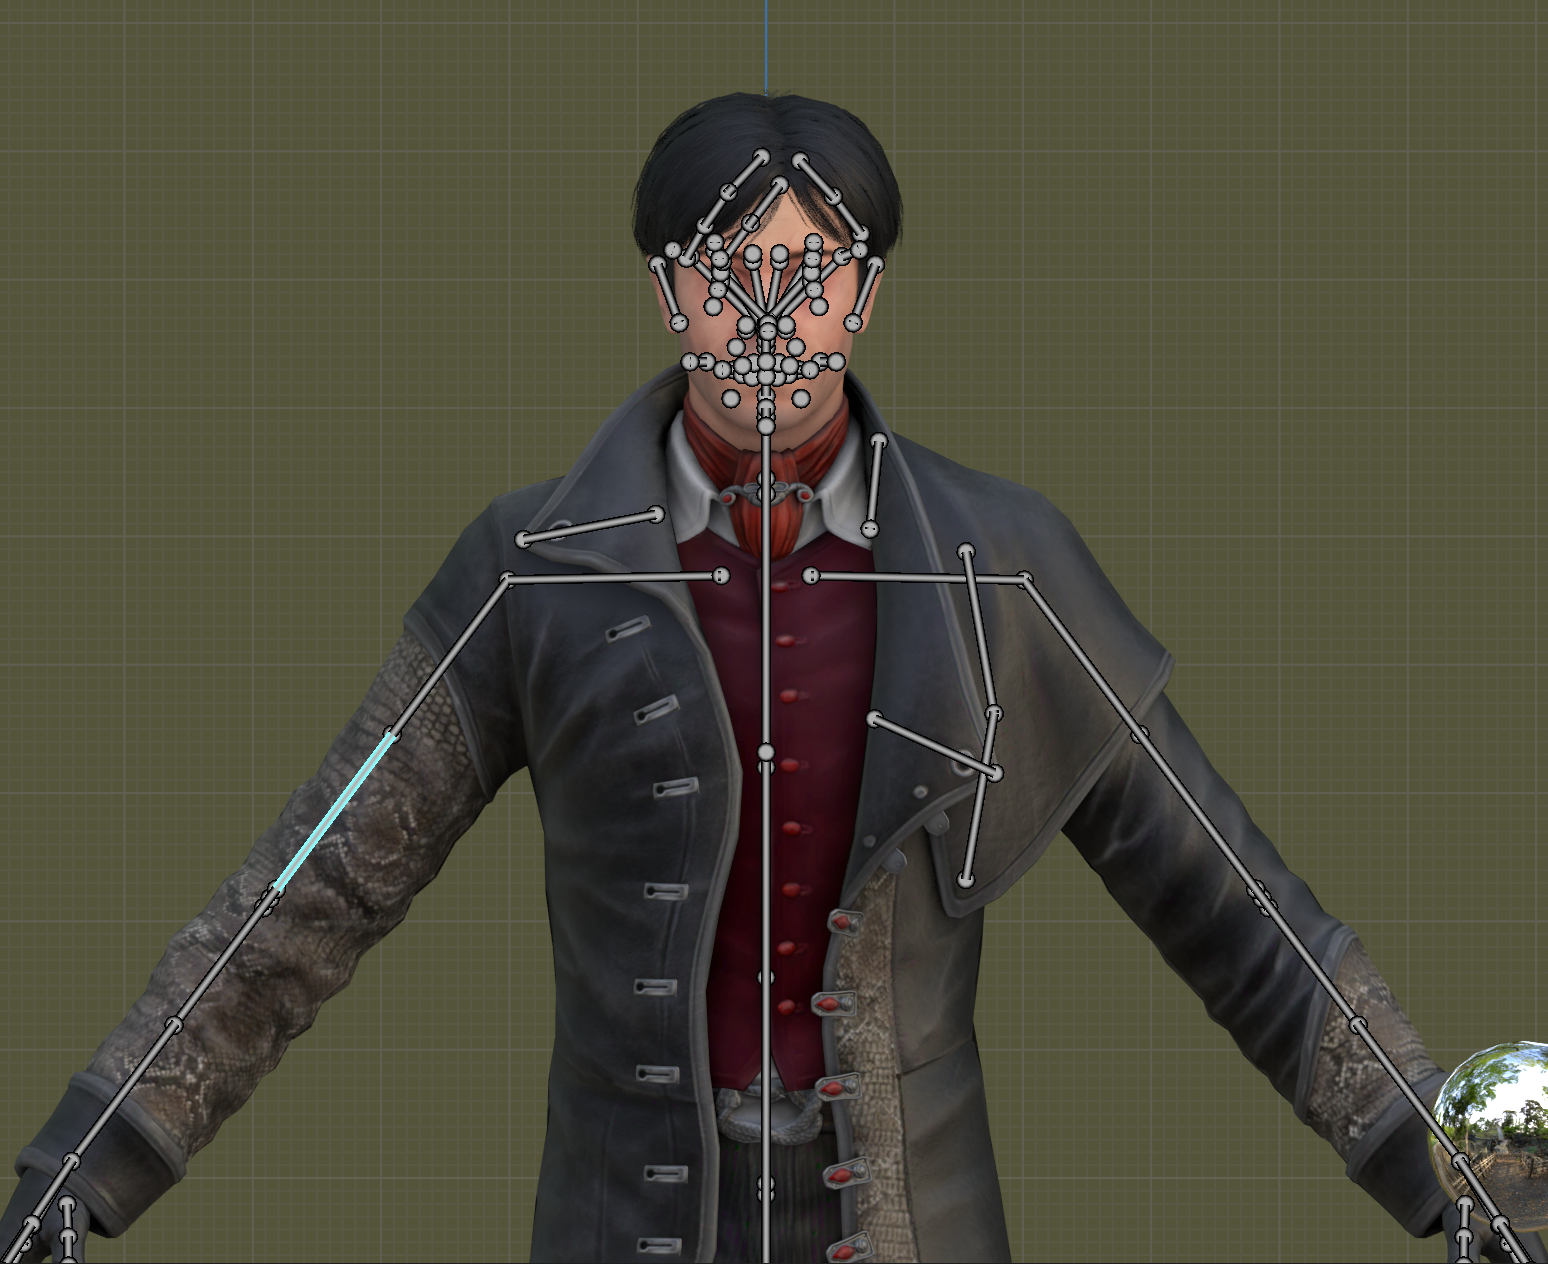
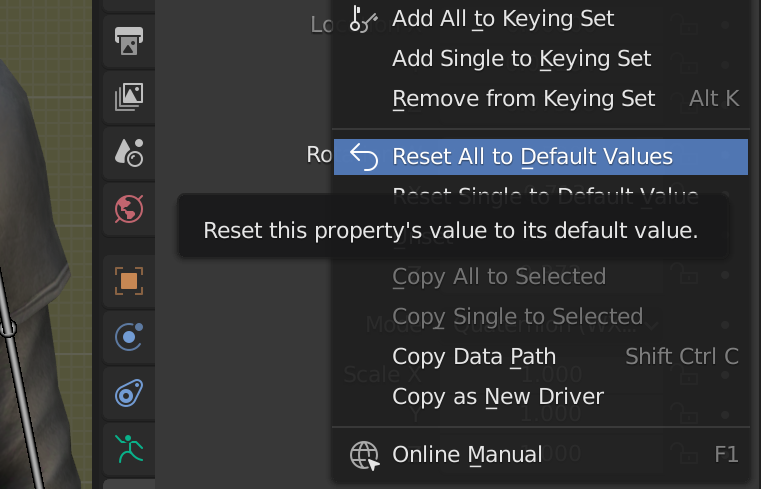
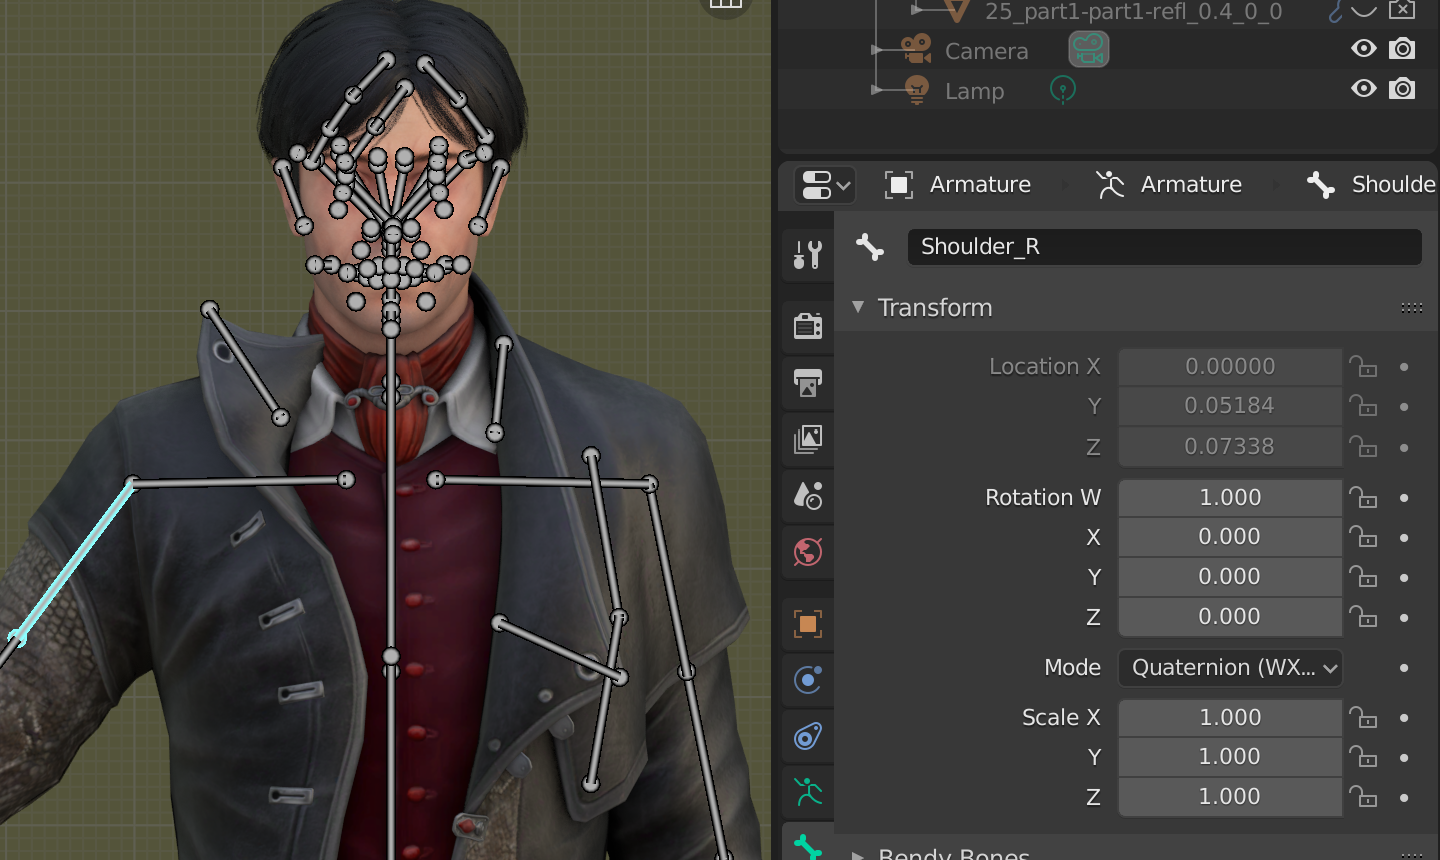
To reset individual bones, you can go to the tab with the green bone icon. Under the Transform dropdown (should already be open), you will see a "Rotation W/X/Y/Z" section. You can right click any of these numbers, and hit "Reset All to Default Values" to reset any edits you've made to the bone.
Adding More Than One Model to a Scene
If you'd like to have more than one model in a scene, you can append collections from different .blend files into one scene. A collection is like a folder that can contain multiple objects, as well as all of the links between these objects.
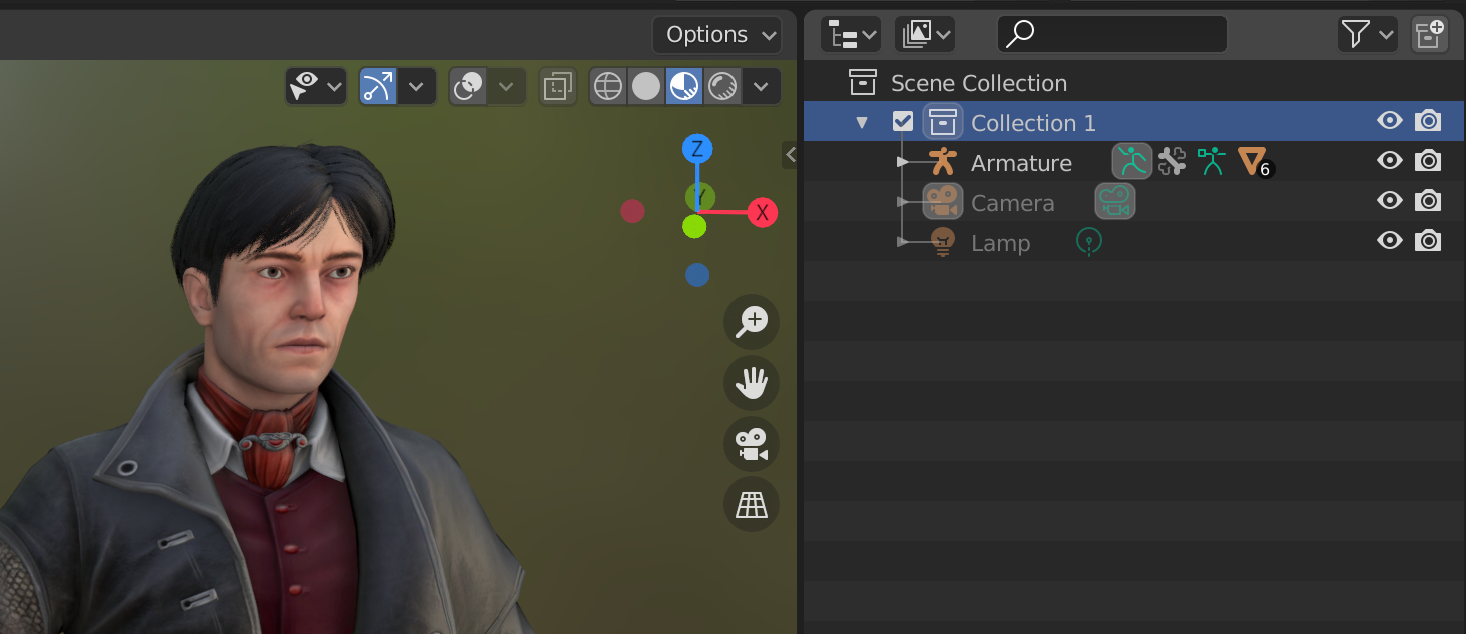
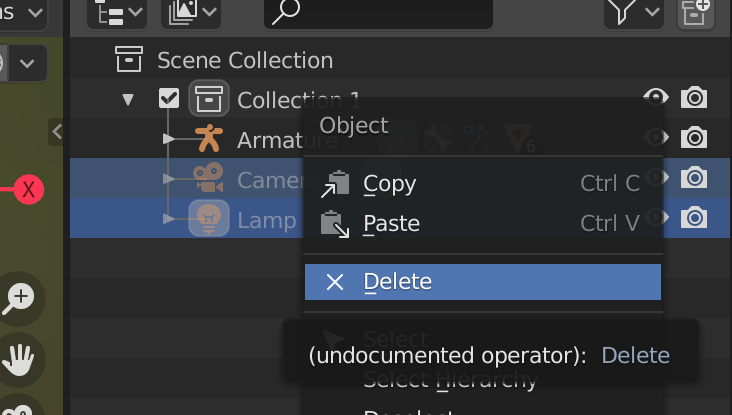
First, you'll want to make sure that your model is all set up in the original facebones.blend file that you first opened it in. Besides setting up materials, you'll want to rename the collection that the armature is in to the character's name, as well as deleting the camera and lamp. It isn't technically necessary, but it does make life easier.
To delete items in the scene collection, right click on them and select "Delete". You can select multiple objects by selecting one, then crtl/CMD + left clicking another. You can select several in a row by left clicking the first one you want to select, and then holding shift and left clicking the last one you want to select.
To rename the collection the armature is in, double-click "Collection 1" and type in the new name.
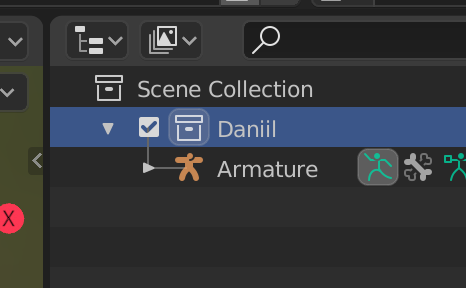
Now, you can create a brand new Blender file where you'll load in all of the collections from the different facebones.blend files. You can do this by pressing ctrl/CMD + N and selecting "General" in the popup menu.
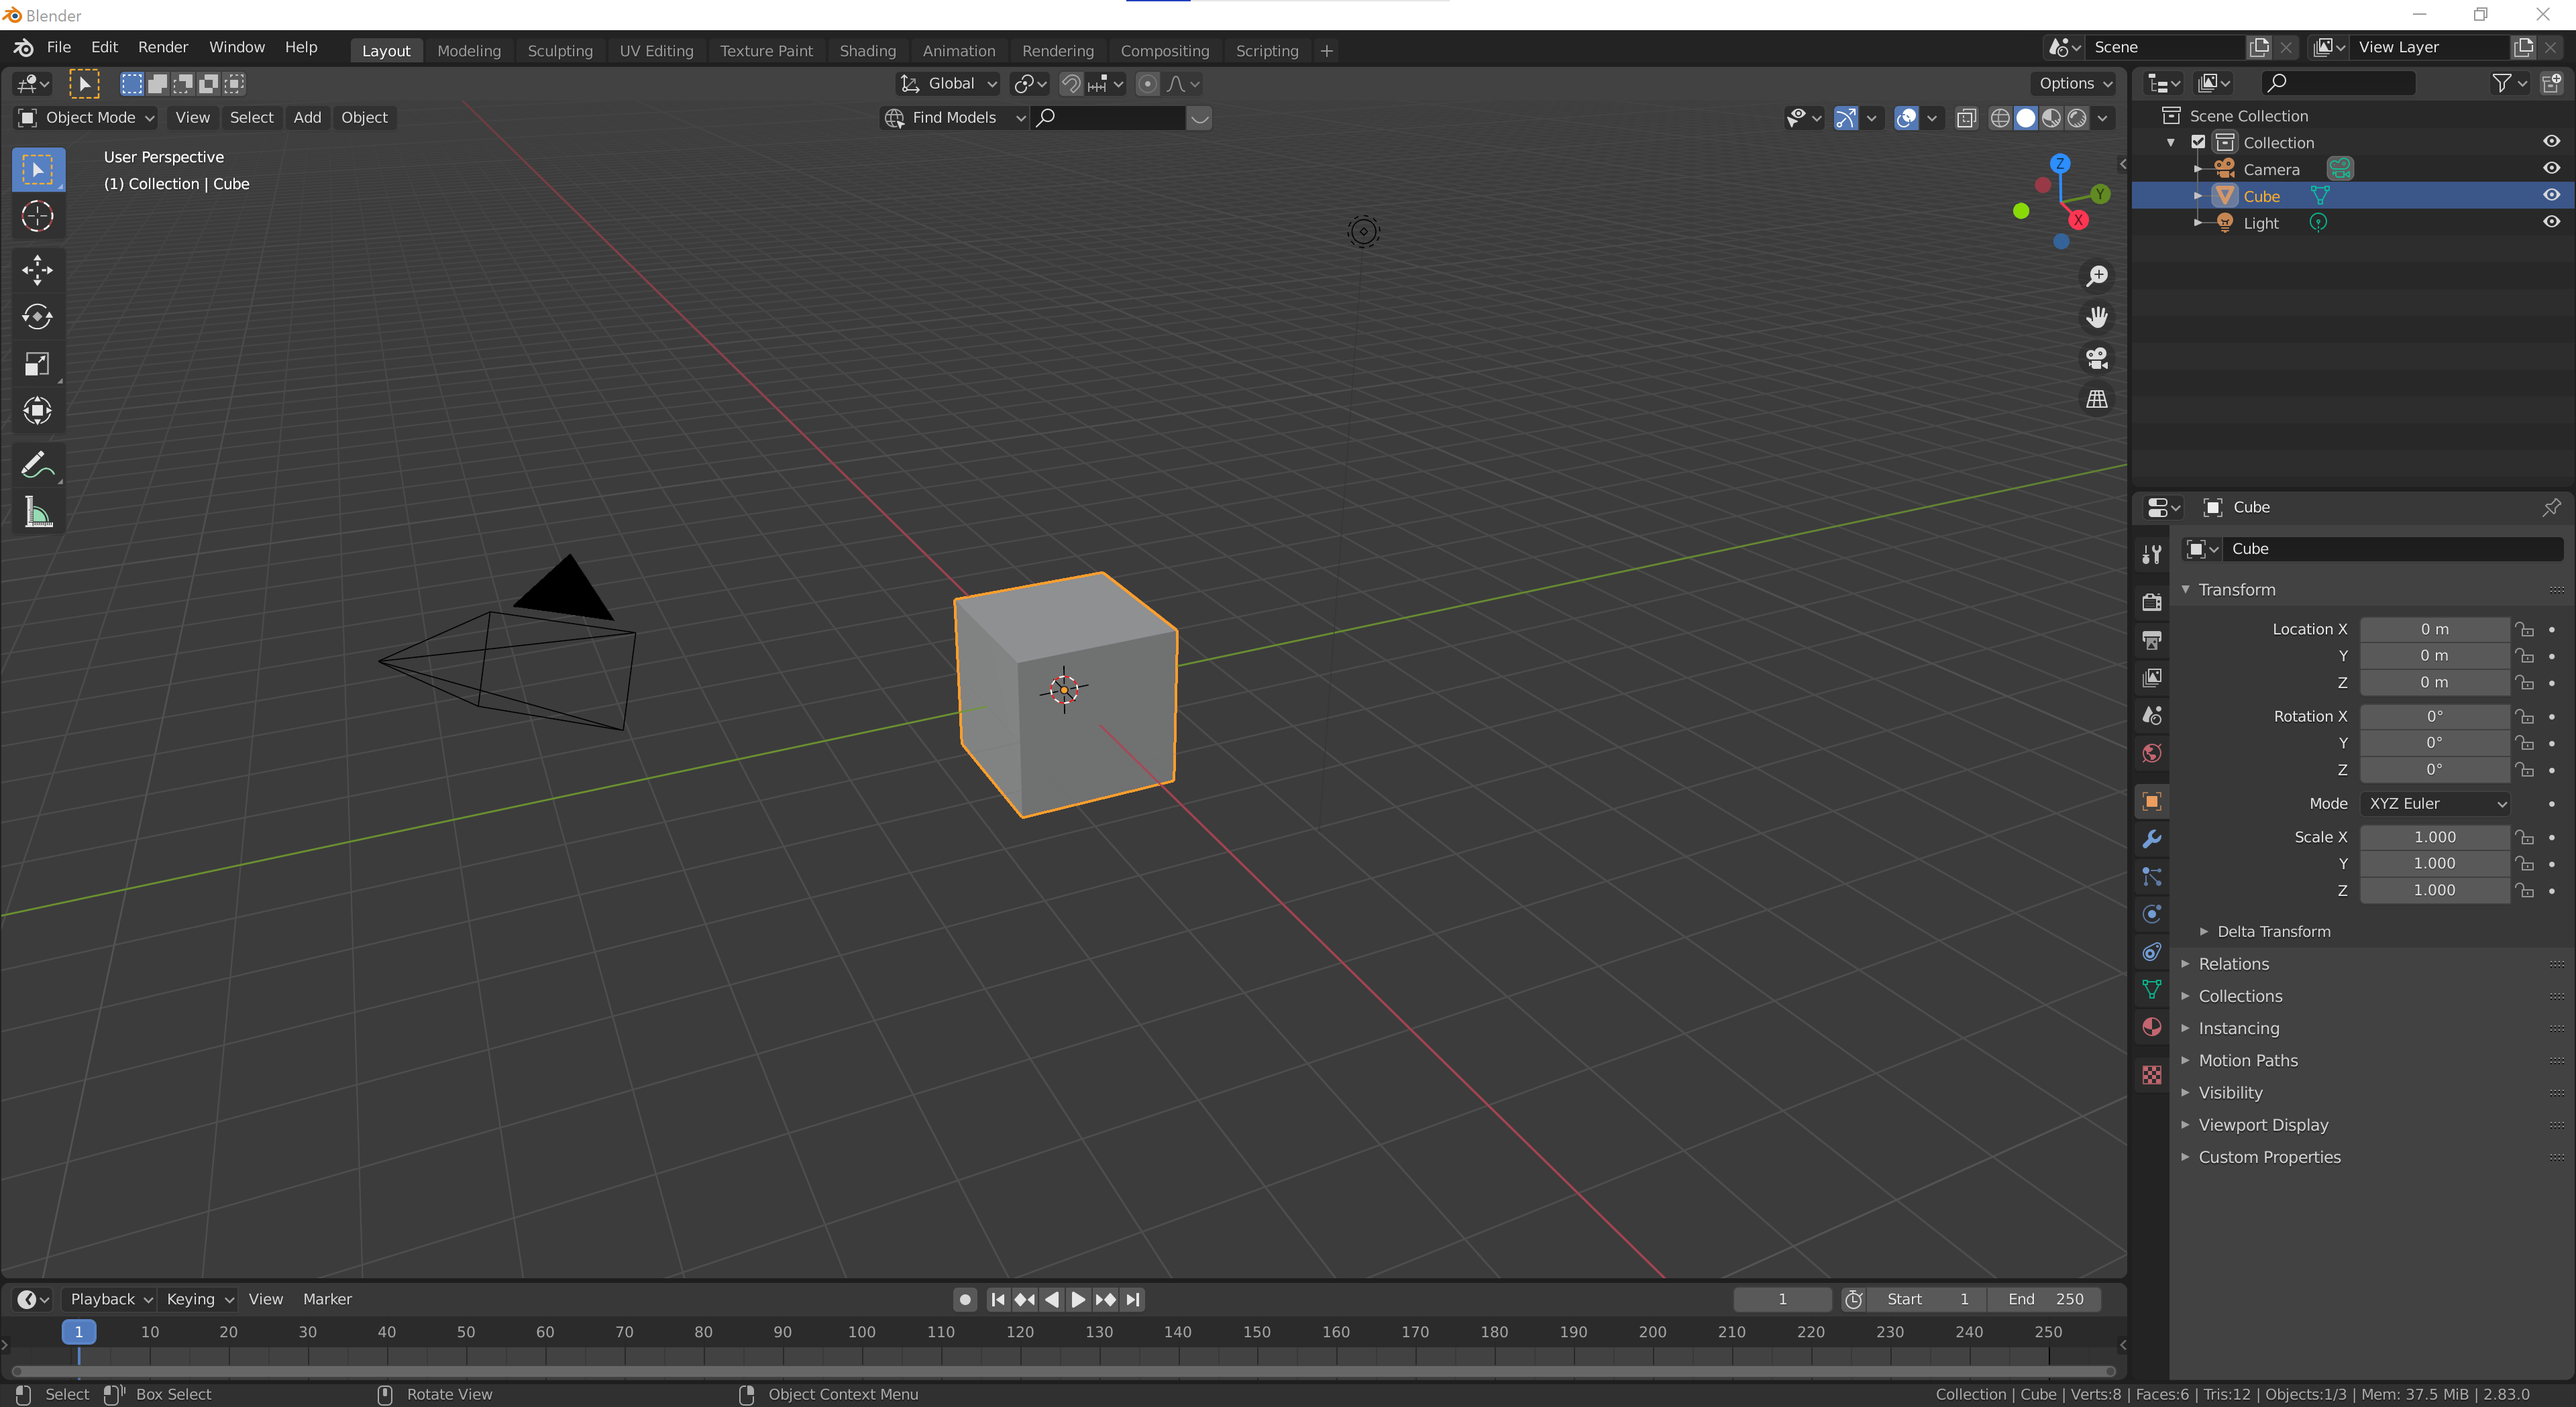
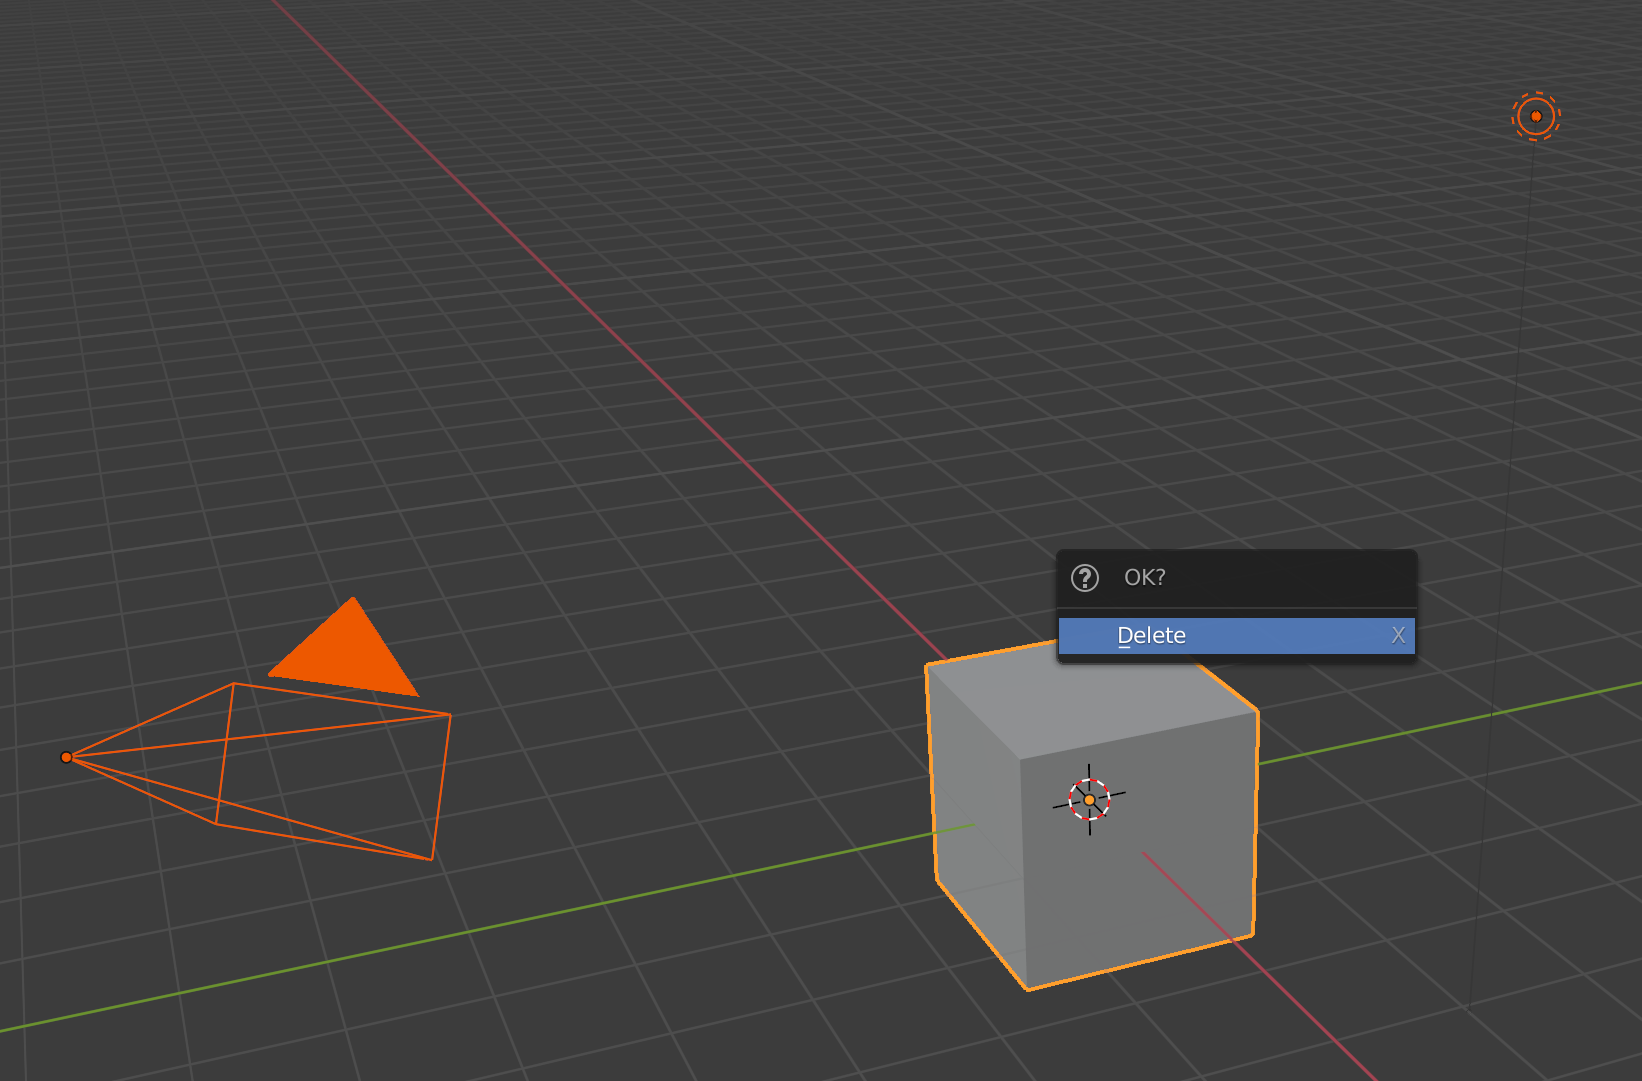
This is the default scene you're greeted with. You can delete the camera, lights, and cube by pressing A inside of the 3D viewport, and with everything highlighted in orange, you can hit X to delete everything. We'll be setting up our own cameras, as well as using a different lighting technique later on, so these aren't necessary.
To append a collection from a different .blend file, you can navigate to the top-left most toolbar, and go to File / Append. This will open up the Blender File Viewer. Navigate to where you have your facebones.blend file, and double-click on the file itself to view its contents. Then, double-click "Collection", and here you should find the collection you renamed earlier. Select it, and hit "Append" at the bottom right of the file viewer.
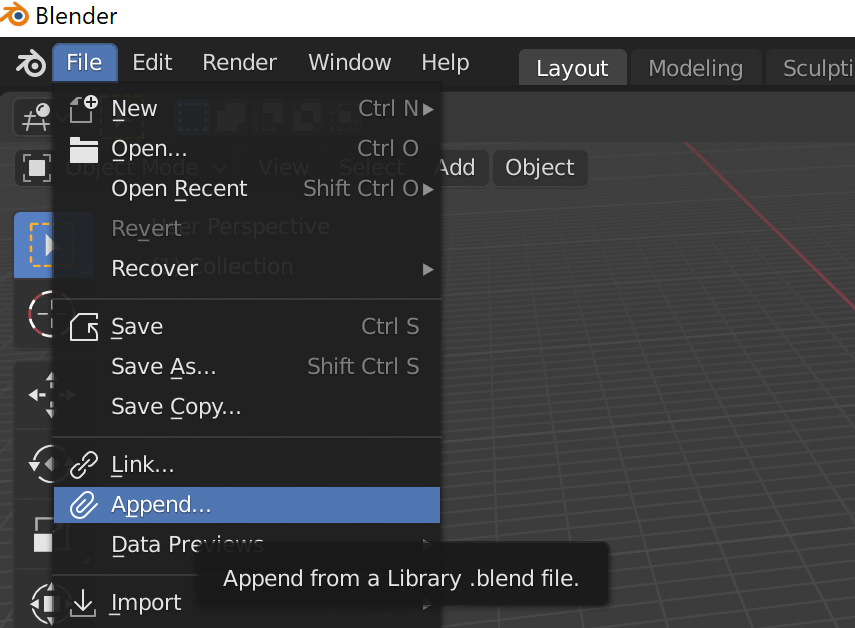
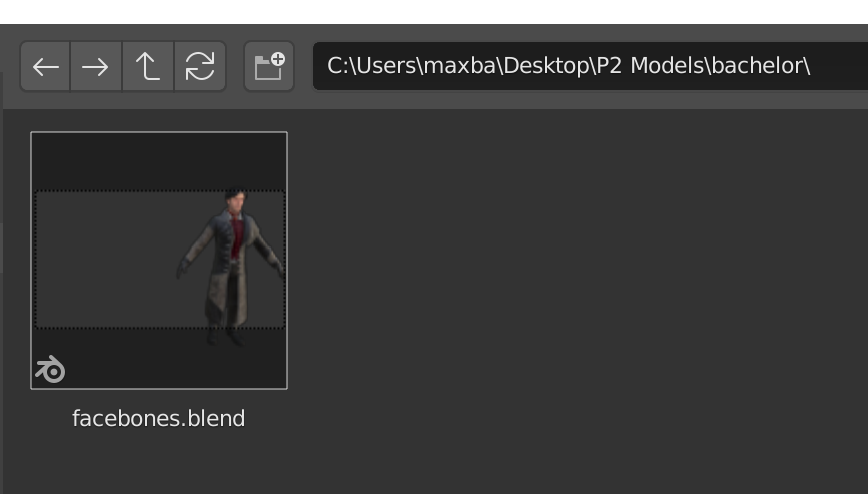
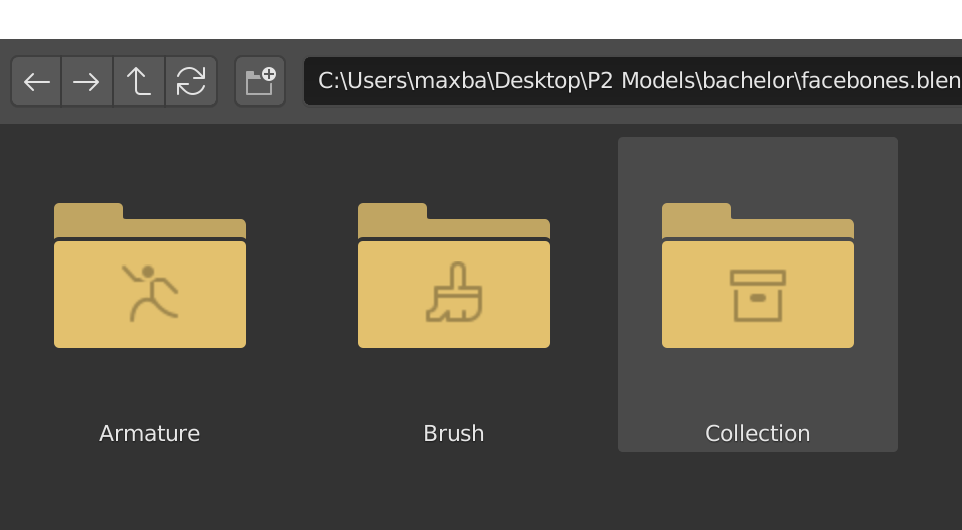
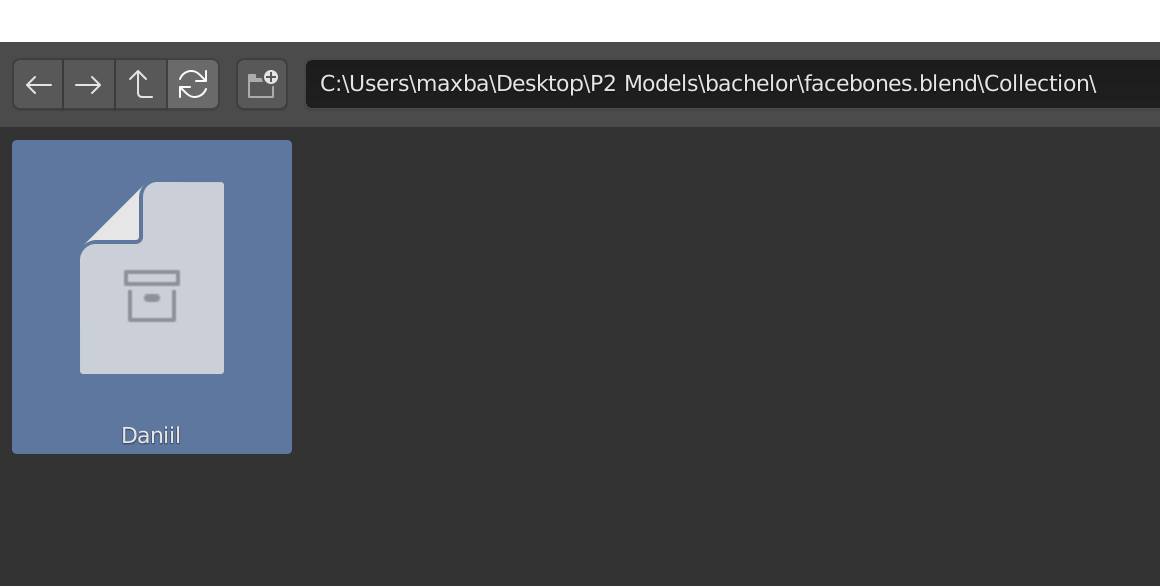
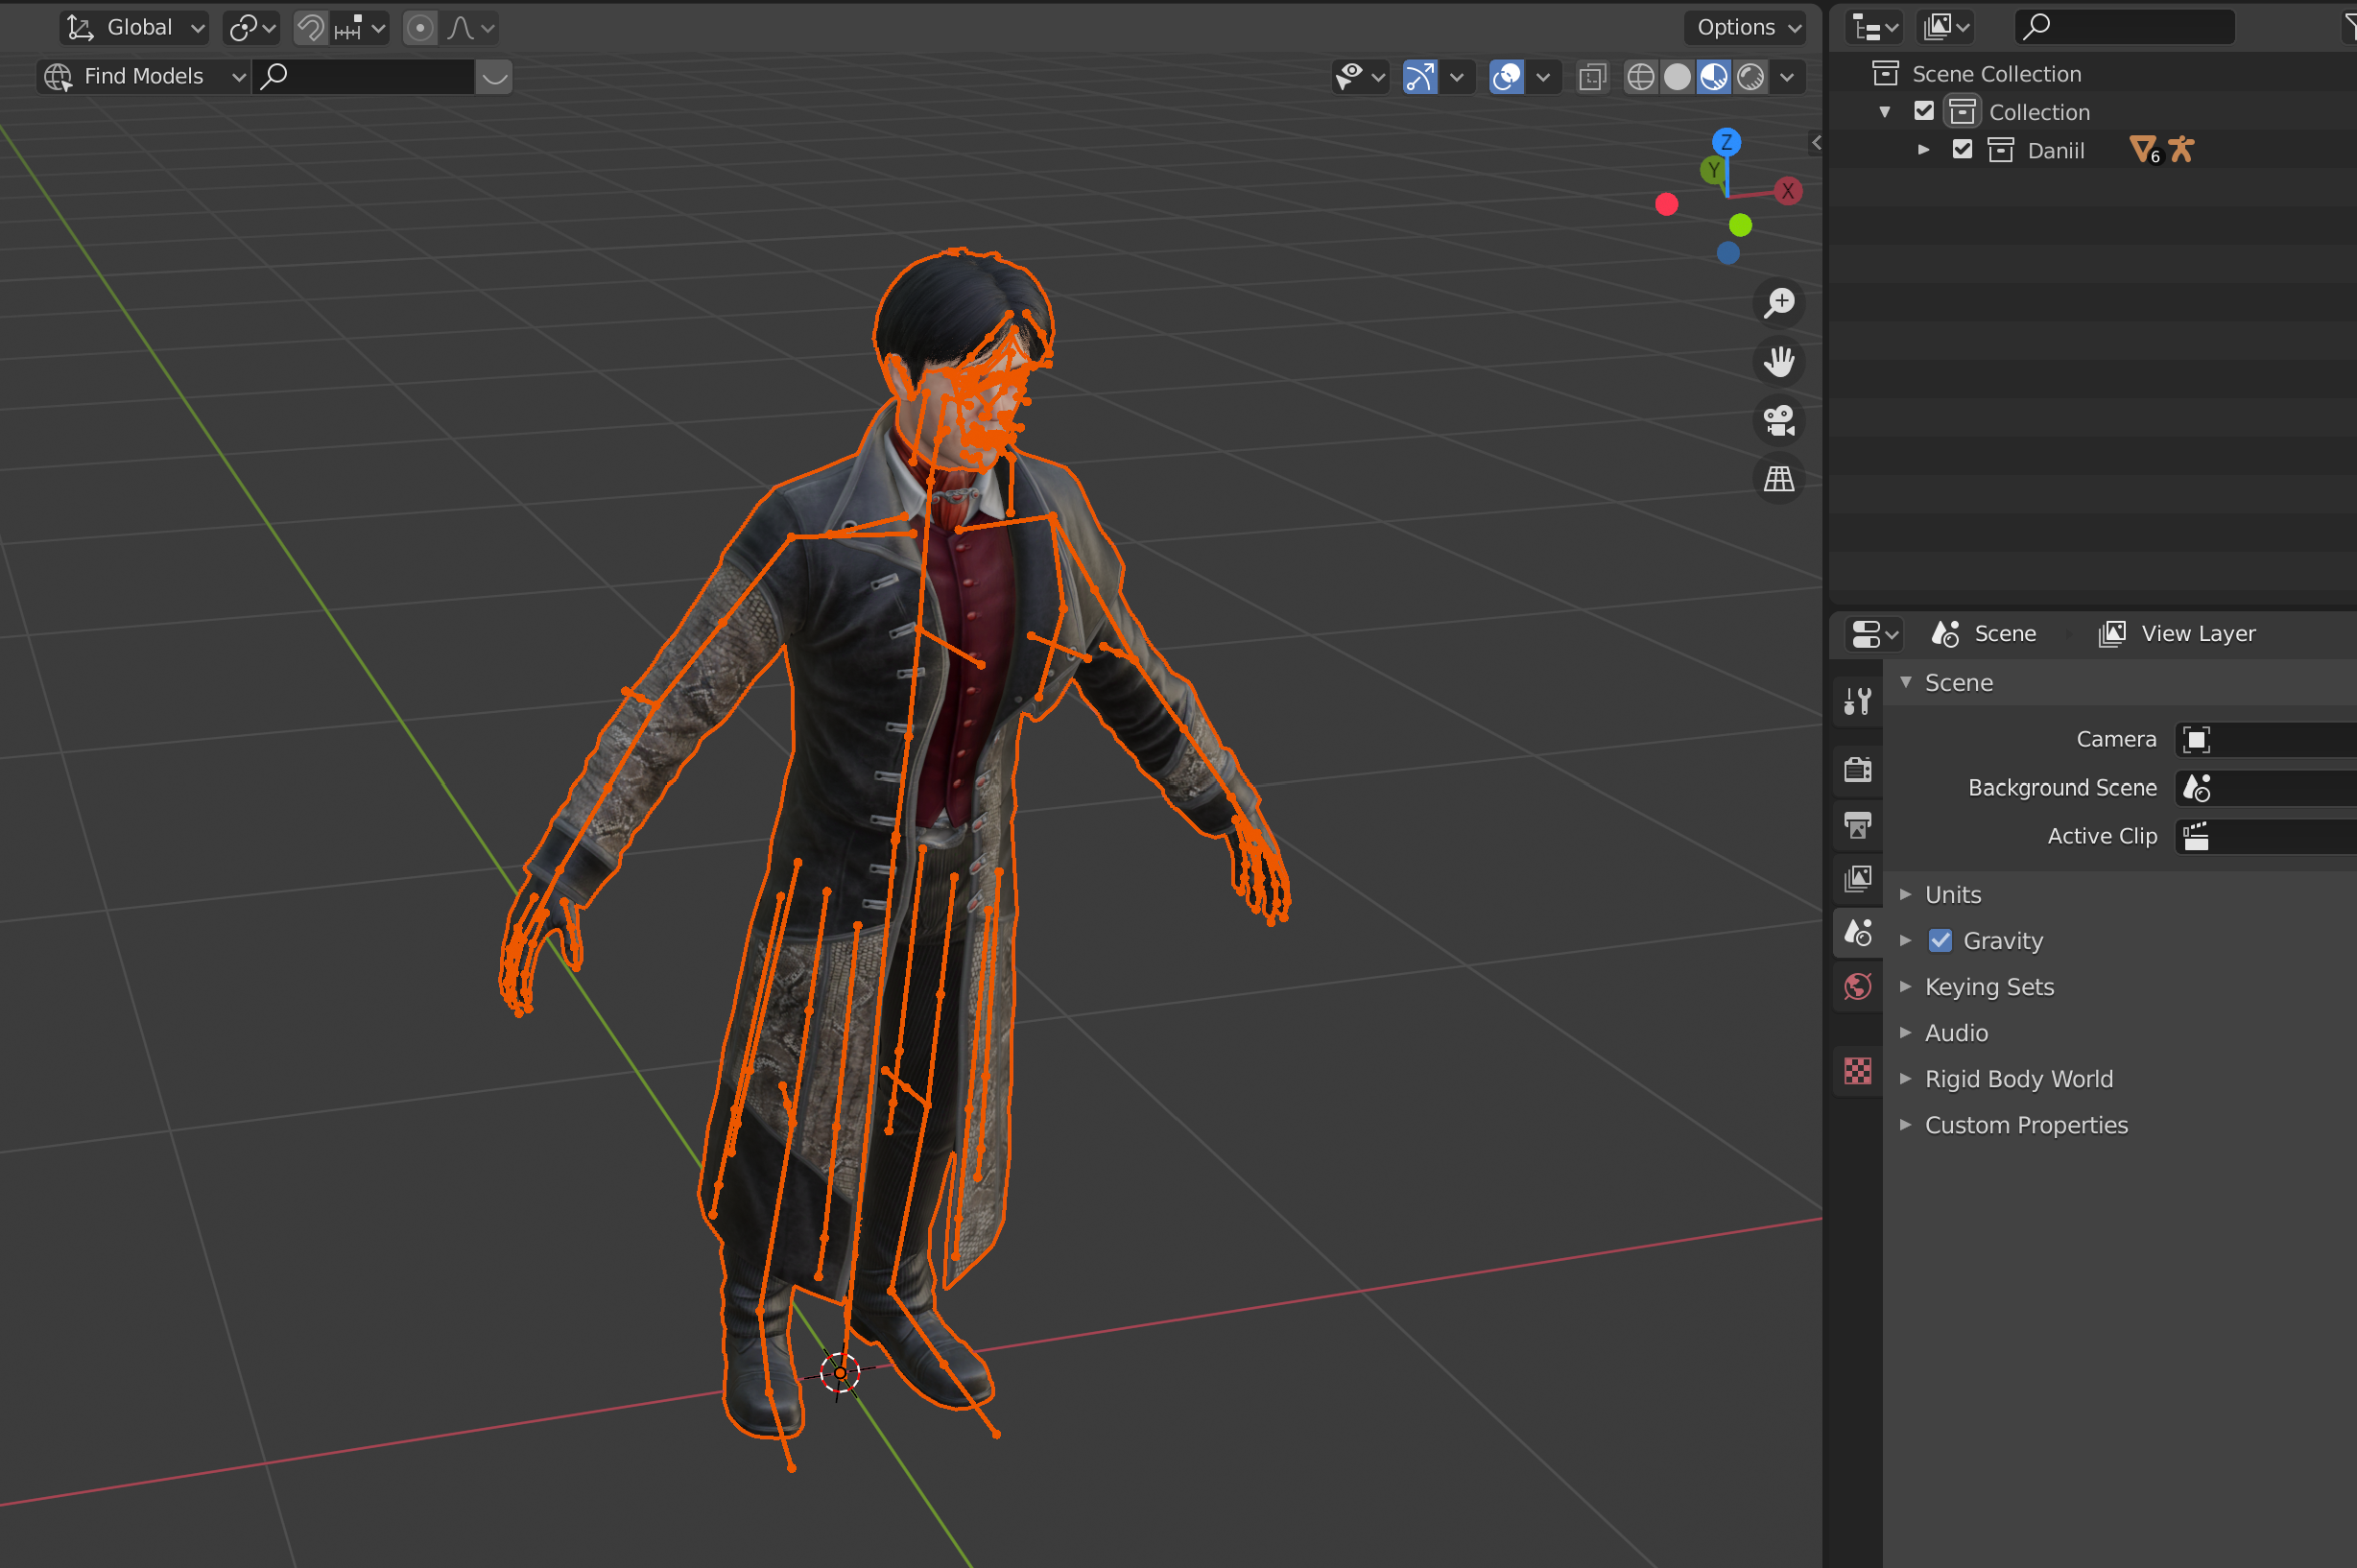
Here, I've repeated the appending process with the Haruspex and Changeling models. I moved them to the side by selecting their armatures, hitting G (to grab) while having my mouse over the 3D Viewport, and hitting X to move them along the global X axis.
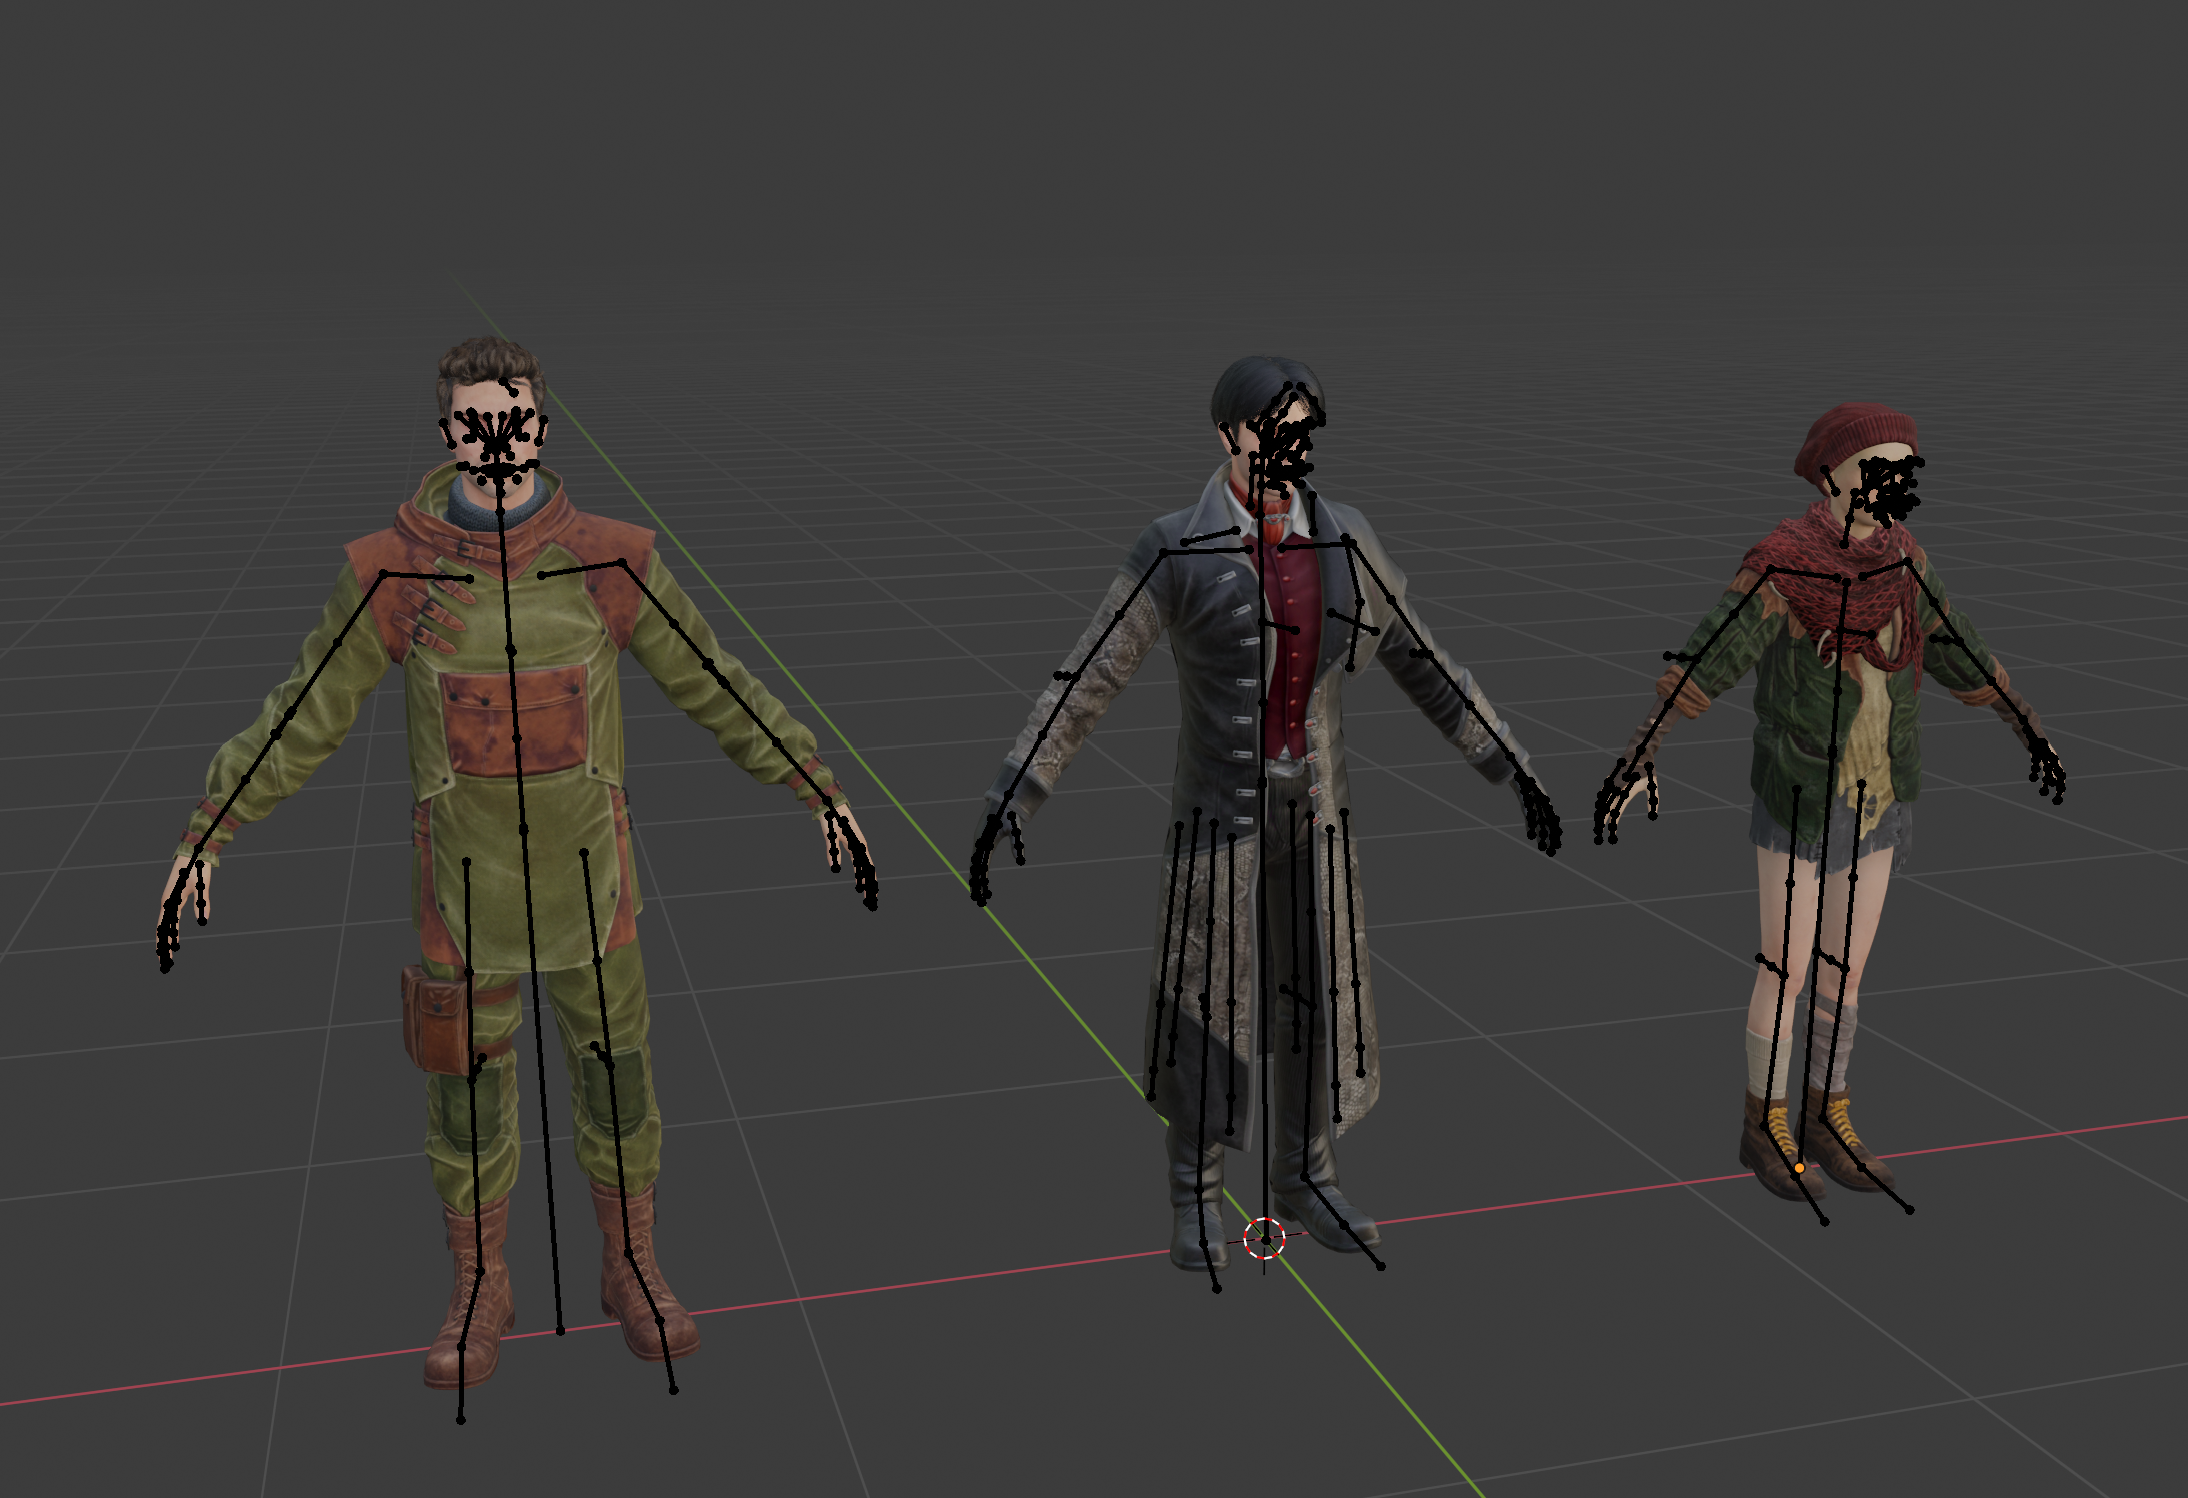
However, I generally keep them where they load in (at the center of the world), since it makes rendering things like turntables easier. I'll show you how to set up the cameras, lights, animations, and output settings for something like a turntable.
Rendering
Output Settings
You can easily pose models in Blender, take screenshots of the 3D Viewport, and use this for artistic reference. However, if you'd like to render animations or large images, there are a few things you need to set up.
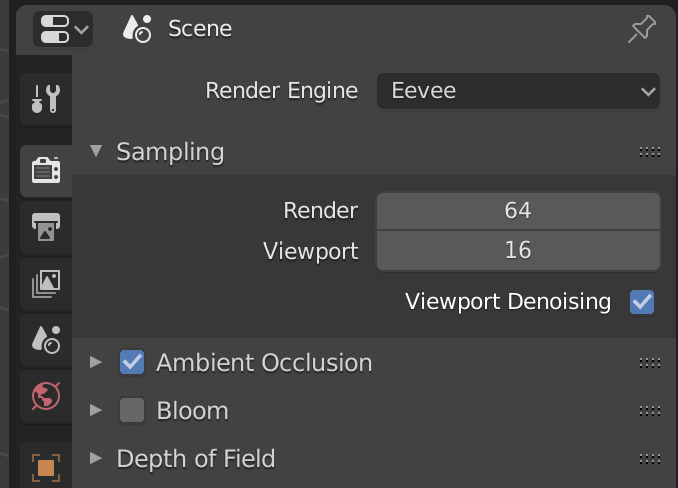
First, you might want to activate ambient occlusion. This is optional, but sometimes models look undesirably flat without it. You can find this by clicking on the tab that has the gray "back of a camera" icon. It's the second one down.
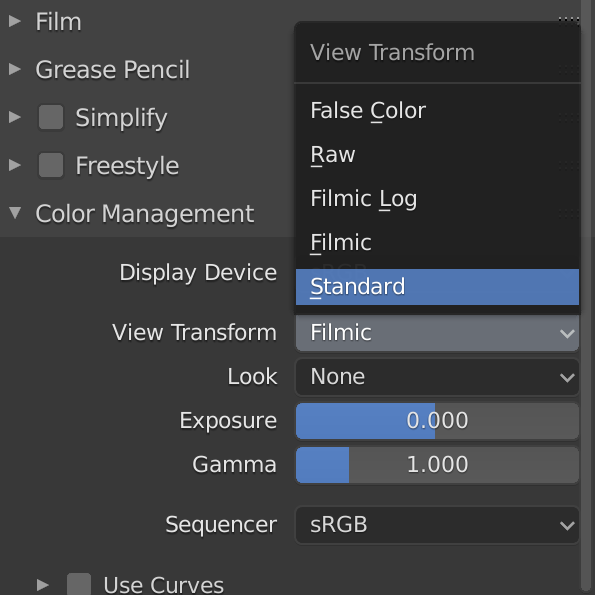
We will also change how colors are handled in this tab. Scroll all the way down to Color Management, and in View Transform, switch it from Filmic to Standard. By default, Blender uses Filmic, as it provides more natural colors and lighting for realisitc renders. However, it can also lead to everything looking muted and innacurate in stylized 3D work and reference models.
Now, we can leave this tab and go to the output tab. It's the one with the gray printer icon, just below the tab we were in before. The default render dimensions are 1920px by 1080px, and you can leave it as is if you want to render an HD, 16:9 aspect ratio image or video.
However, since I'll be showing you how to make a turntable, I'm going to type in a square aspect ratio. Since 2160px by 2160px is the largest square video that Davinci Resolve can render, that's the size I'm going with. However, you can also set it to 1920px by 1920px, or any other square sized you'd like.
Other 16:9 ratios that work well for videos and general posts on the internet are 3840px by 2160px (4k or UHD resolution), or 2560px by 1440px (2k or QHD resoluton).
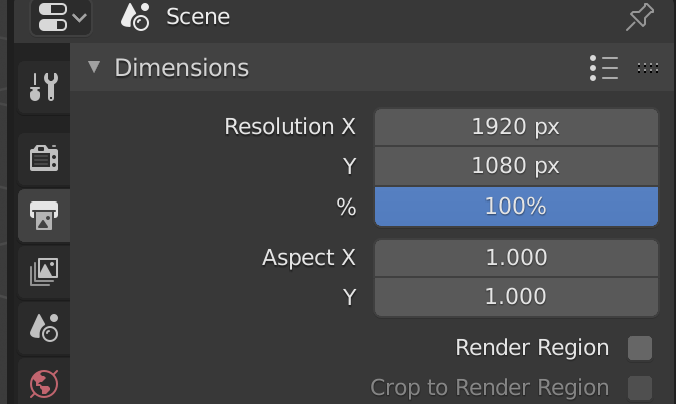
The next thing we'll be looking at in this tab are the Output settings for animations. This includes both the destination of your render, and the file format. These settings are less important for still images, because we can always render an image and select the file format / destination when we finish.
We can render animations as image sequences (the individual, numbered frames of an animation, in any image format you'd like), or as a video file (such as an mp4, which can be uploaded to Youtube or Twitter without any further editing.)
Image sequences are preferrable, because if Blender crashes halfway through rendering an animation, you'll keep all of the images you've already rendered. You can then pick up where you left off by simply changing where the animation timeline starts, which I'll show you how to do later. Additionally, if you select an image format like PNG, the images will be nice and crisp and suitable for reference materials and artwork.
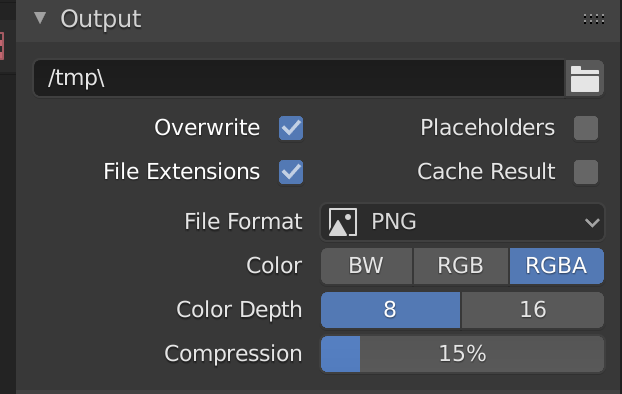
By default, Blender will send image sequences and videos to a temporary folder on your computer. You can change the location by clicking on the folder icon next to the folder name, and navigating to the right folder. I suggest creating individual folders for each render you want to make.
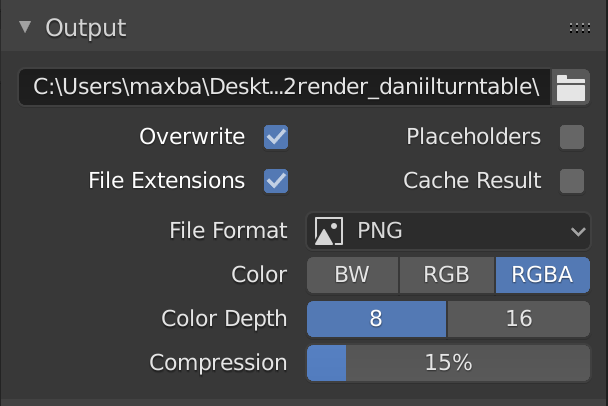
Also by default, Blender will render animations as PNG image sequences, and this is what I'll be using. However, if you'd like to render an mp4, you can change the file format to "FFmpeg video". This will add a new dropdown the Output section called "Encoding". In here, you can switch the container to MPEG-4.
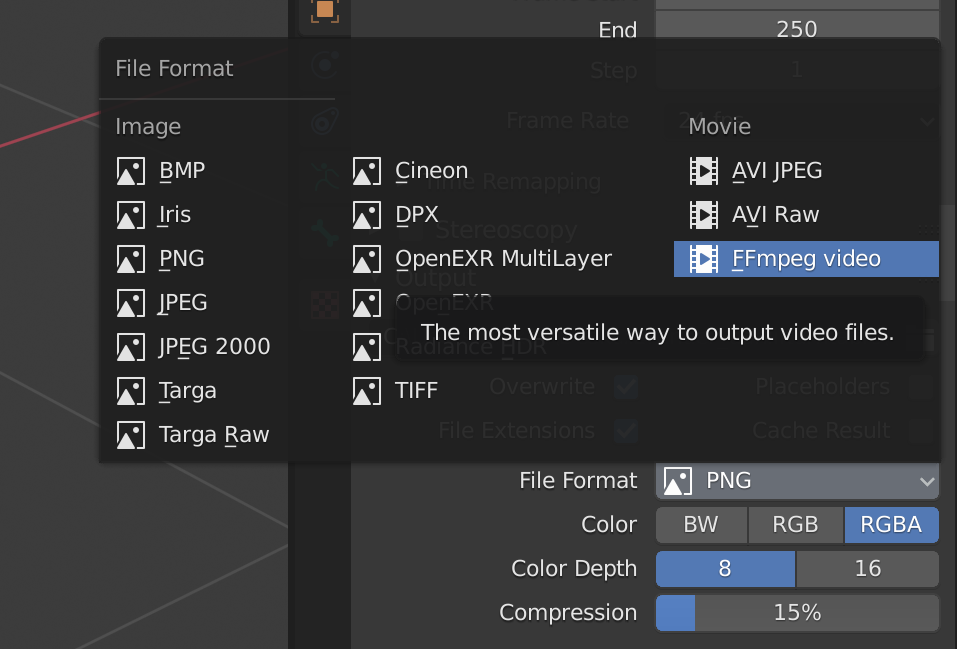
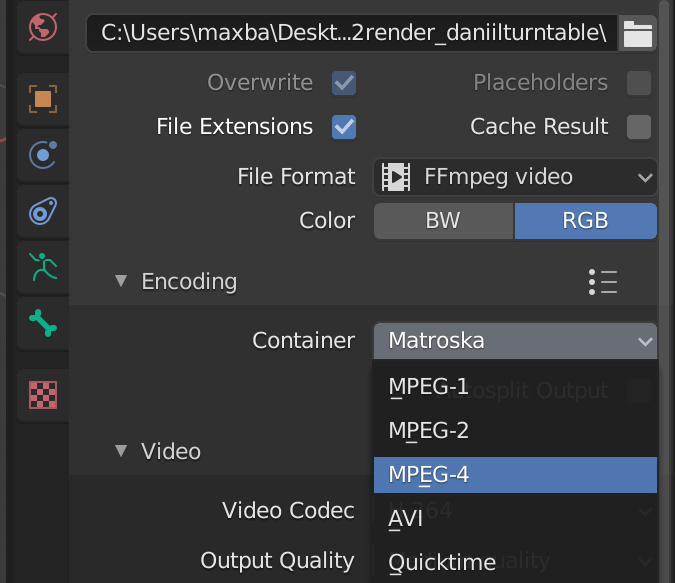
For now, I'll switch the file format back to PNG.
To render anything, you'll need to set up an active camera. I'll show you how to set one up specifically for a turntable, but I'll also show you how you can modify and move it around for anything, as well as how to render from your angle in the 3D Viewport.
Setting up Cameras
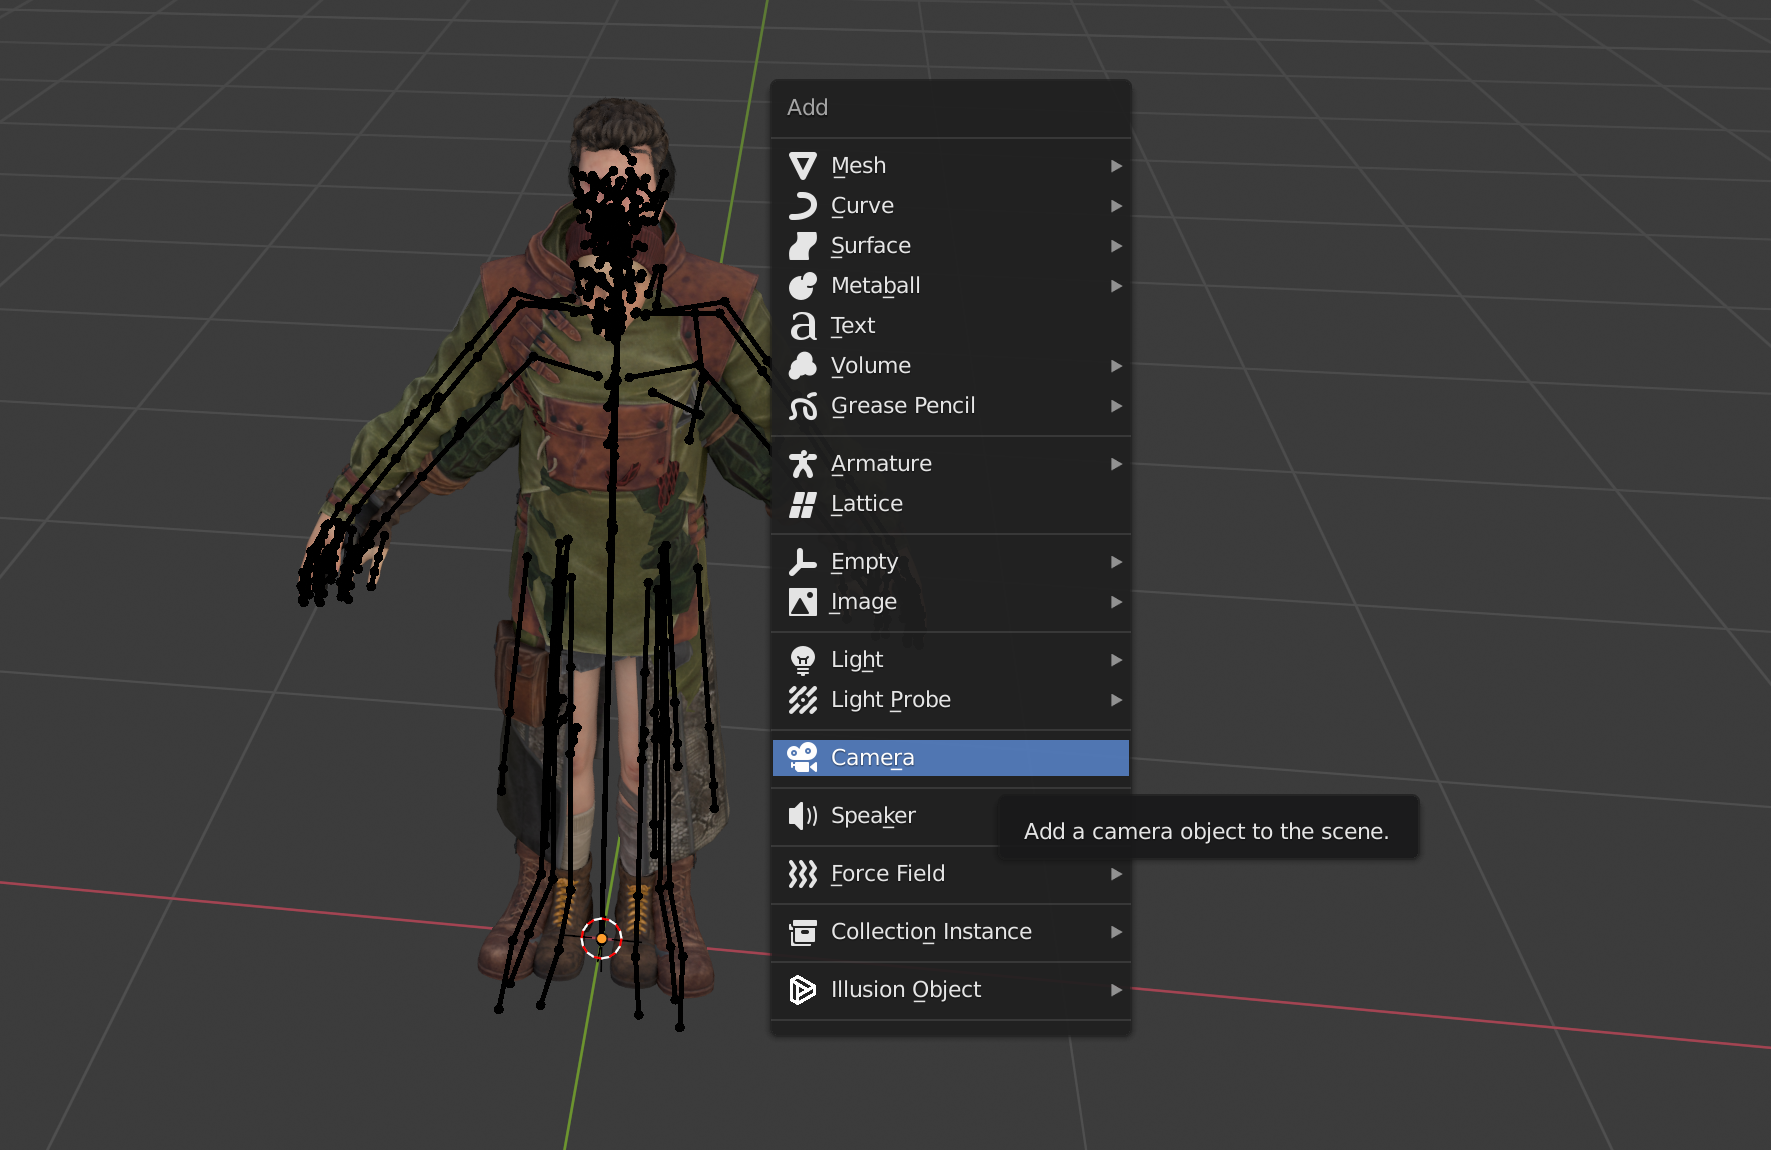
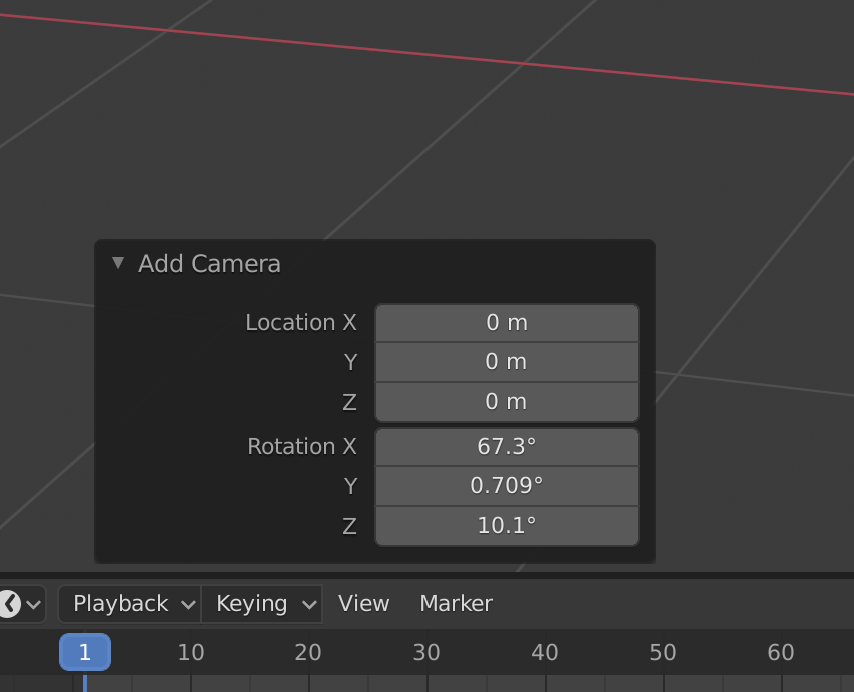
To add a camera, press shift + A while having your mouse in the 3D Viewport. A menu will pop up, and you can select Camera from here. Towards the bottom left, you will see a collapsed menu pop up that says "Add Camera". If you open it, you can change the location and rotation values. You can also do this later by moving the camera around in the 3D viewport with G (Grab), or R (rotate). You can also edit it in the Object properties, which is the tab with the "orange box with corner pieces" icon.
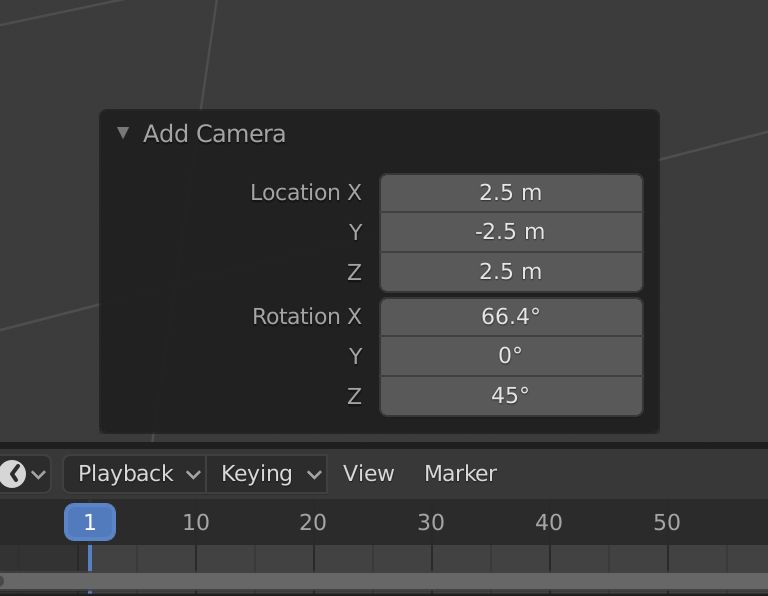
The values I'll be using for the turntable are as follows:
Location X: 2.5m
Location Y: -2.5m
Location Z: 2.5m
Rotation X: 66.4°
Rotation Y: 0°
Rotation Z: 45°
If we toggle to the Camera view by pressing the camera icon on the top-right section of the Viewport, we can see how the Camera is positioned. This is not the render view: it currently has simulated lights and a world environment, as well as a bunch of interface elements like armatures and the 3D Cursor.
We can also see the same values we just typed in the Object Properties tab.
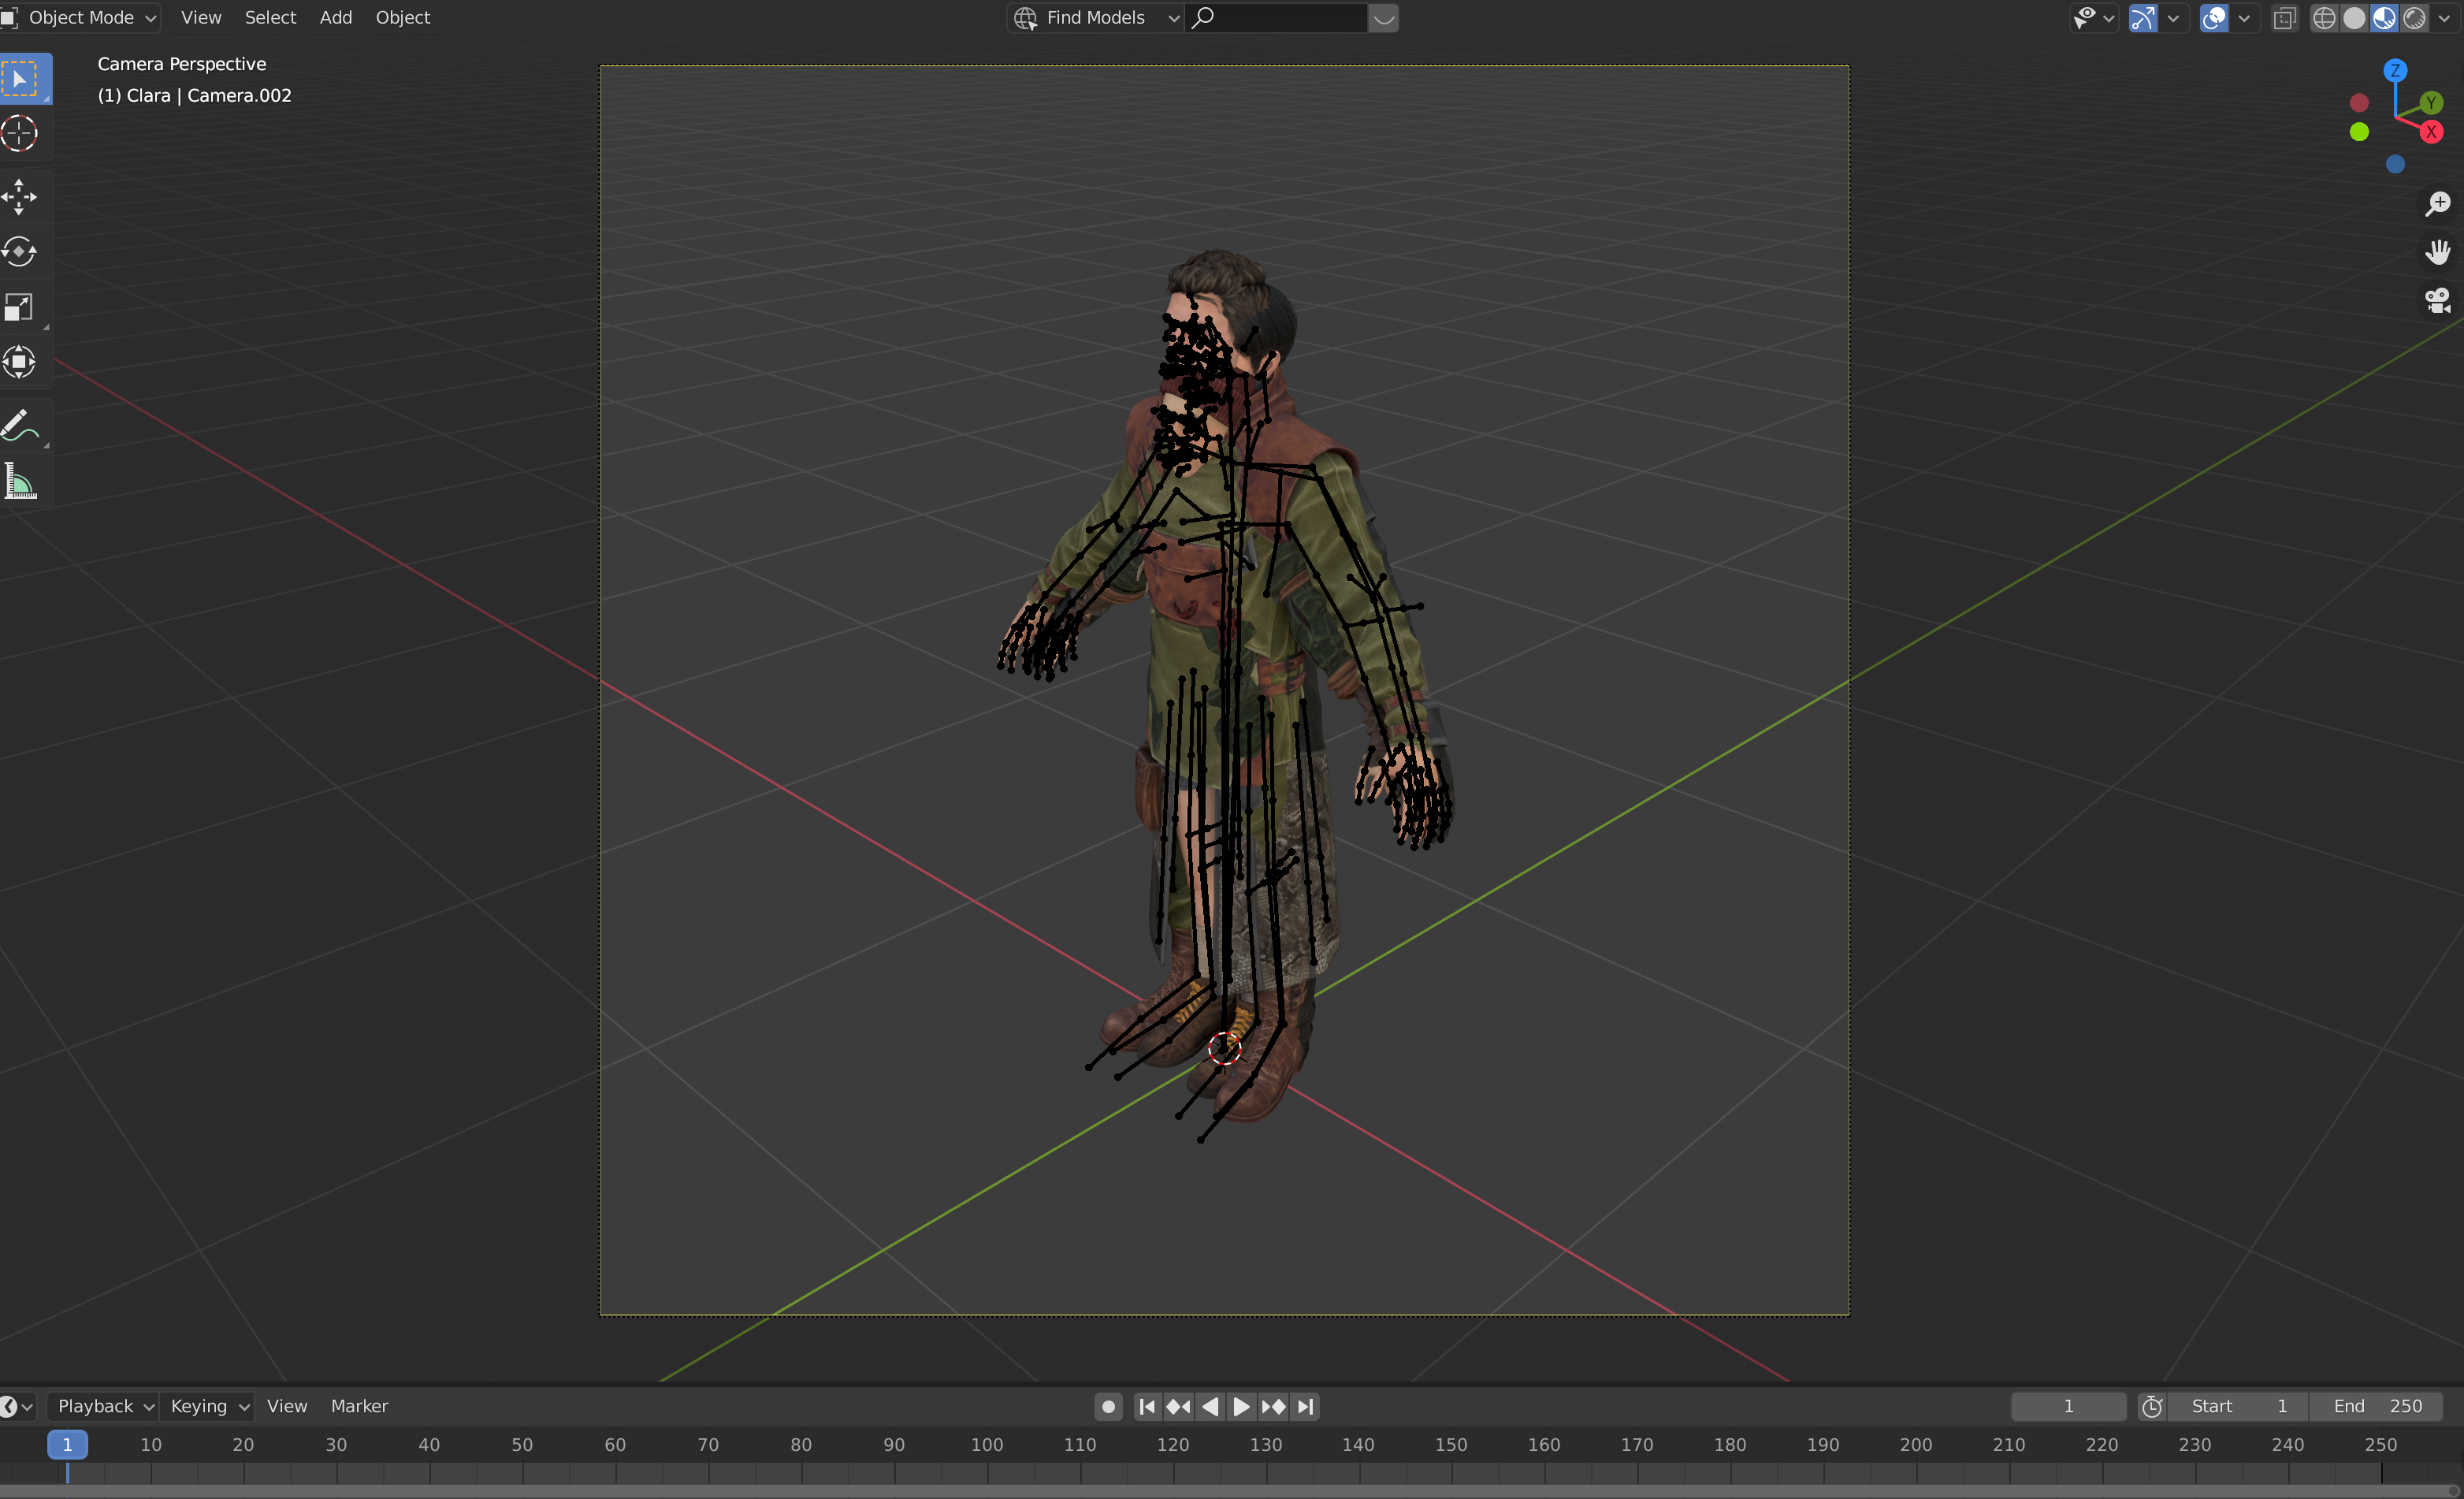
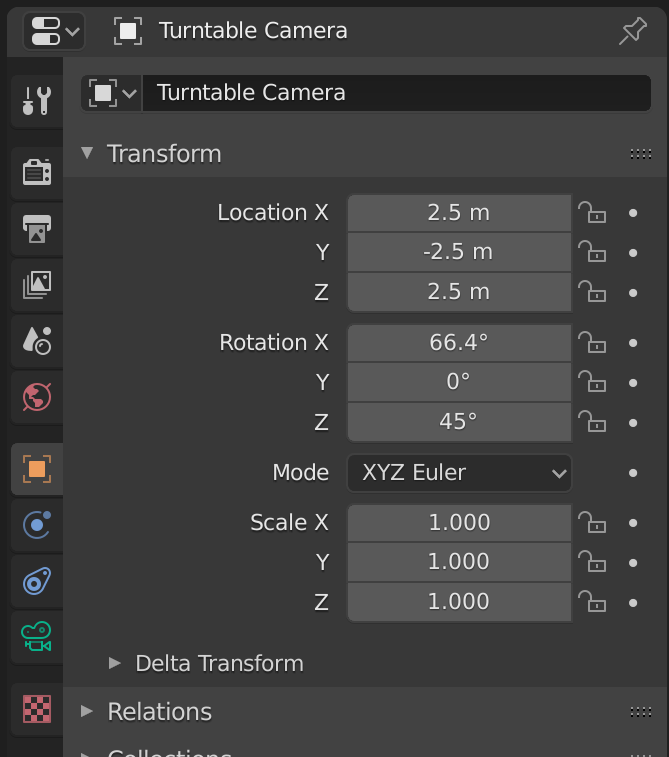
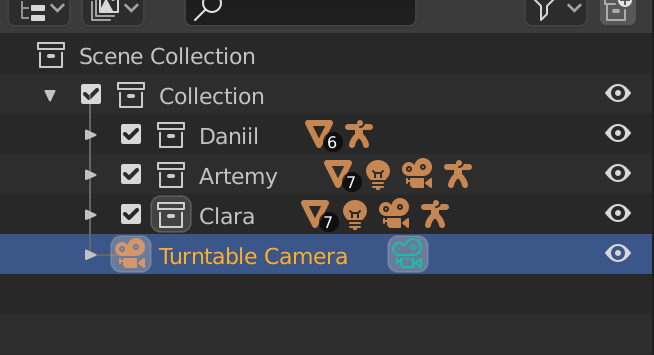
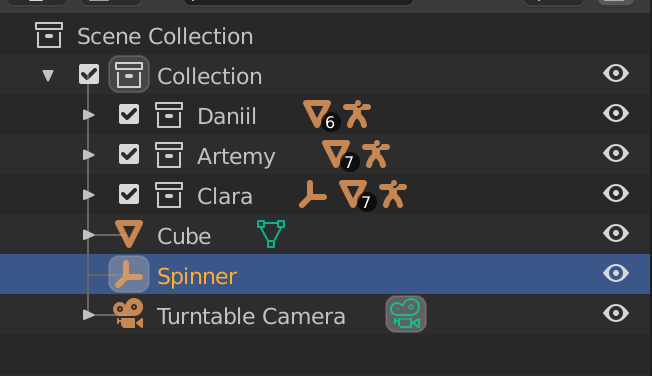
Before we make more changes to the scene, we should rename our camera. It might also be hidden within one of the character collections, so just find it and drag it out onto the overarching "Collection" folder. I'm calling it "Turntable Camera".
You can see that the green camera icon after the name is highlighted, which means it is the active camera that the renderer will use. If you have multiple cameras, you can select this icon in the Scene Collection to switch between them.
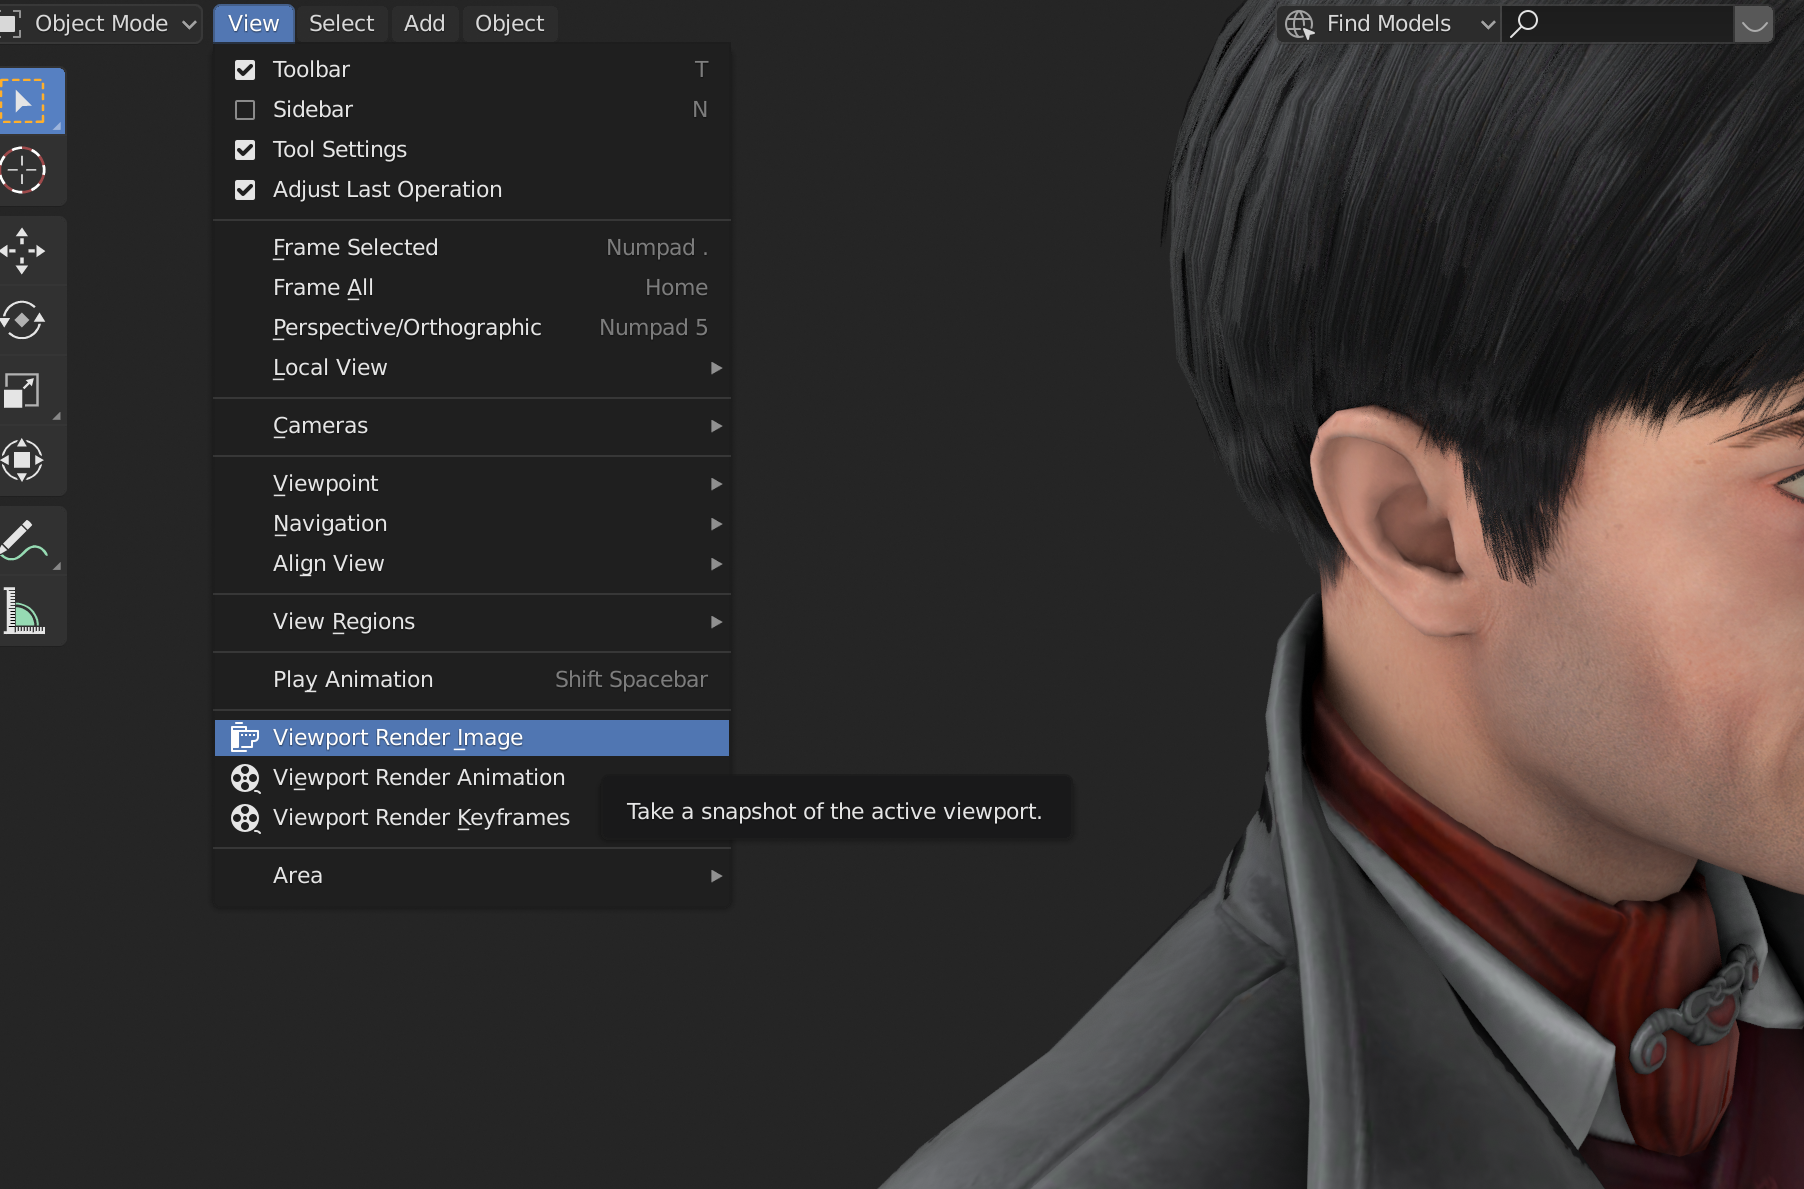
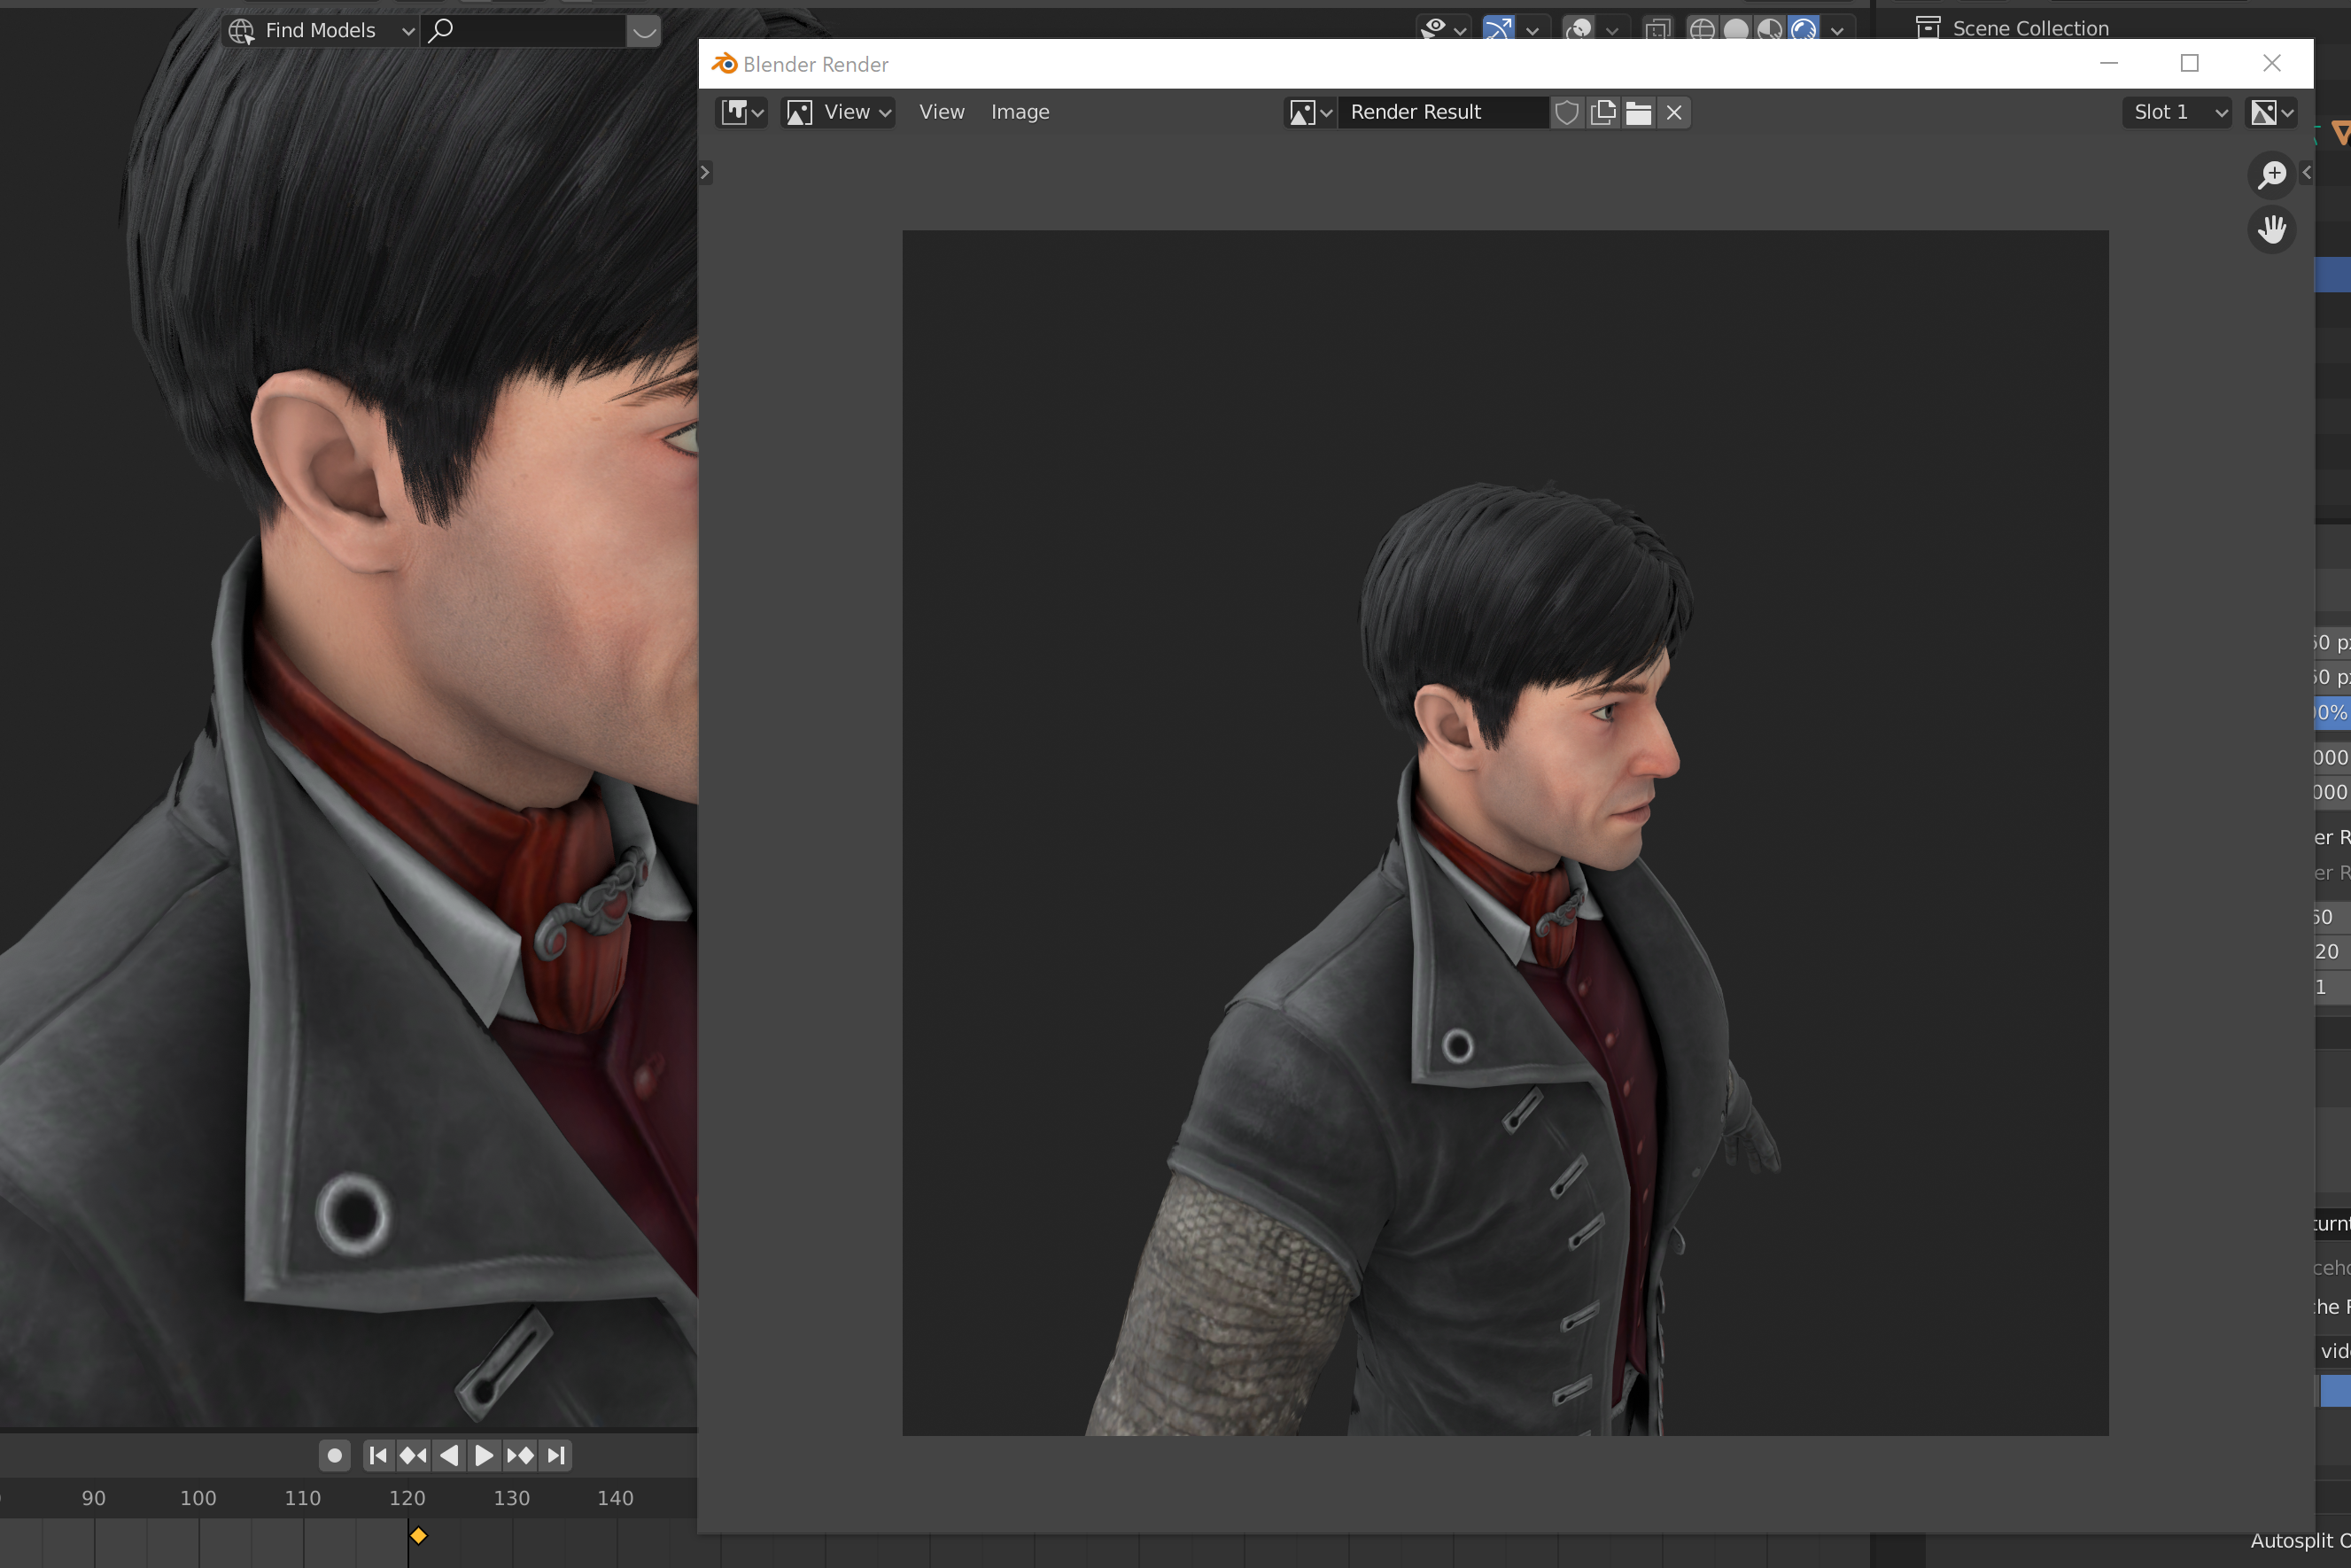
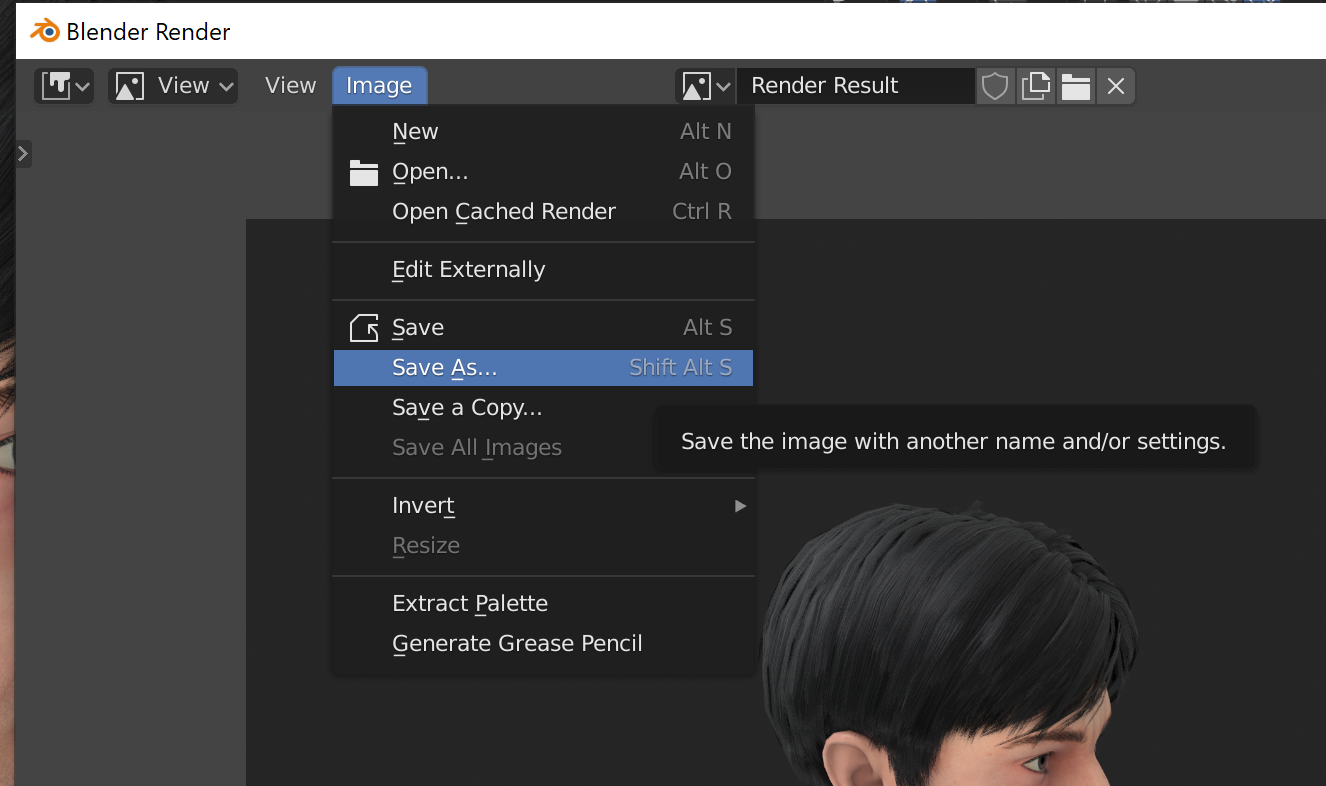
If you'd like to render an image at the angle that you're at in the viewport without setting up a camera, you can go to View / Viewport Render Image, right at the top-left of the 3D Viewport. This image will be rendered at the dimensions of your active camera, which is the only caveat. You can save this image by going to Image / Save As in the render pop up.
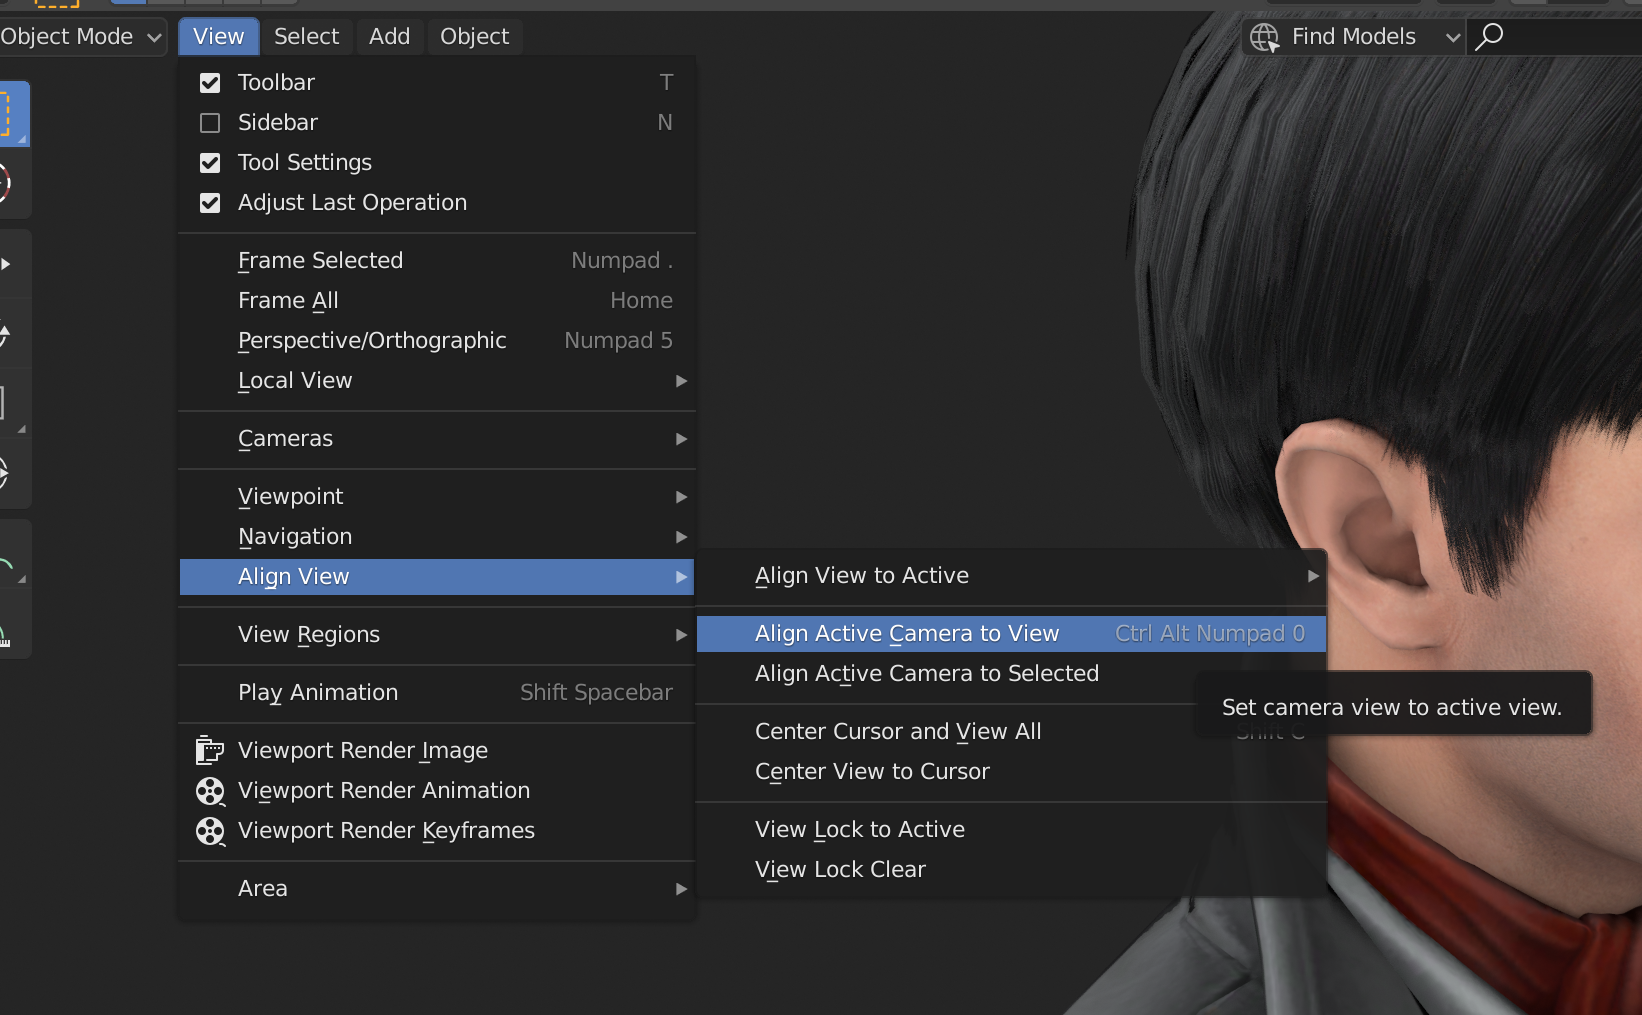
Conversely, you can also snap the current active camera to your angle in the viewport by going to View / Align View / Align Active Camera to View. Just make sure to add a new camera and make it the active one if you want to preserve your old one.
Lighting with HDRIs / World Shader Nodes
To add lighting, we'll have to edit the world environment. You can set up lamp objects if you'd like, but using the world environment / HDRIs is more simple and not as computationally heavy.
First, we can view how the render will look like by going to the top-right of the 3D Viewport and selecting Rendered View. It's the very last sphere icon. We can also toggle off overlays by pressing the button with the two circles (the third one.)
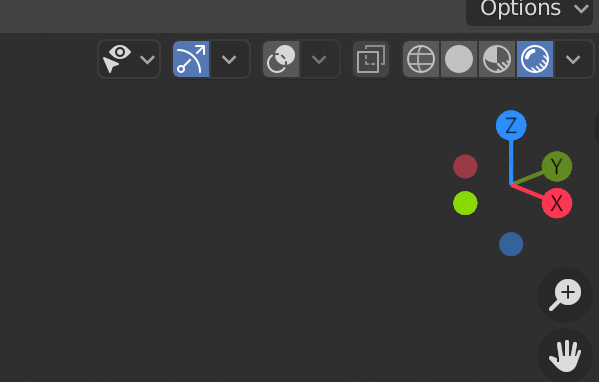
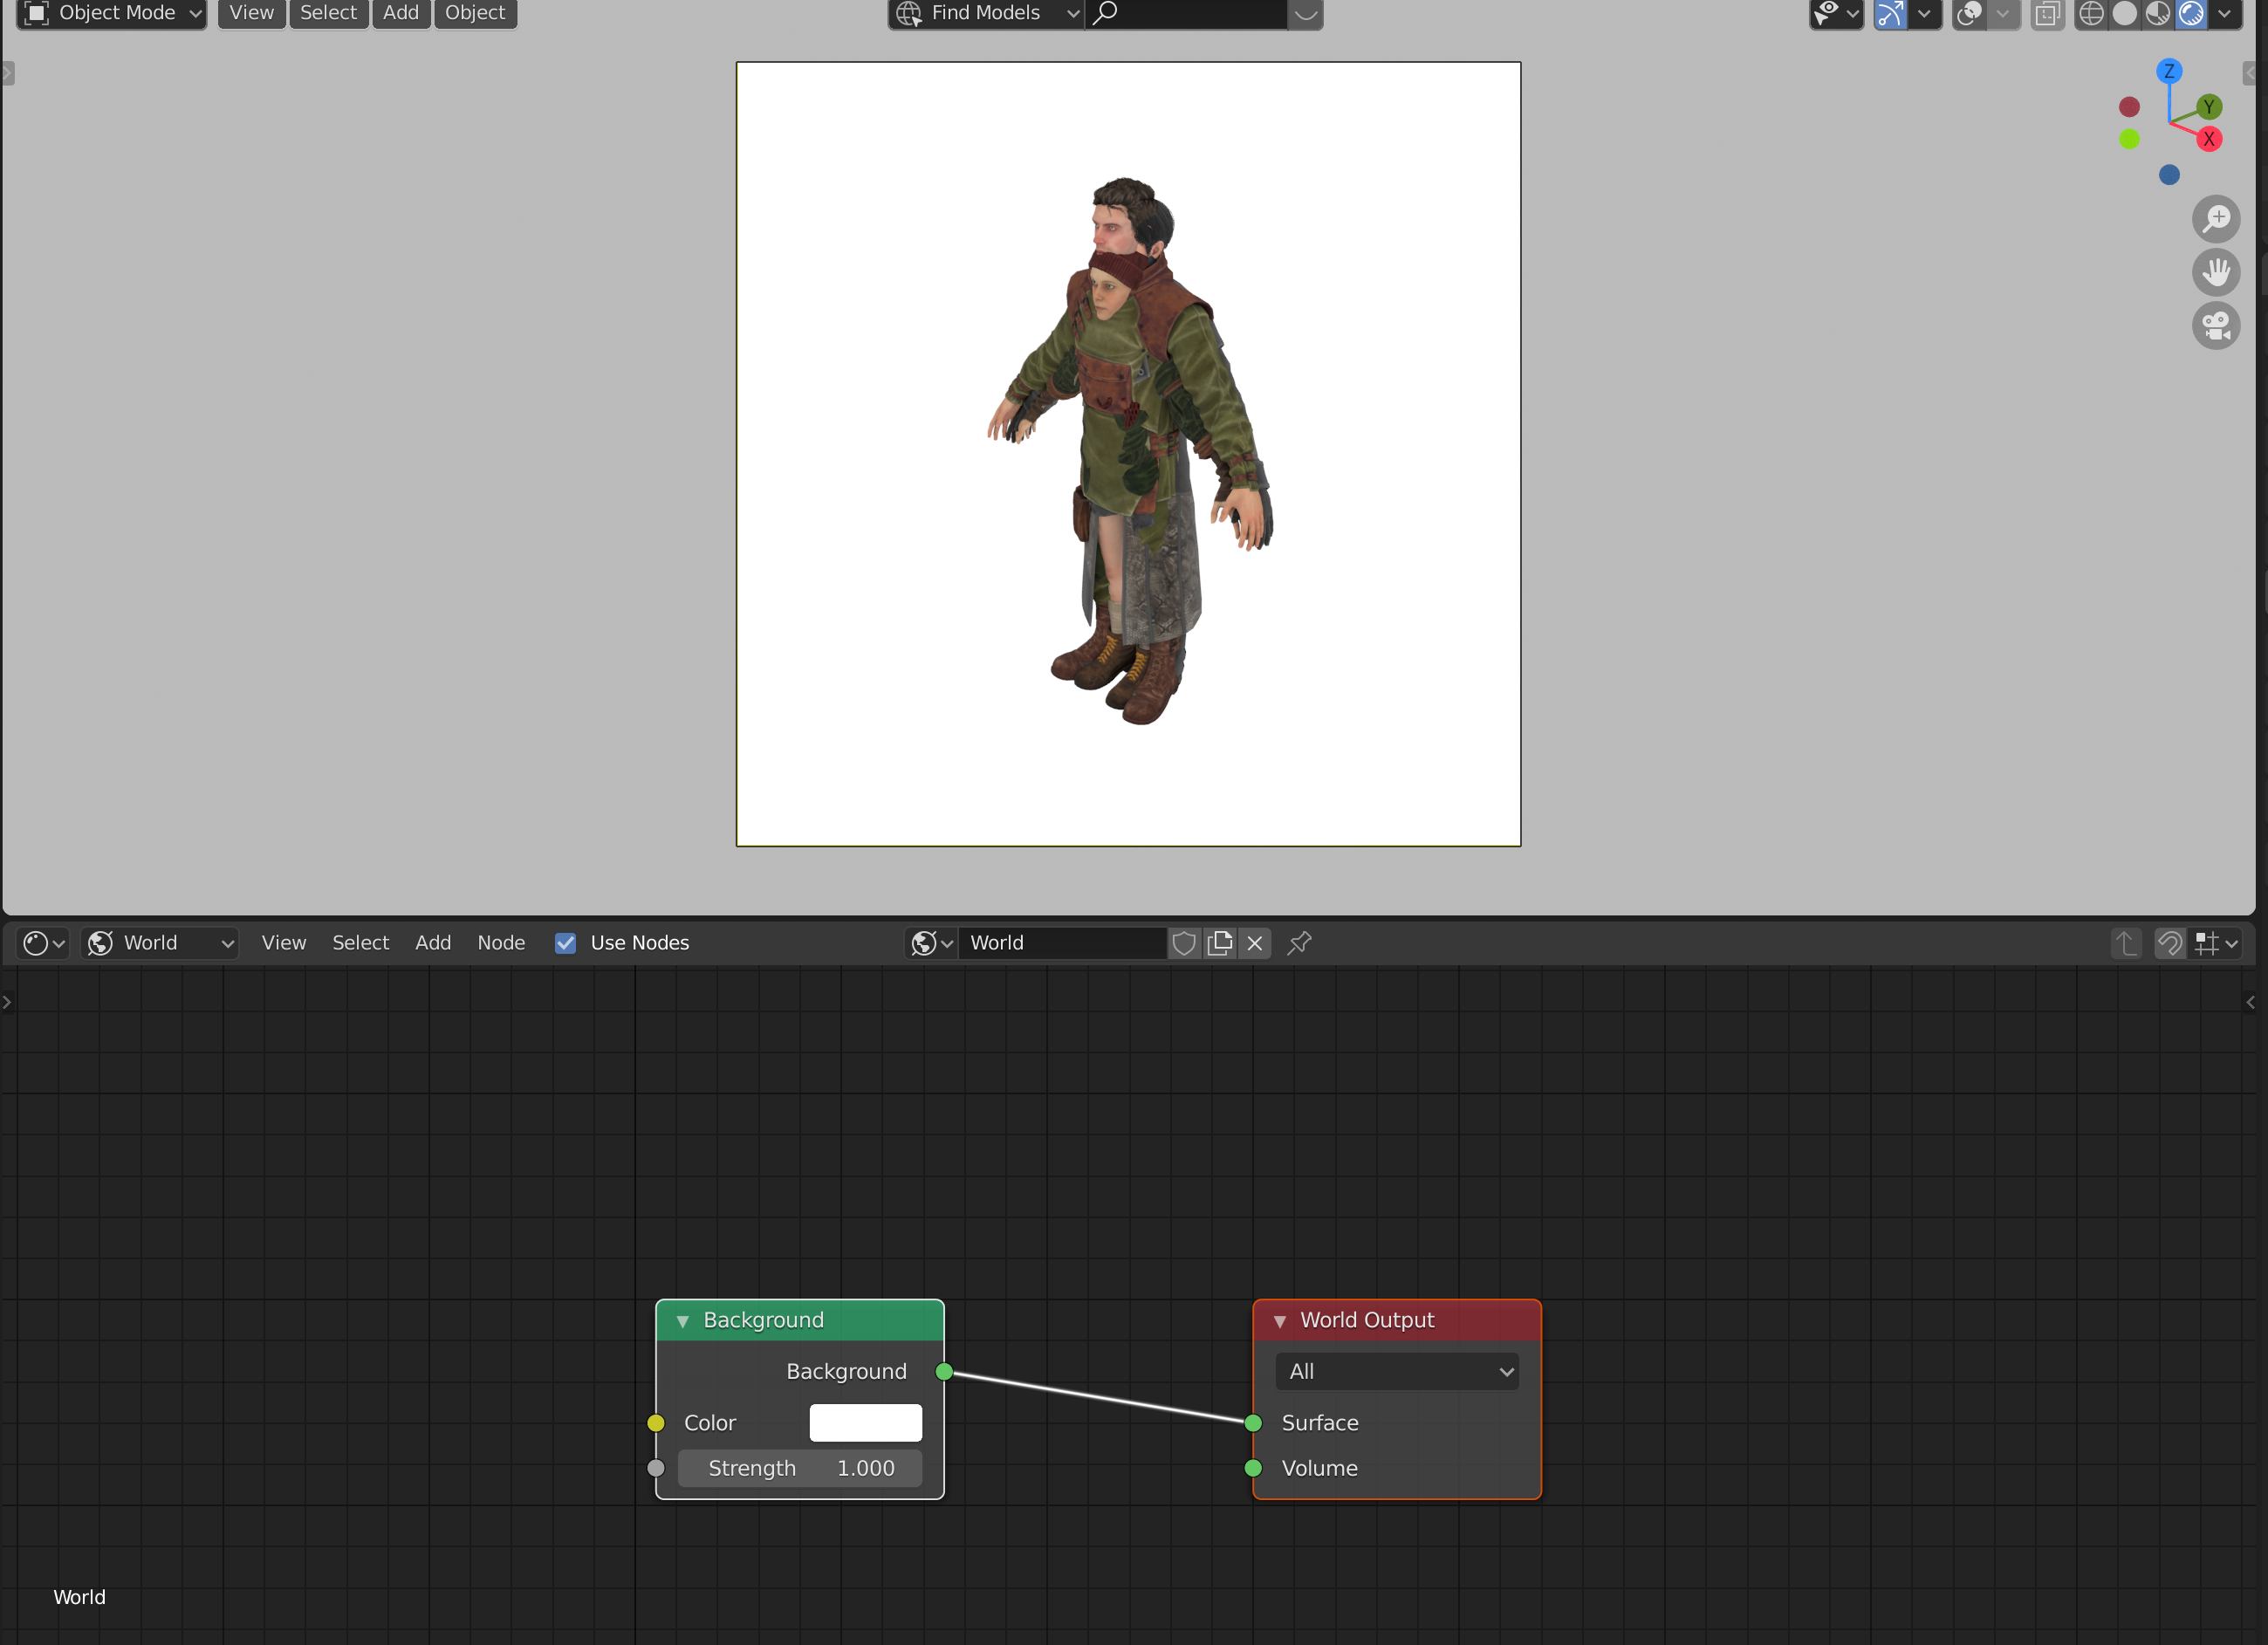
The view is pretty dark right now, because we don't have any lights, and the world environment is rather dark. To change this, as well as getting a custom background color, we're going to mess with nodes again.
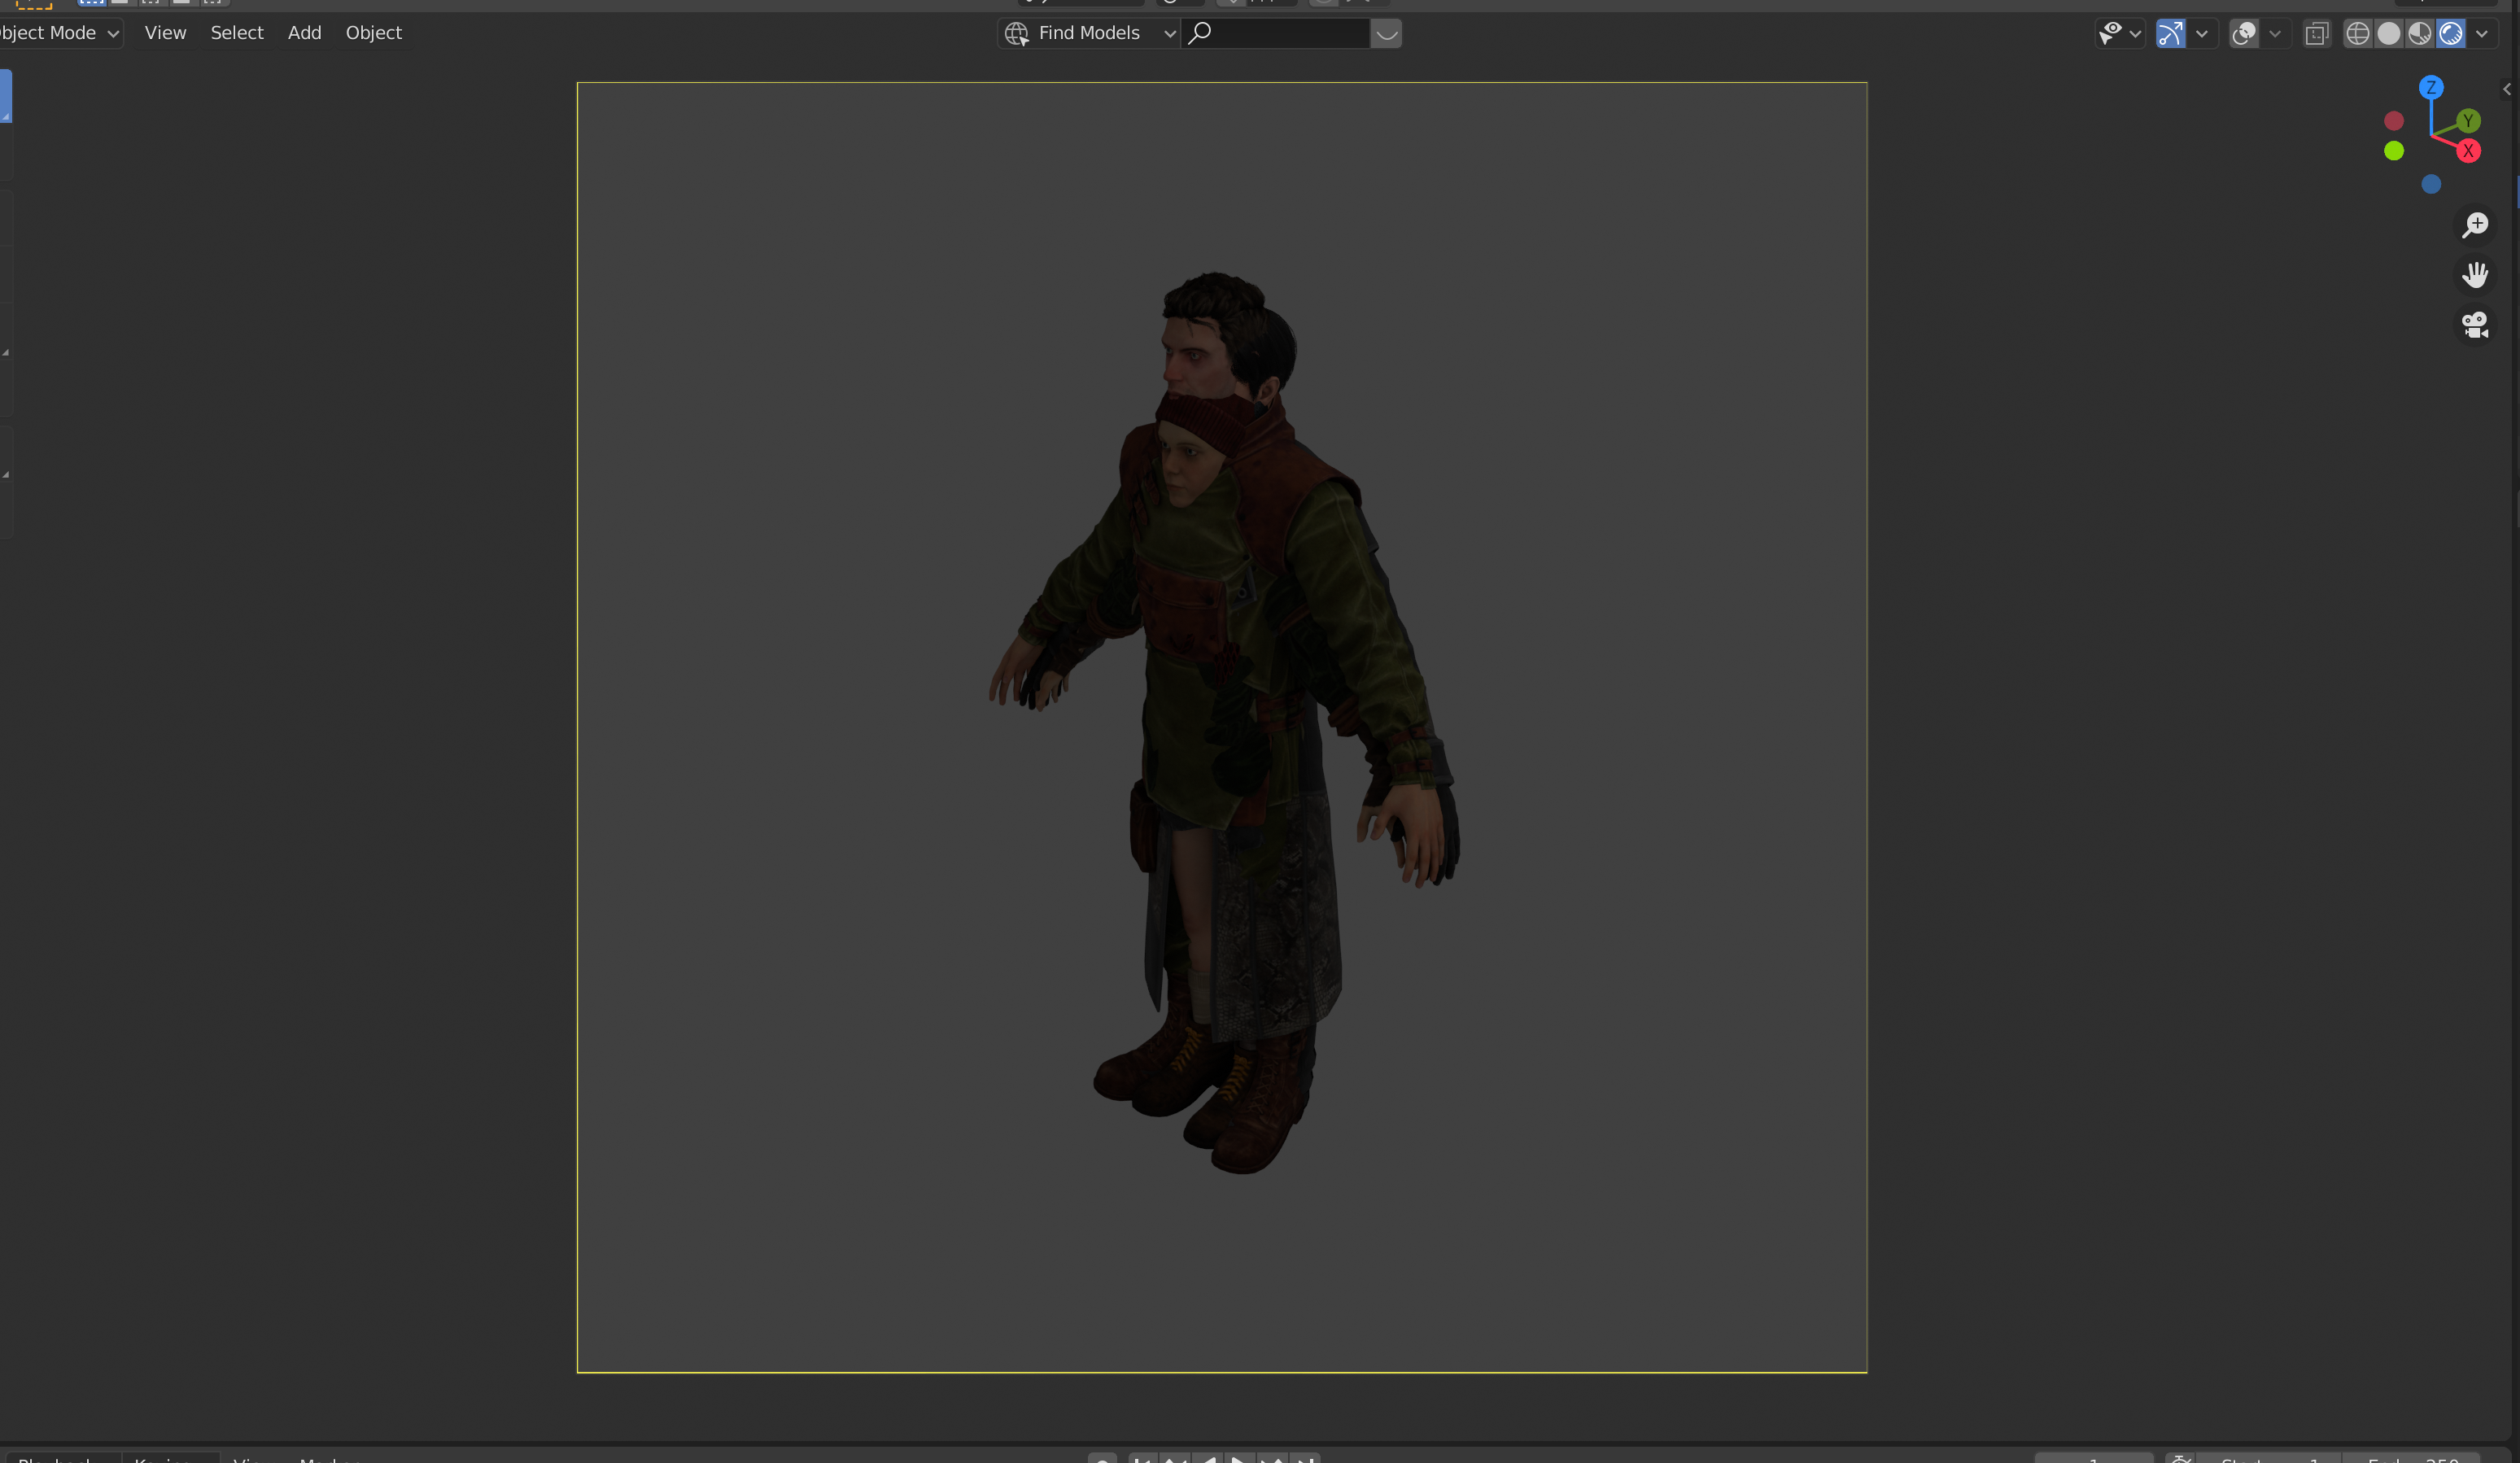
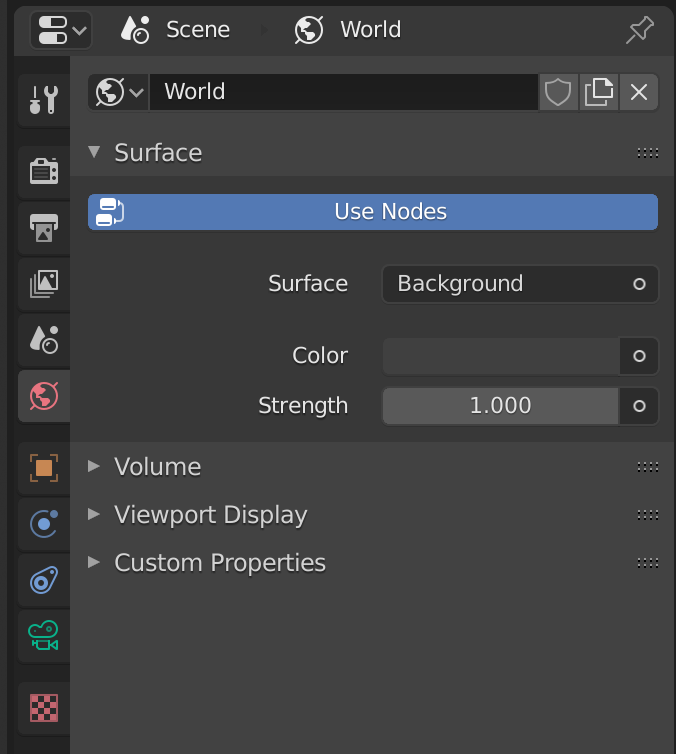
In the World Properties tab (pink globe icon), there is a Surface Color option that we can change in order to make the scene brighter. We can set this to white.
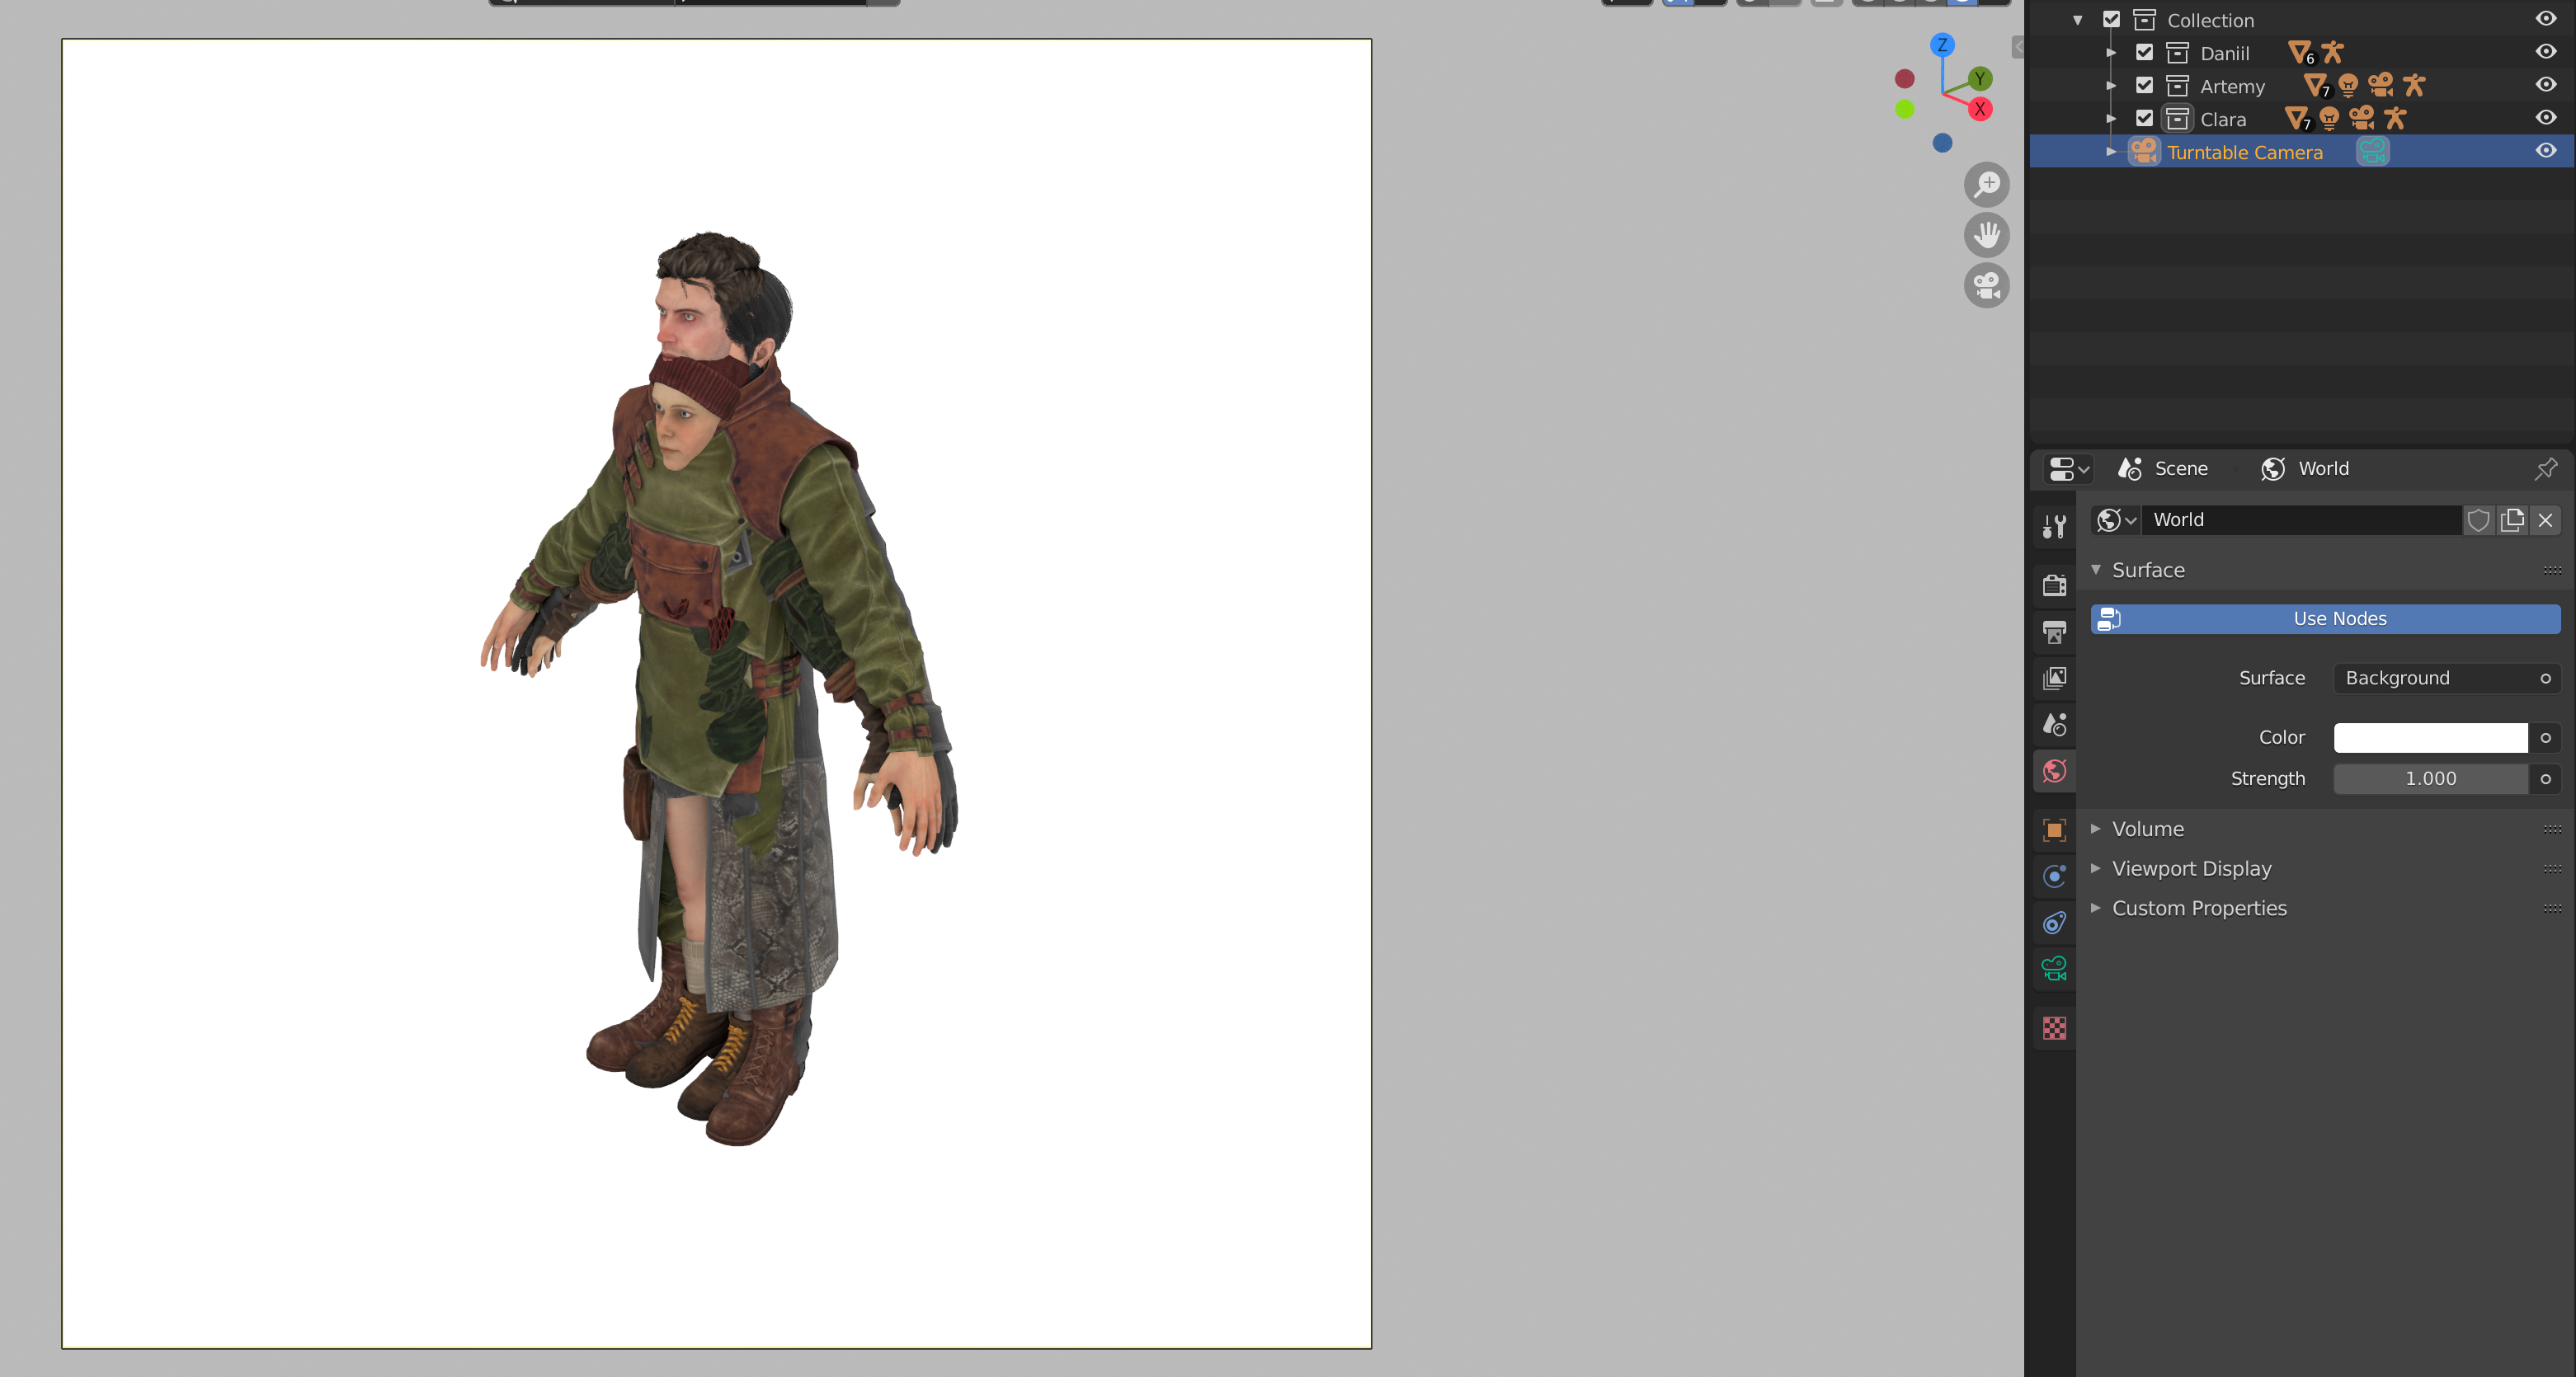
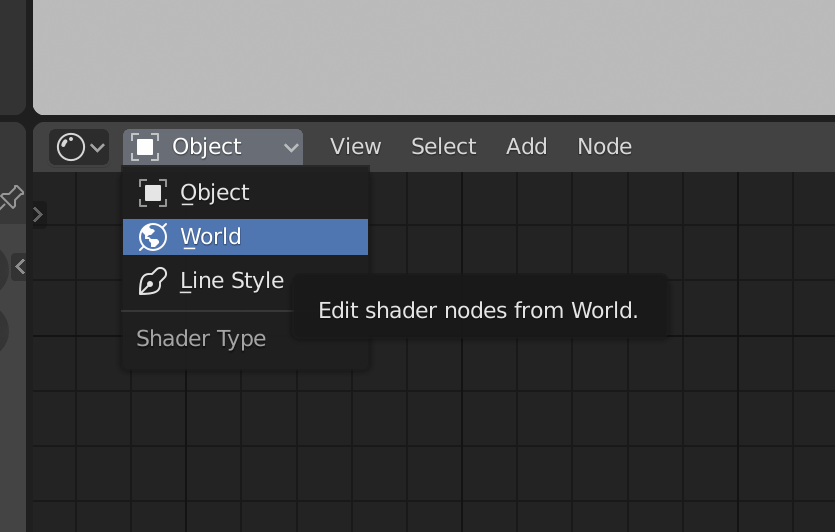
If you'd like to add an HDRI or mess with other World settings, you can head to the Shading workspace. It's at the center of the same toolbar we added the Shading workspace before. Here, in the top-left section of the node editor, you can toggle from Object to World.
The world nodes might not be immediately visible: You can zoom out with the scrollwheel, or pan around by holding down the scrollwheel and dragging your mouse around until you find them.
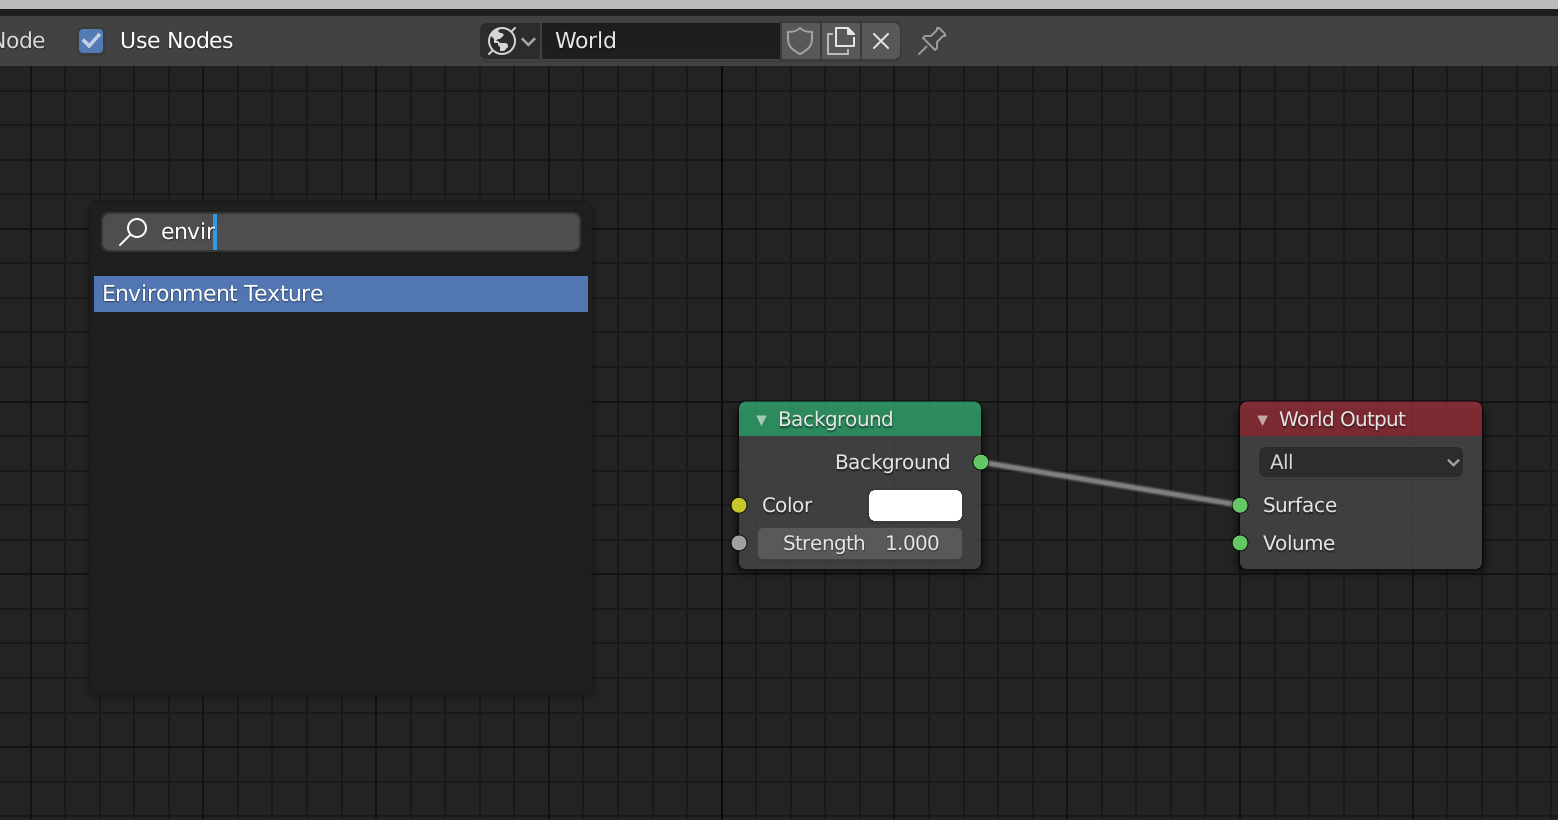
You can add any HDRIs you've downloaded by first pressing shift + A, clicking on search, and typing Environment Texture. Then, you can select your HDRI by pressing the Open button and finding it on your computer. Next, you can disconnect the Background node from the World Output by clicking and dragging on the green Surface input on the World Output. You can now connect the yellow Color output from the HDRI to the green Surface node on the World output.
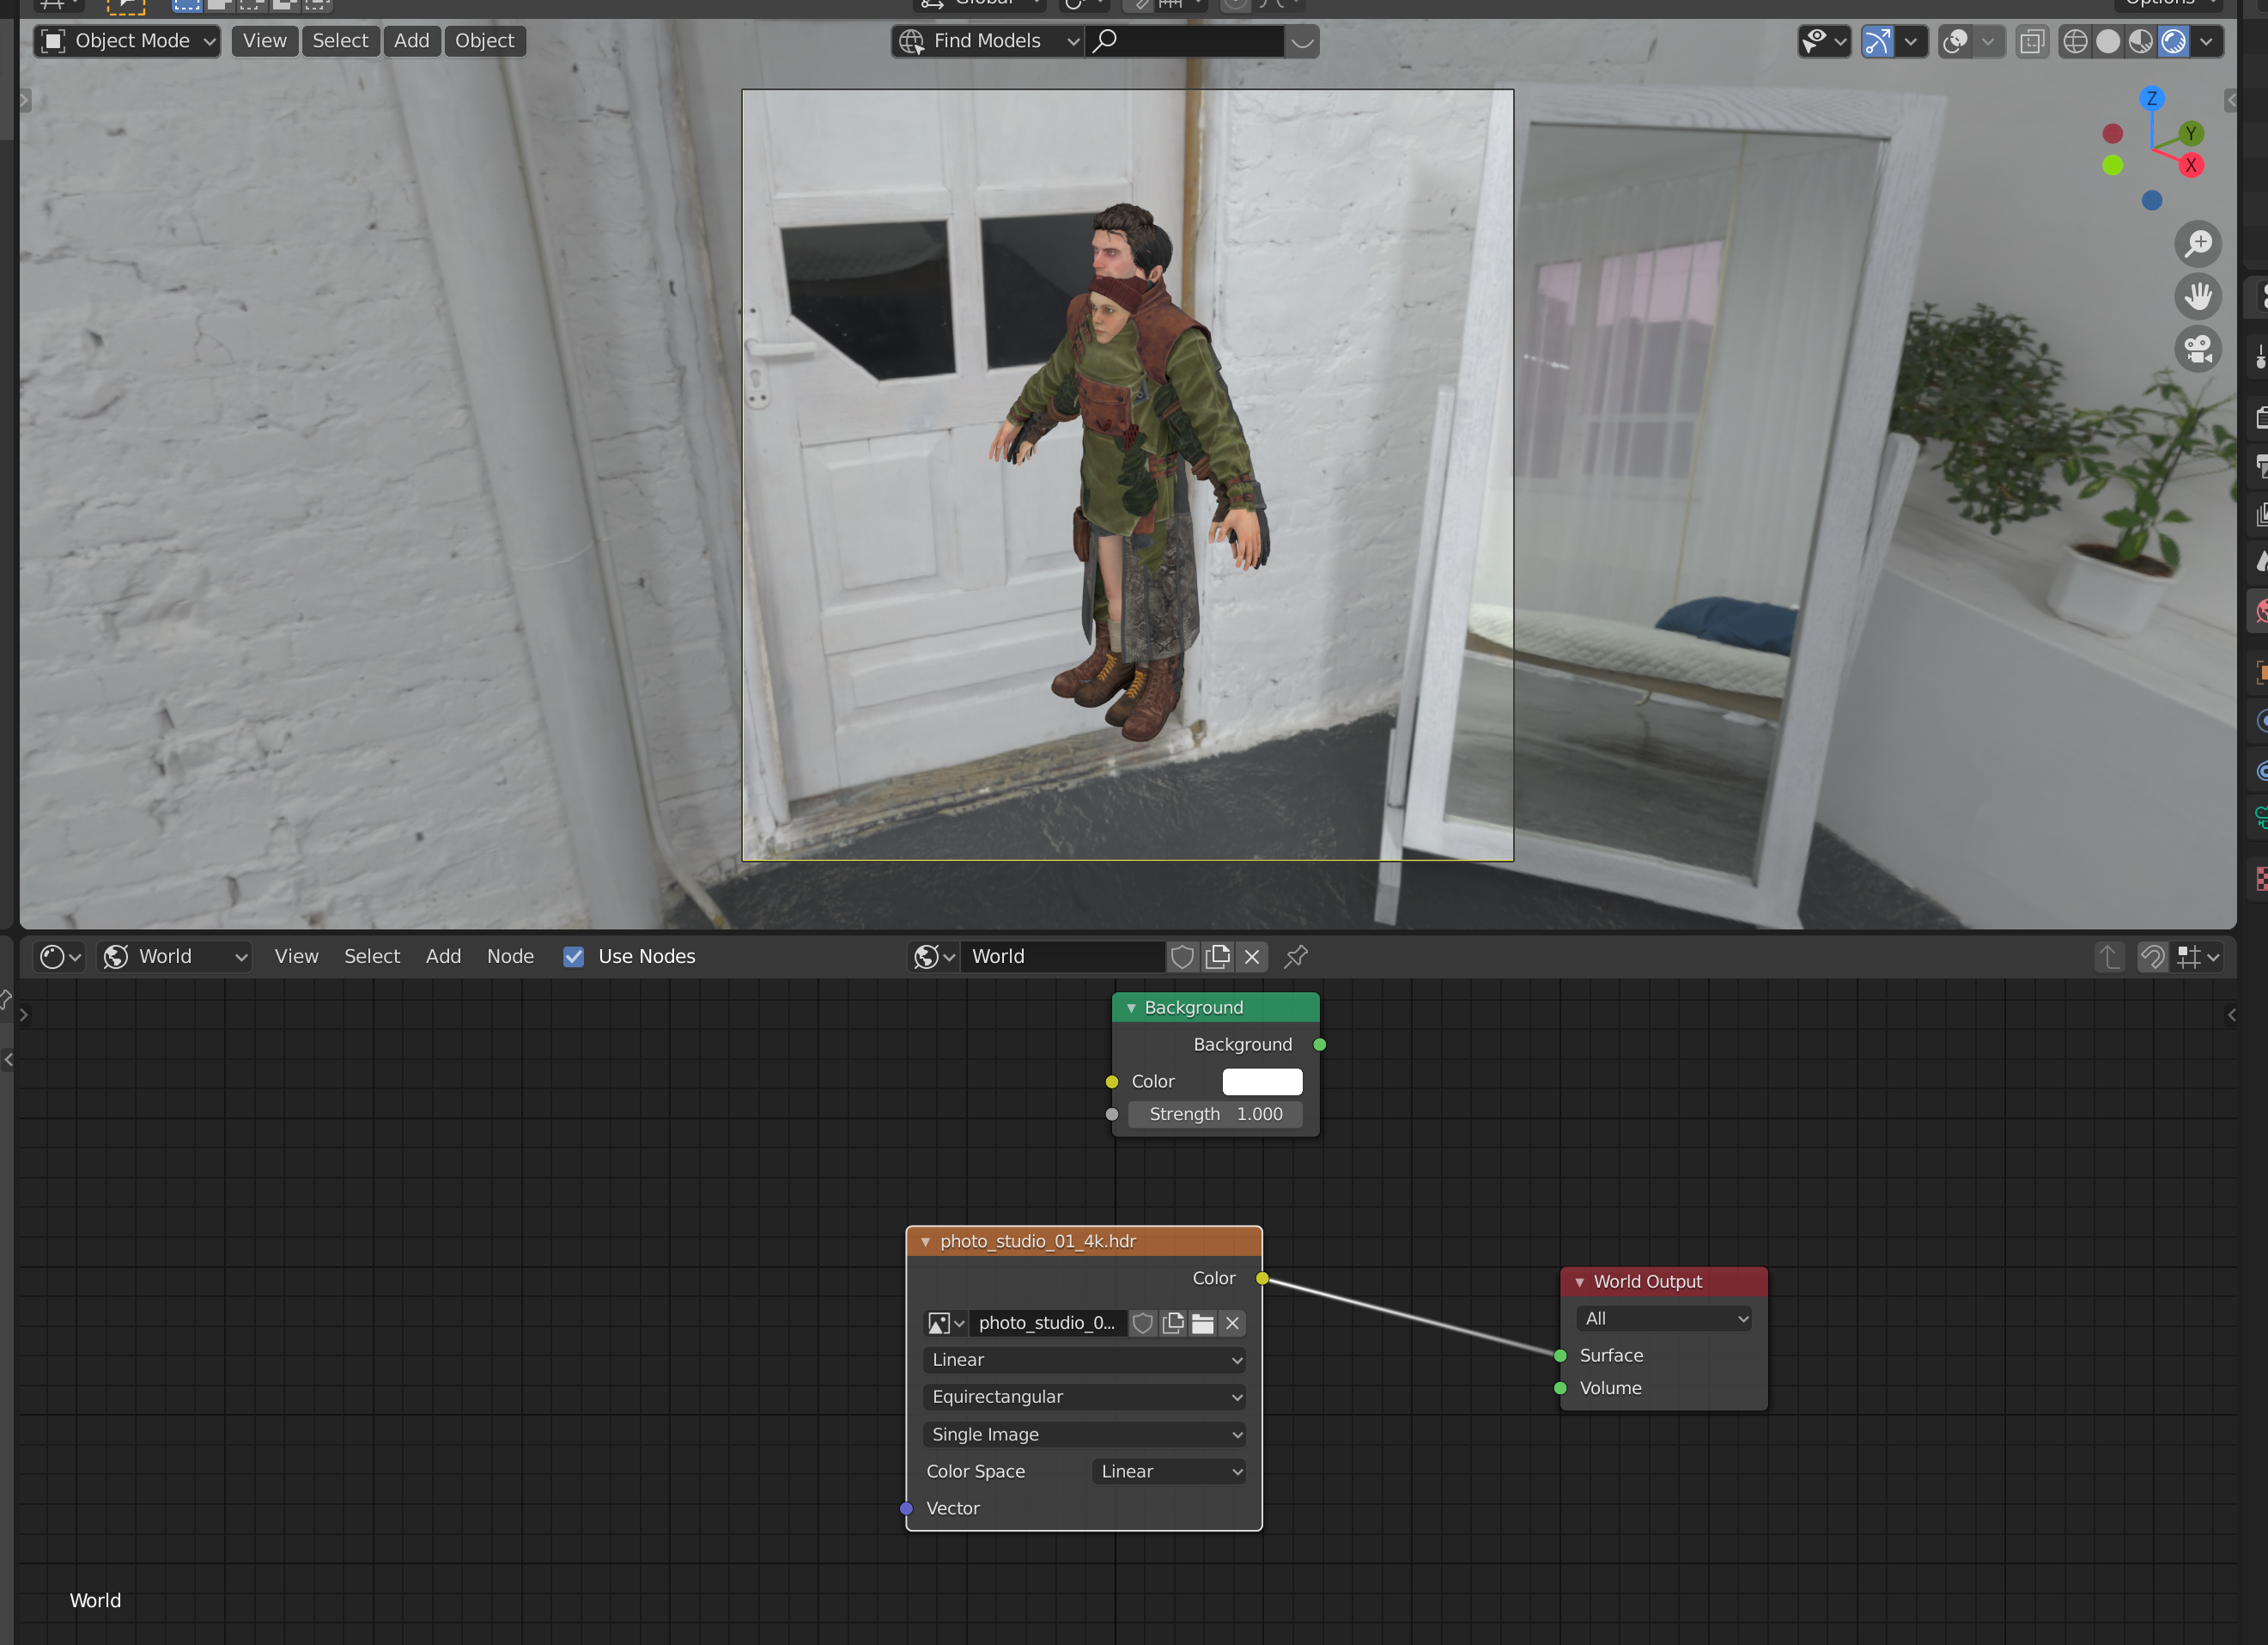
You can get more dramatic effects with different HDRIs. However, one issue with using HDRIs (and the Background node as well) is that we can't change the background without also affecting the lighting.
The quickest way to get a custom flat color is to place a large cube with a material that does not affect or is affected by lighting conditions. For this, an emission material works best. Press shift + A with your mouse in the 3D Viewport, and select "Cube" under Mesh.
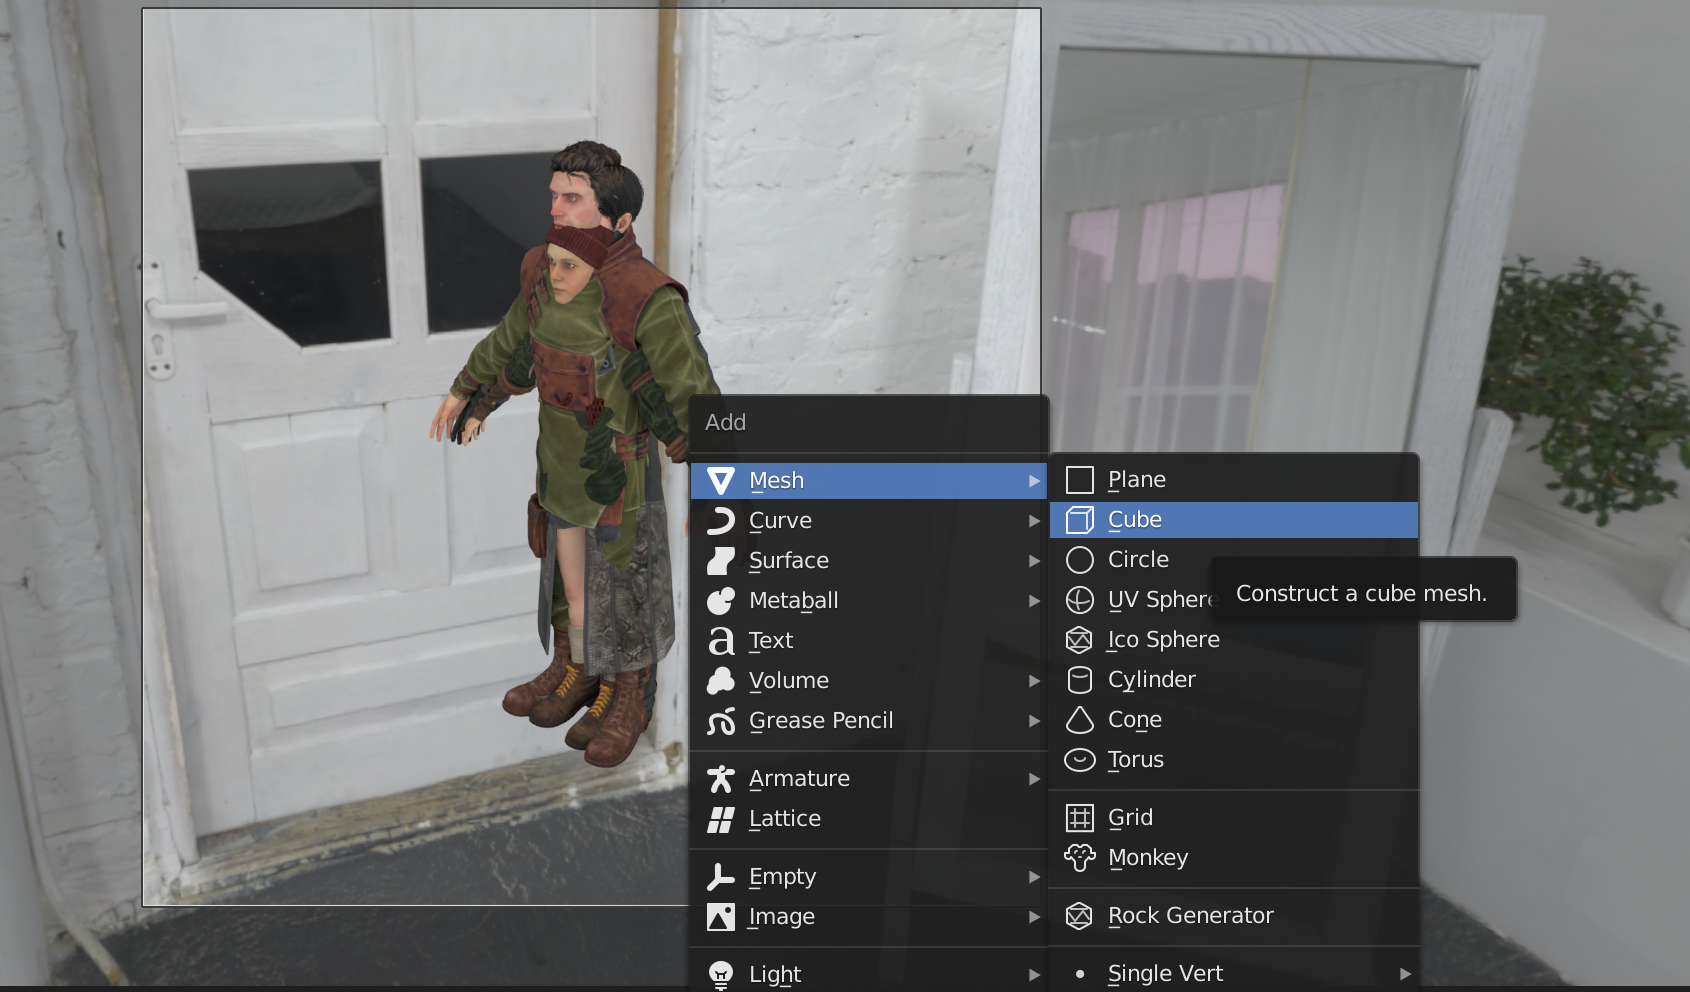
You can scale the cube by using the resize menu at the bottom left of the 3D Viewport, and changing the size to something like 5. You can also press S to Scale, and click inside of the viewport to commit the size change.
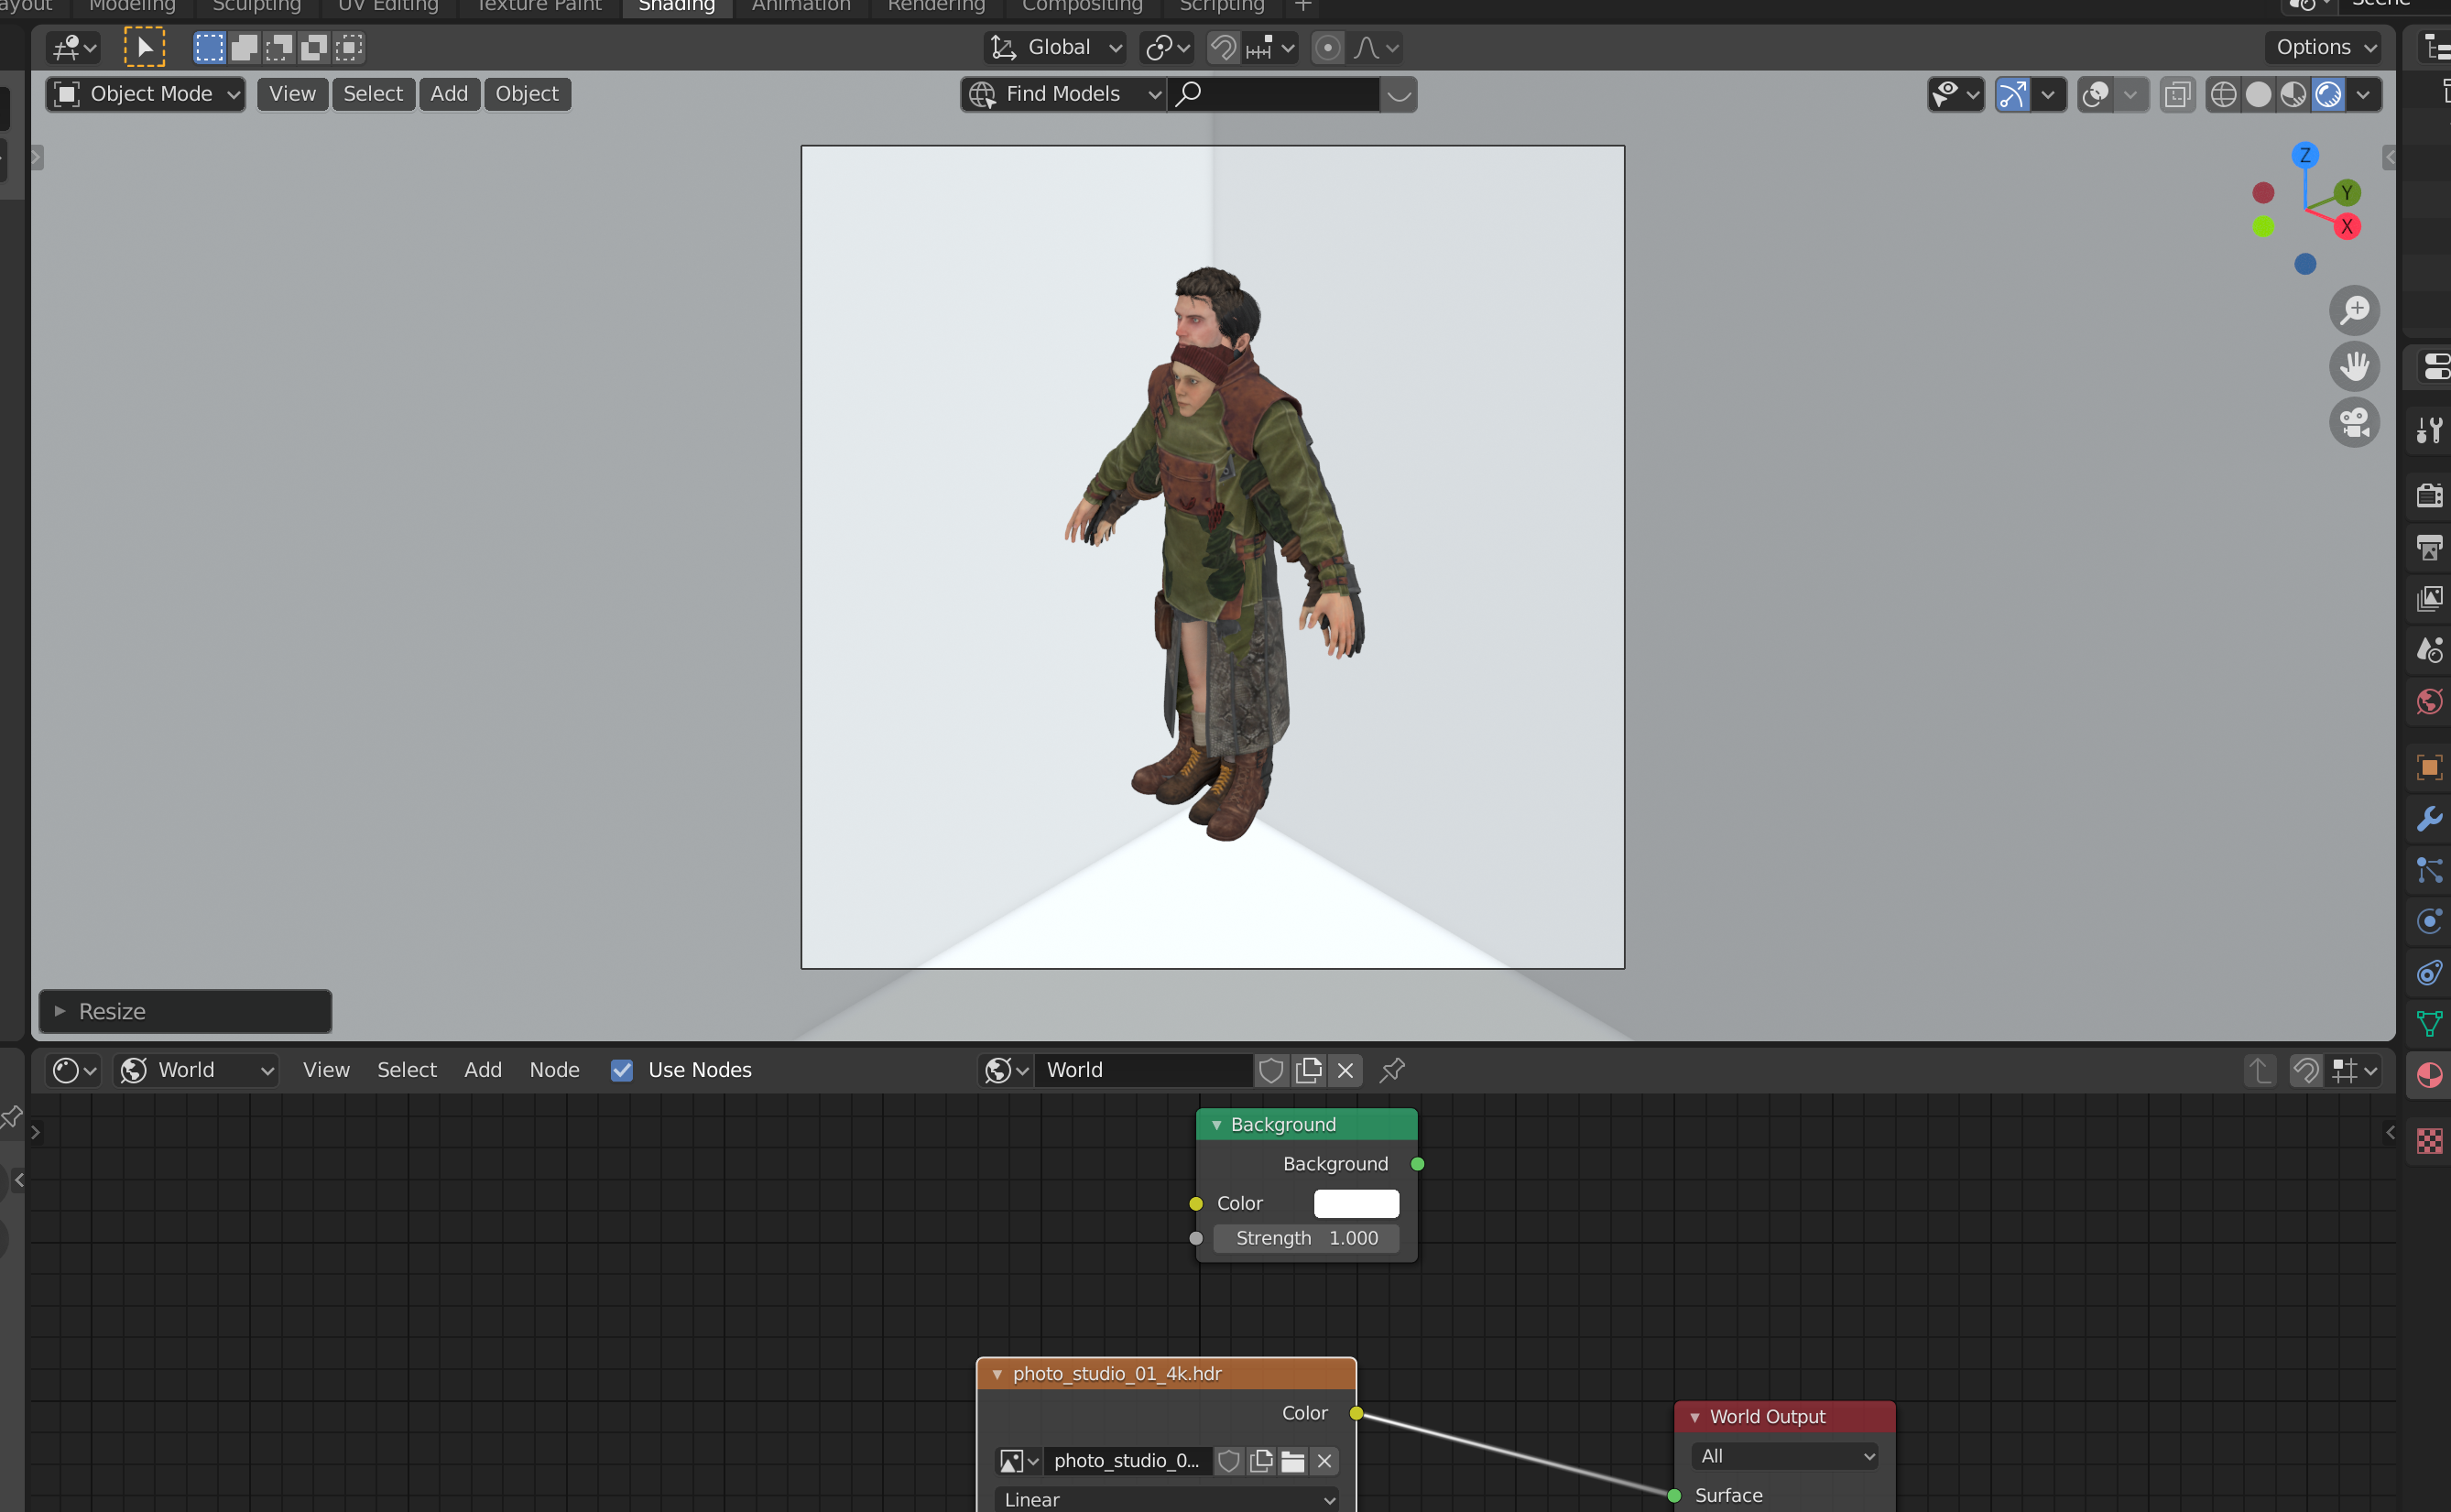
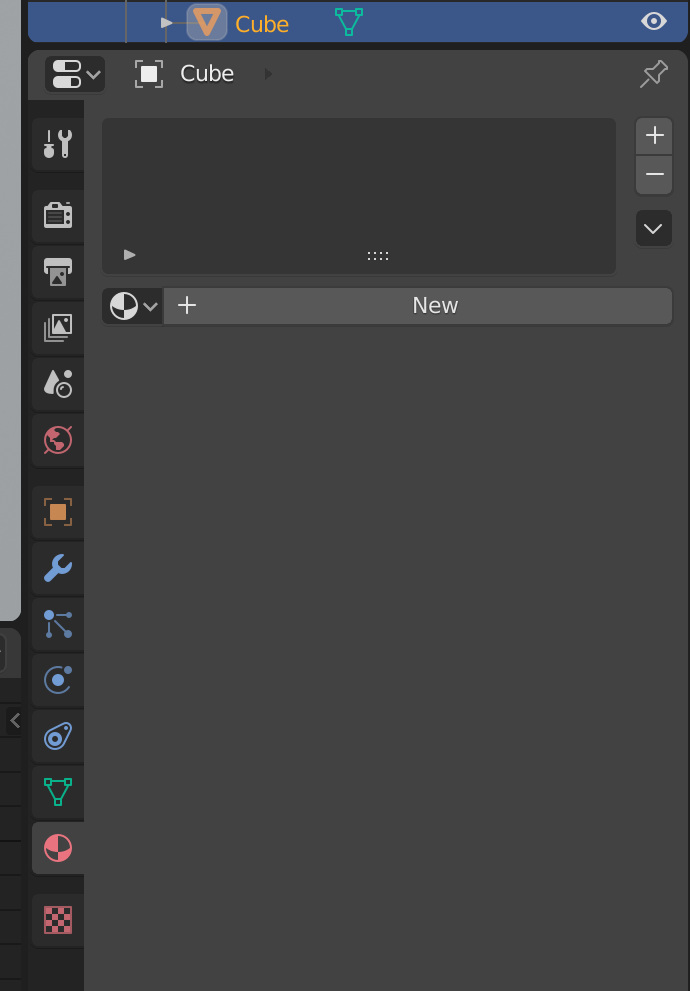
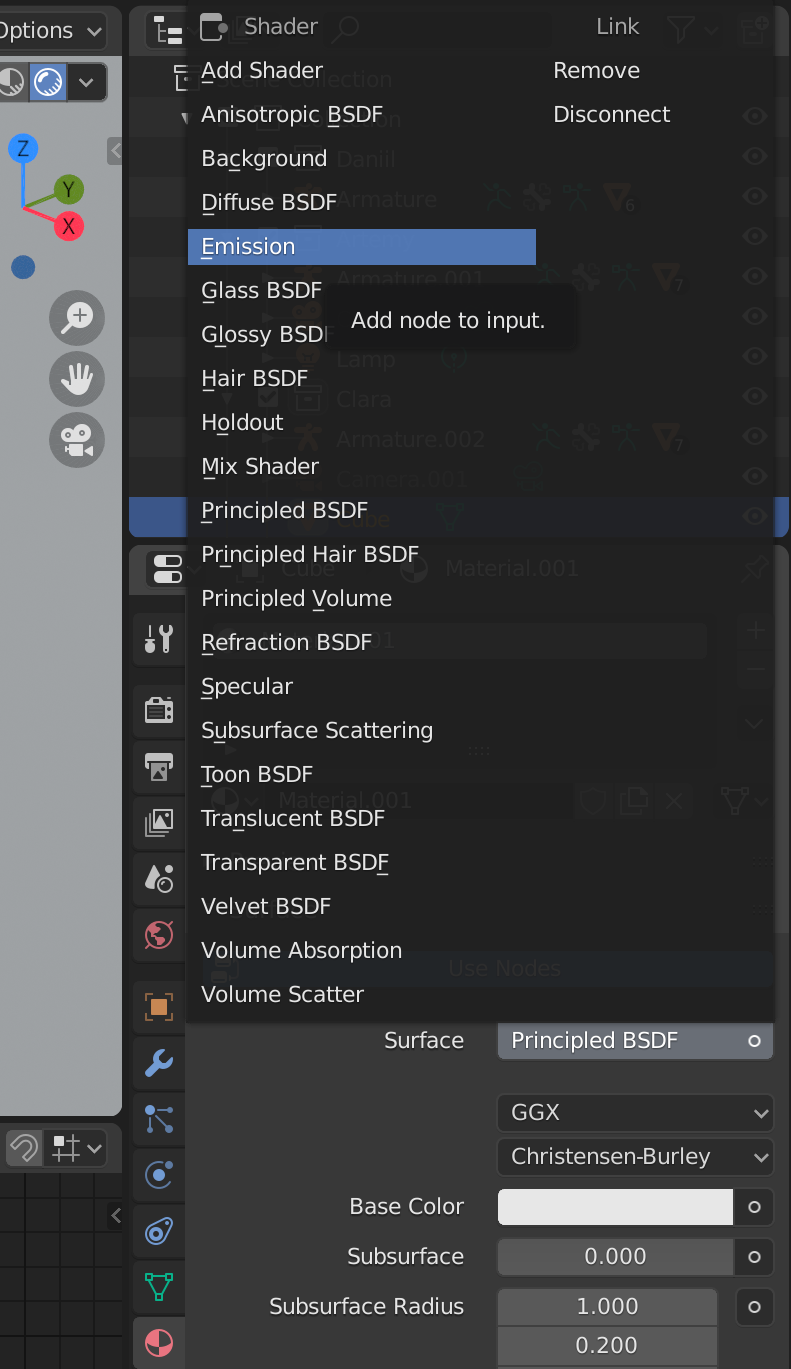
To give it an emission material, go to the Material tab (pink sphere with checkerboard pattern), and add a new material. Then, change the Surface from "Principled BSDF" to "Emission". Now, we can change the emission material color to whatever we like without affecting the lighting on the models.
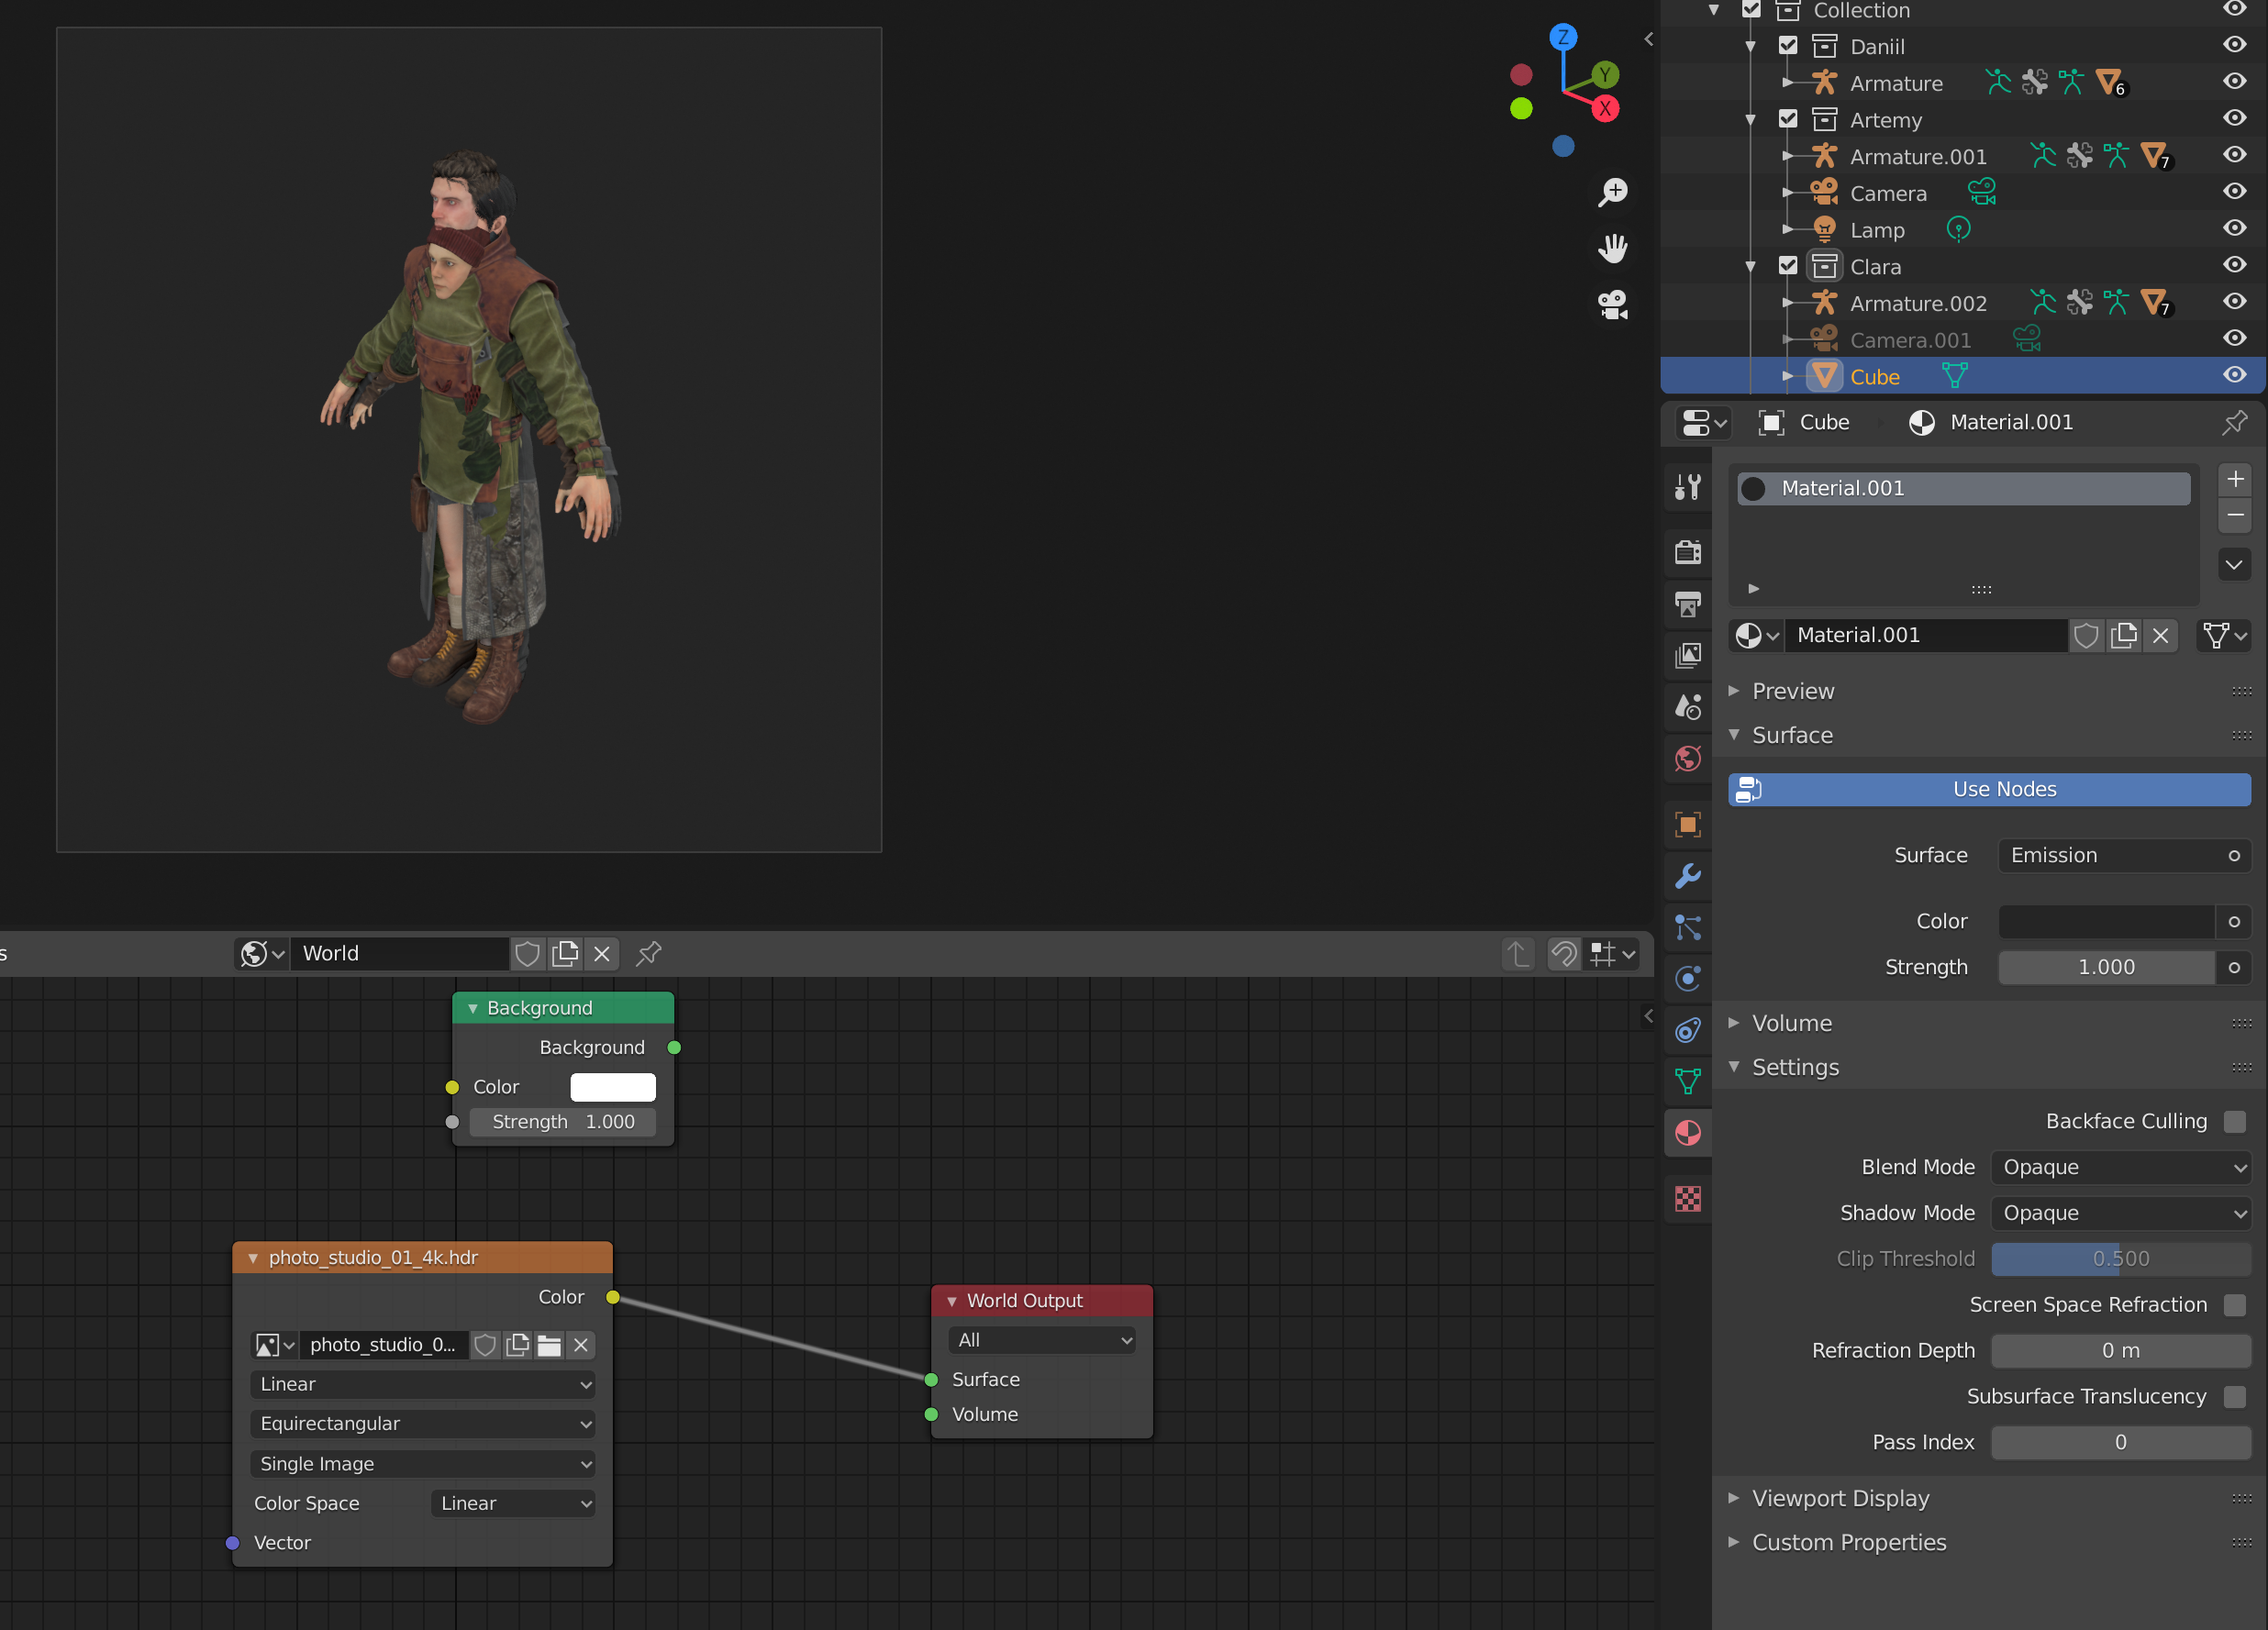
You can also create a flat plane, rotate it at the same angle as the camera (rotation X: 66.4°, rotation Y: 0° rotation Z: 45°), scale it large, and position it far enough away from the camera and models so that nothing clips. A cube assures that you will have the flat color anywhere you look, but a plane can have certain applications.
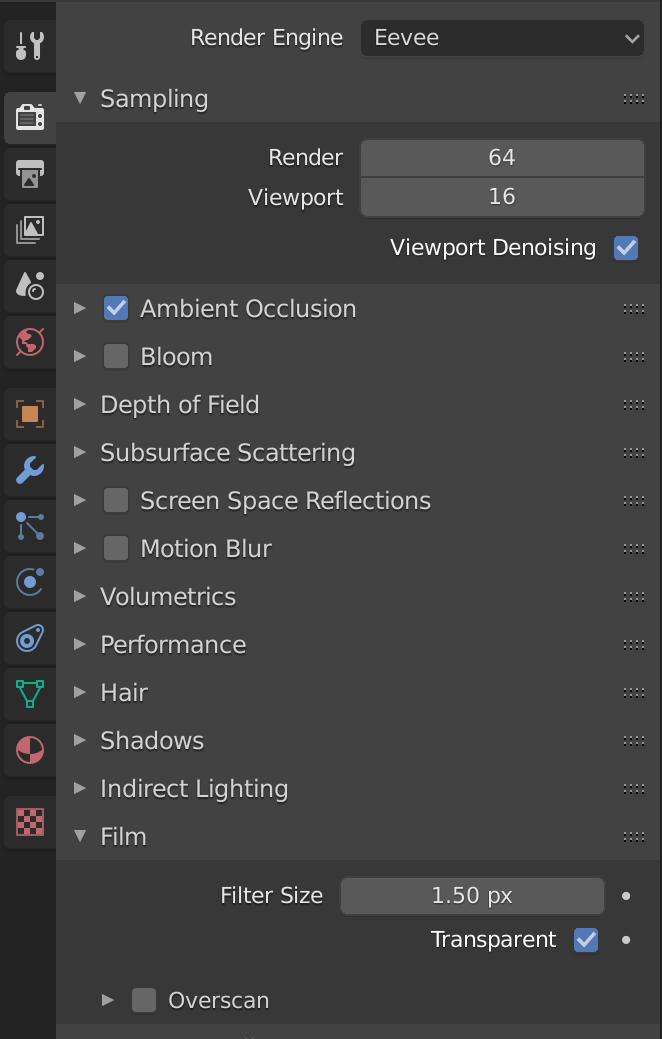
If you'd like to render the models with a transparent background, you can go to the Render Properties (second tab down, icon looks like the back of a camera), and under Film, select "Transparent".
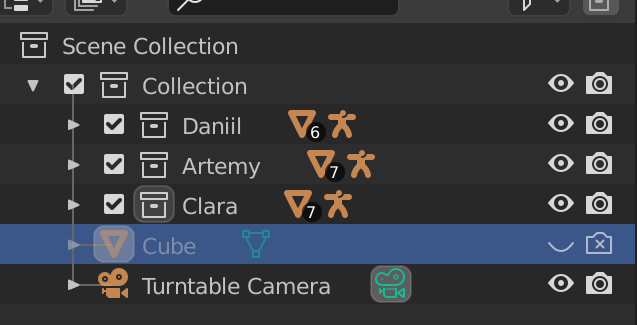
Make sure the colored cube is hidden in both the viewport and render by clicking on the funnel icon at the top right of the Scene Collection, and selecting the camera icon in the restriction toggle section. Then, toggle both of these views off for the cube.
Animating a Turntable
To animate a turntable, we will create an invisible, rotating object, and then we will copy that rotation onto our models.
First, switch over to the Layout workspace in the top toolbar, since this workspace has a timeline. The Layout workspace is the very first one.
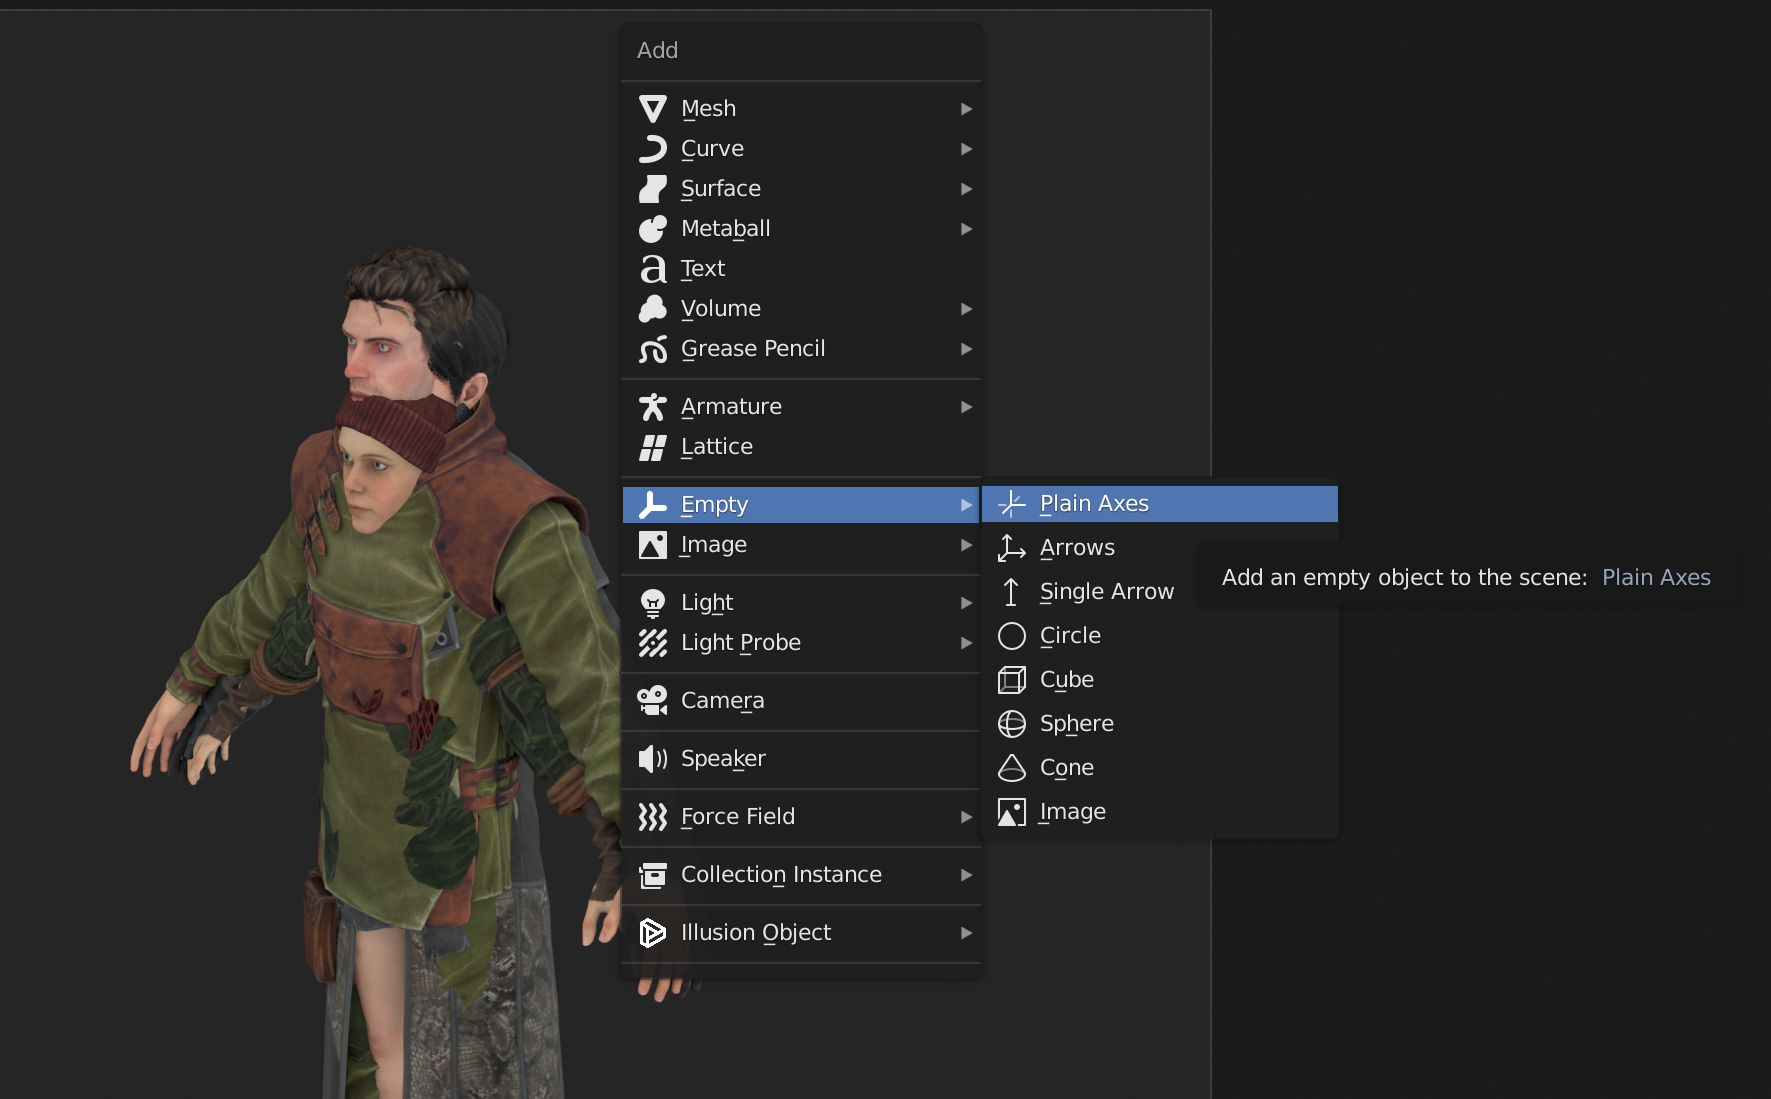
Then, press shift + A in the 3D Viewport, and select Plain Axes under Empty. Make sure this object is in the outermost collection, and not hidden in one of the character collections. Rename it to "Spinner."
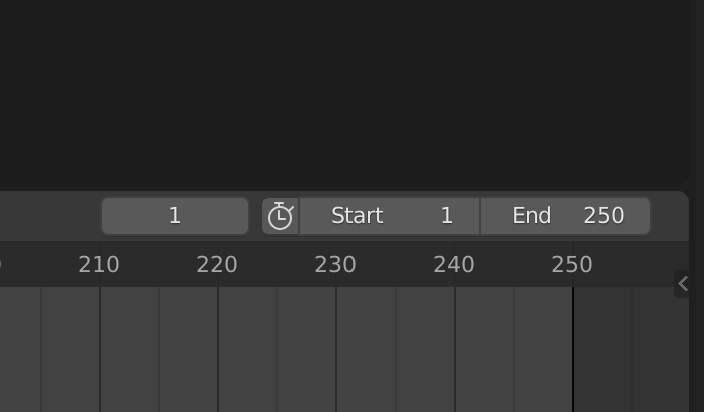
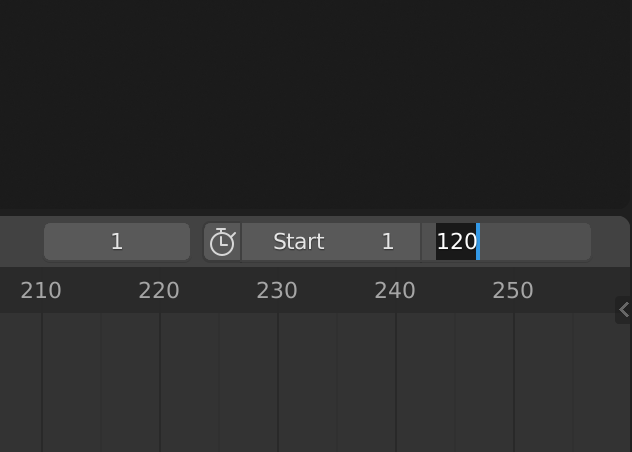
Now, we will change the timeline length from 250 frames to 120 frames. Since Blender creates animations at 24 frames per second by default, 120 frames will give us 5 seconds of animation. You can change this by going to the right side of the timeline, clicking the End value, and writing in 120.
Now, we'll animate the empty. First, make sure the timeline needle is on the first frame. Then, in the empty's Object properties (orange square with borders), click on the dot next to the lock on the Z rotation. The Z value will change color, and a keyframe will also be created on the timeline on frame 1.
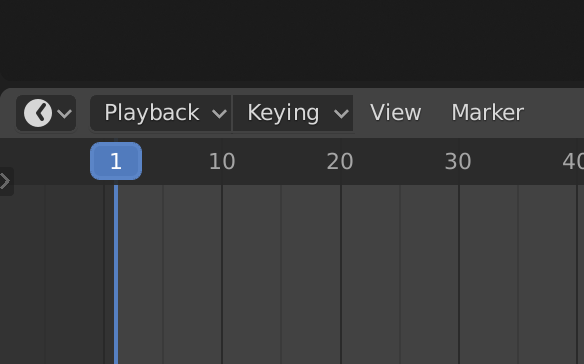
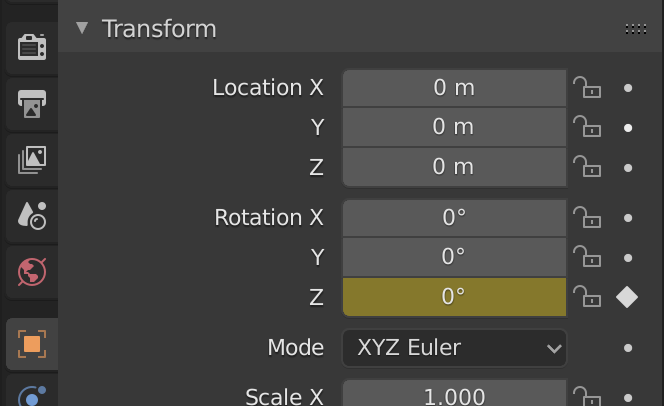
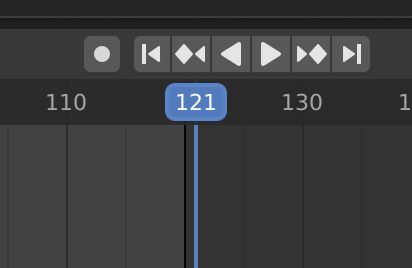
You can leave those values as is. Next, you'll want to move to frame 121, which is exactly one frame after the animation ends. We go 1 frame over in order for the looping turntable animation to not have a repeat frame at the end.
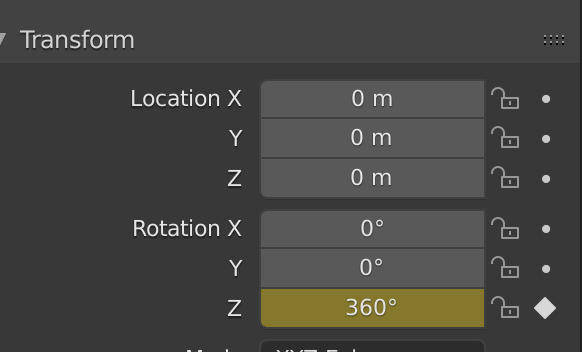
On the Z rotation value for this frame, we'll write 360. Then, we'll click on the diamond next to the lock to commit the change. You'll see a new keyframe appear on the timeline.
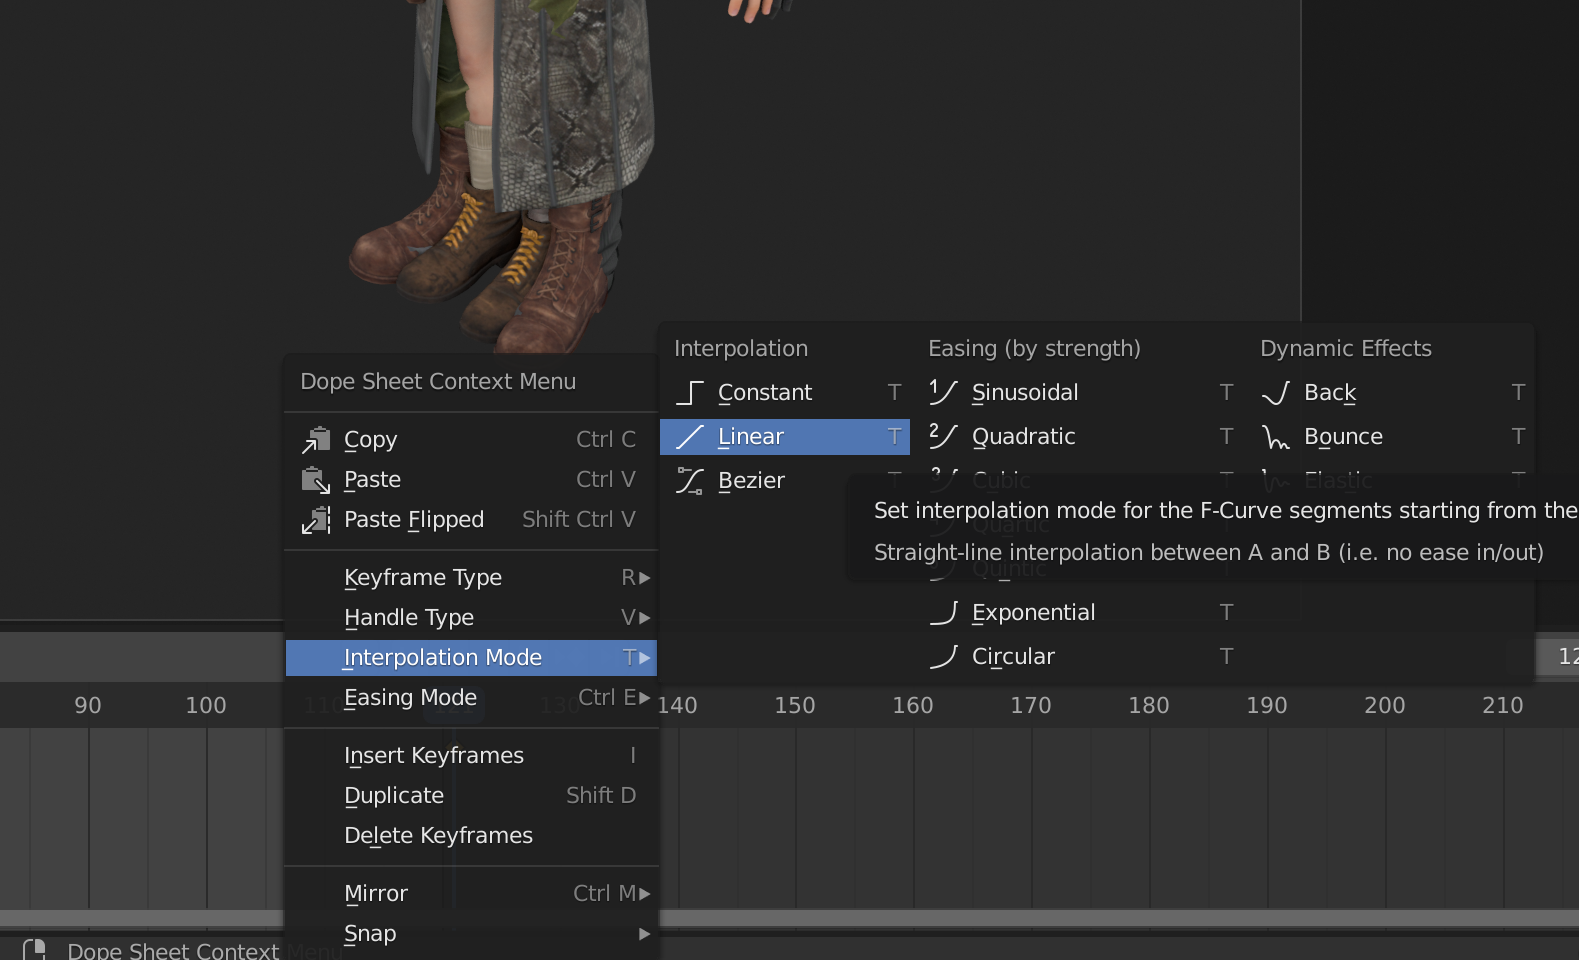
By default, movement between keyframes has some easing applied to it. To remove this easing, you can select every keyframe in the timeline by pressing A while having your cursor in the timeline, right clicking, and selecting Interpolation Mode / Linear.
Now, we can copy this rotation to any of our character's armatures. Select the armature you want to rotate in the Scene Collecton, and hide the rest in the Viewport and Rendered views.
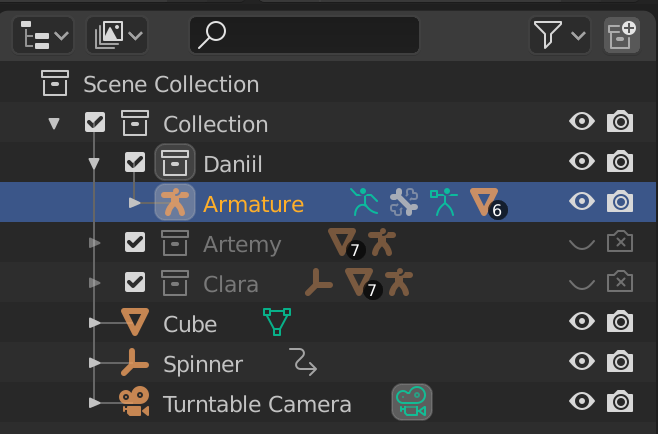
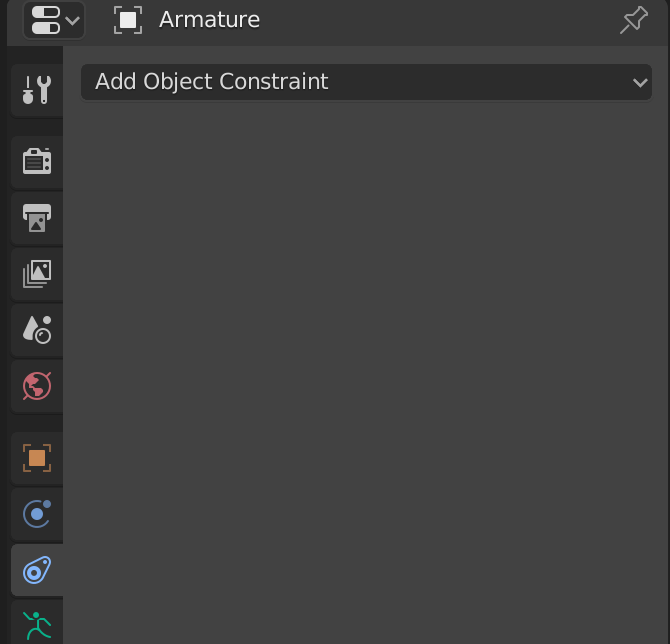
Then, go to the Object Constraint tab for the armature, (blue, elongated egg shape icon), click "Add Object Constraint", and select "Copy Rotation". For the target, click on the square with frames to see a list of your objects, and scroll all the way down until you see "Spinner" (or whatever name you've given to your spinning empty object.)
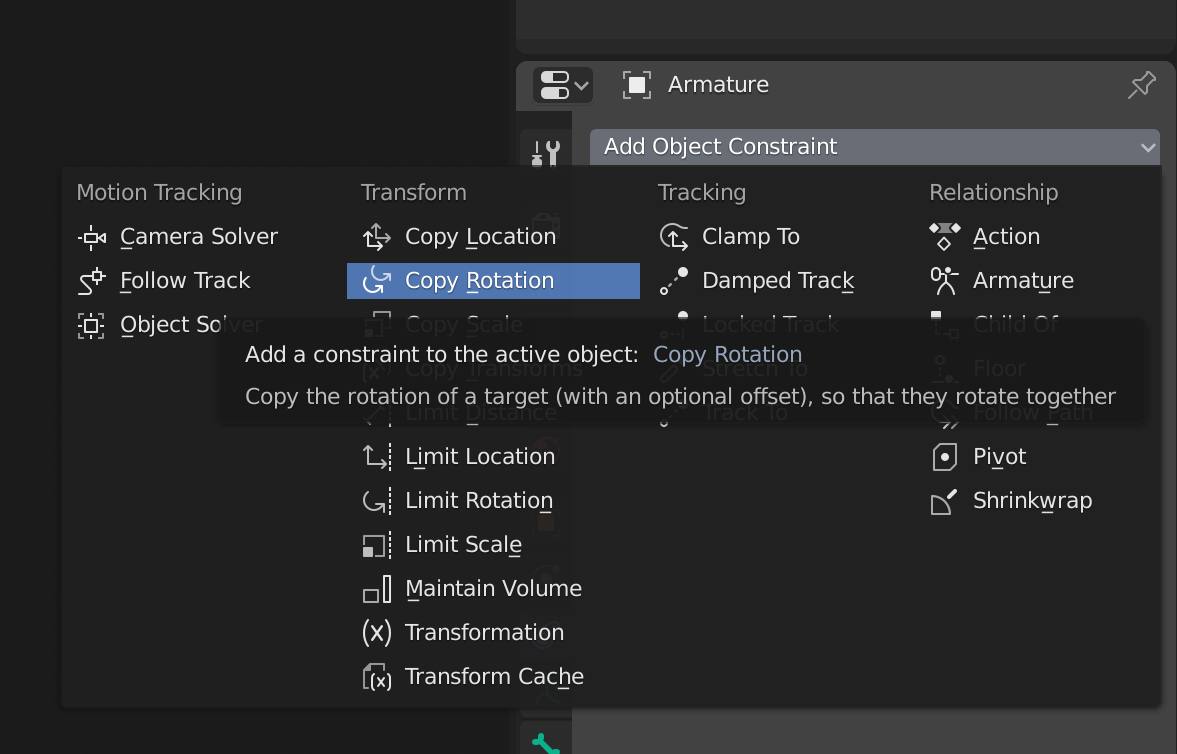
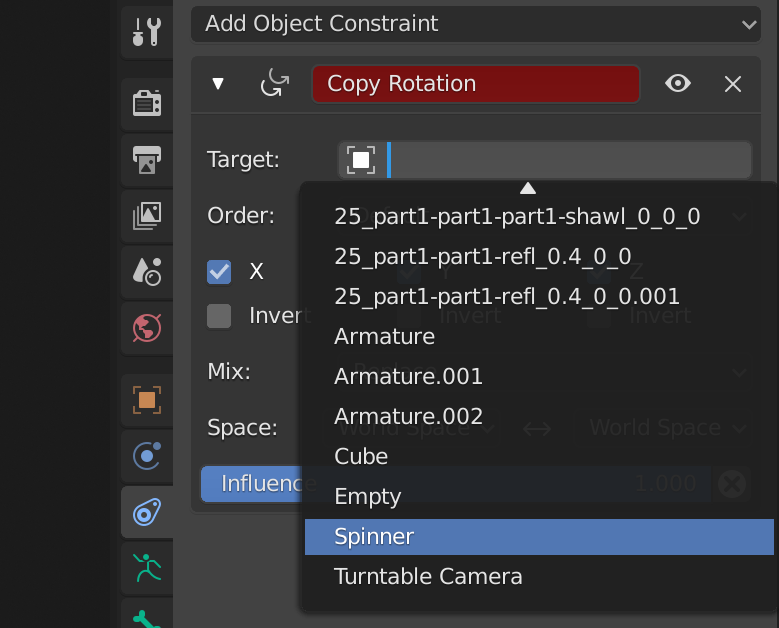
Now, your model spins! Press the play button on the timeline, or shift + space (or just space, depending on what Play is bound to for you) to see it in action.
Rendering the Turntable
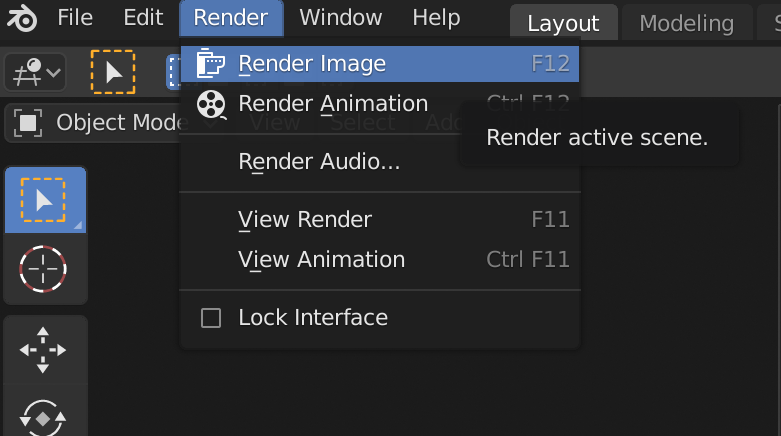
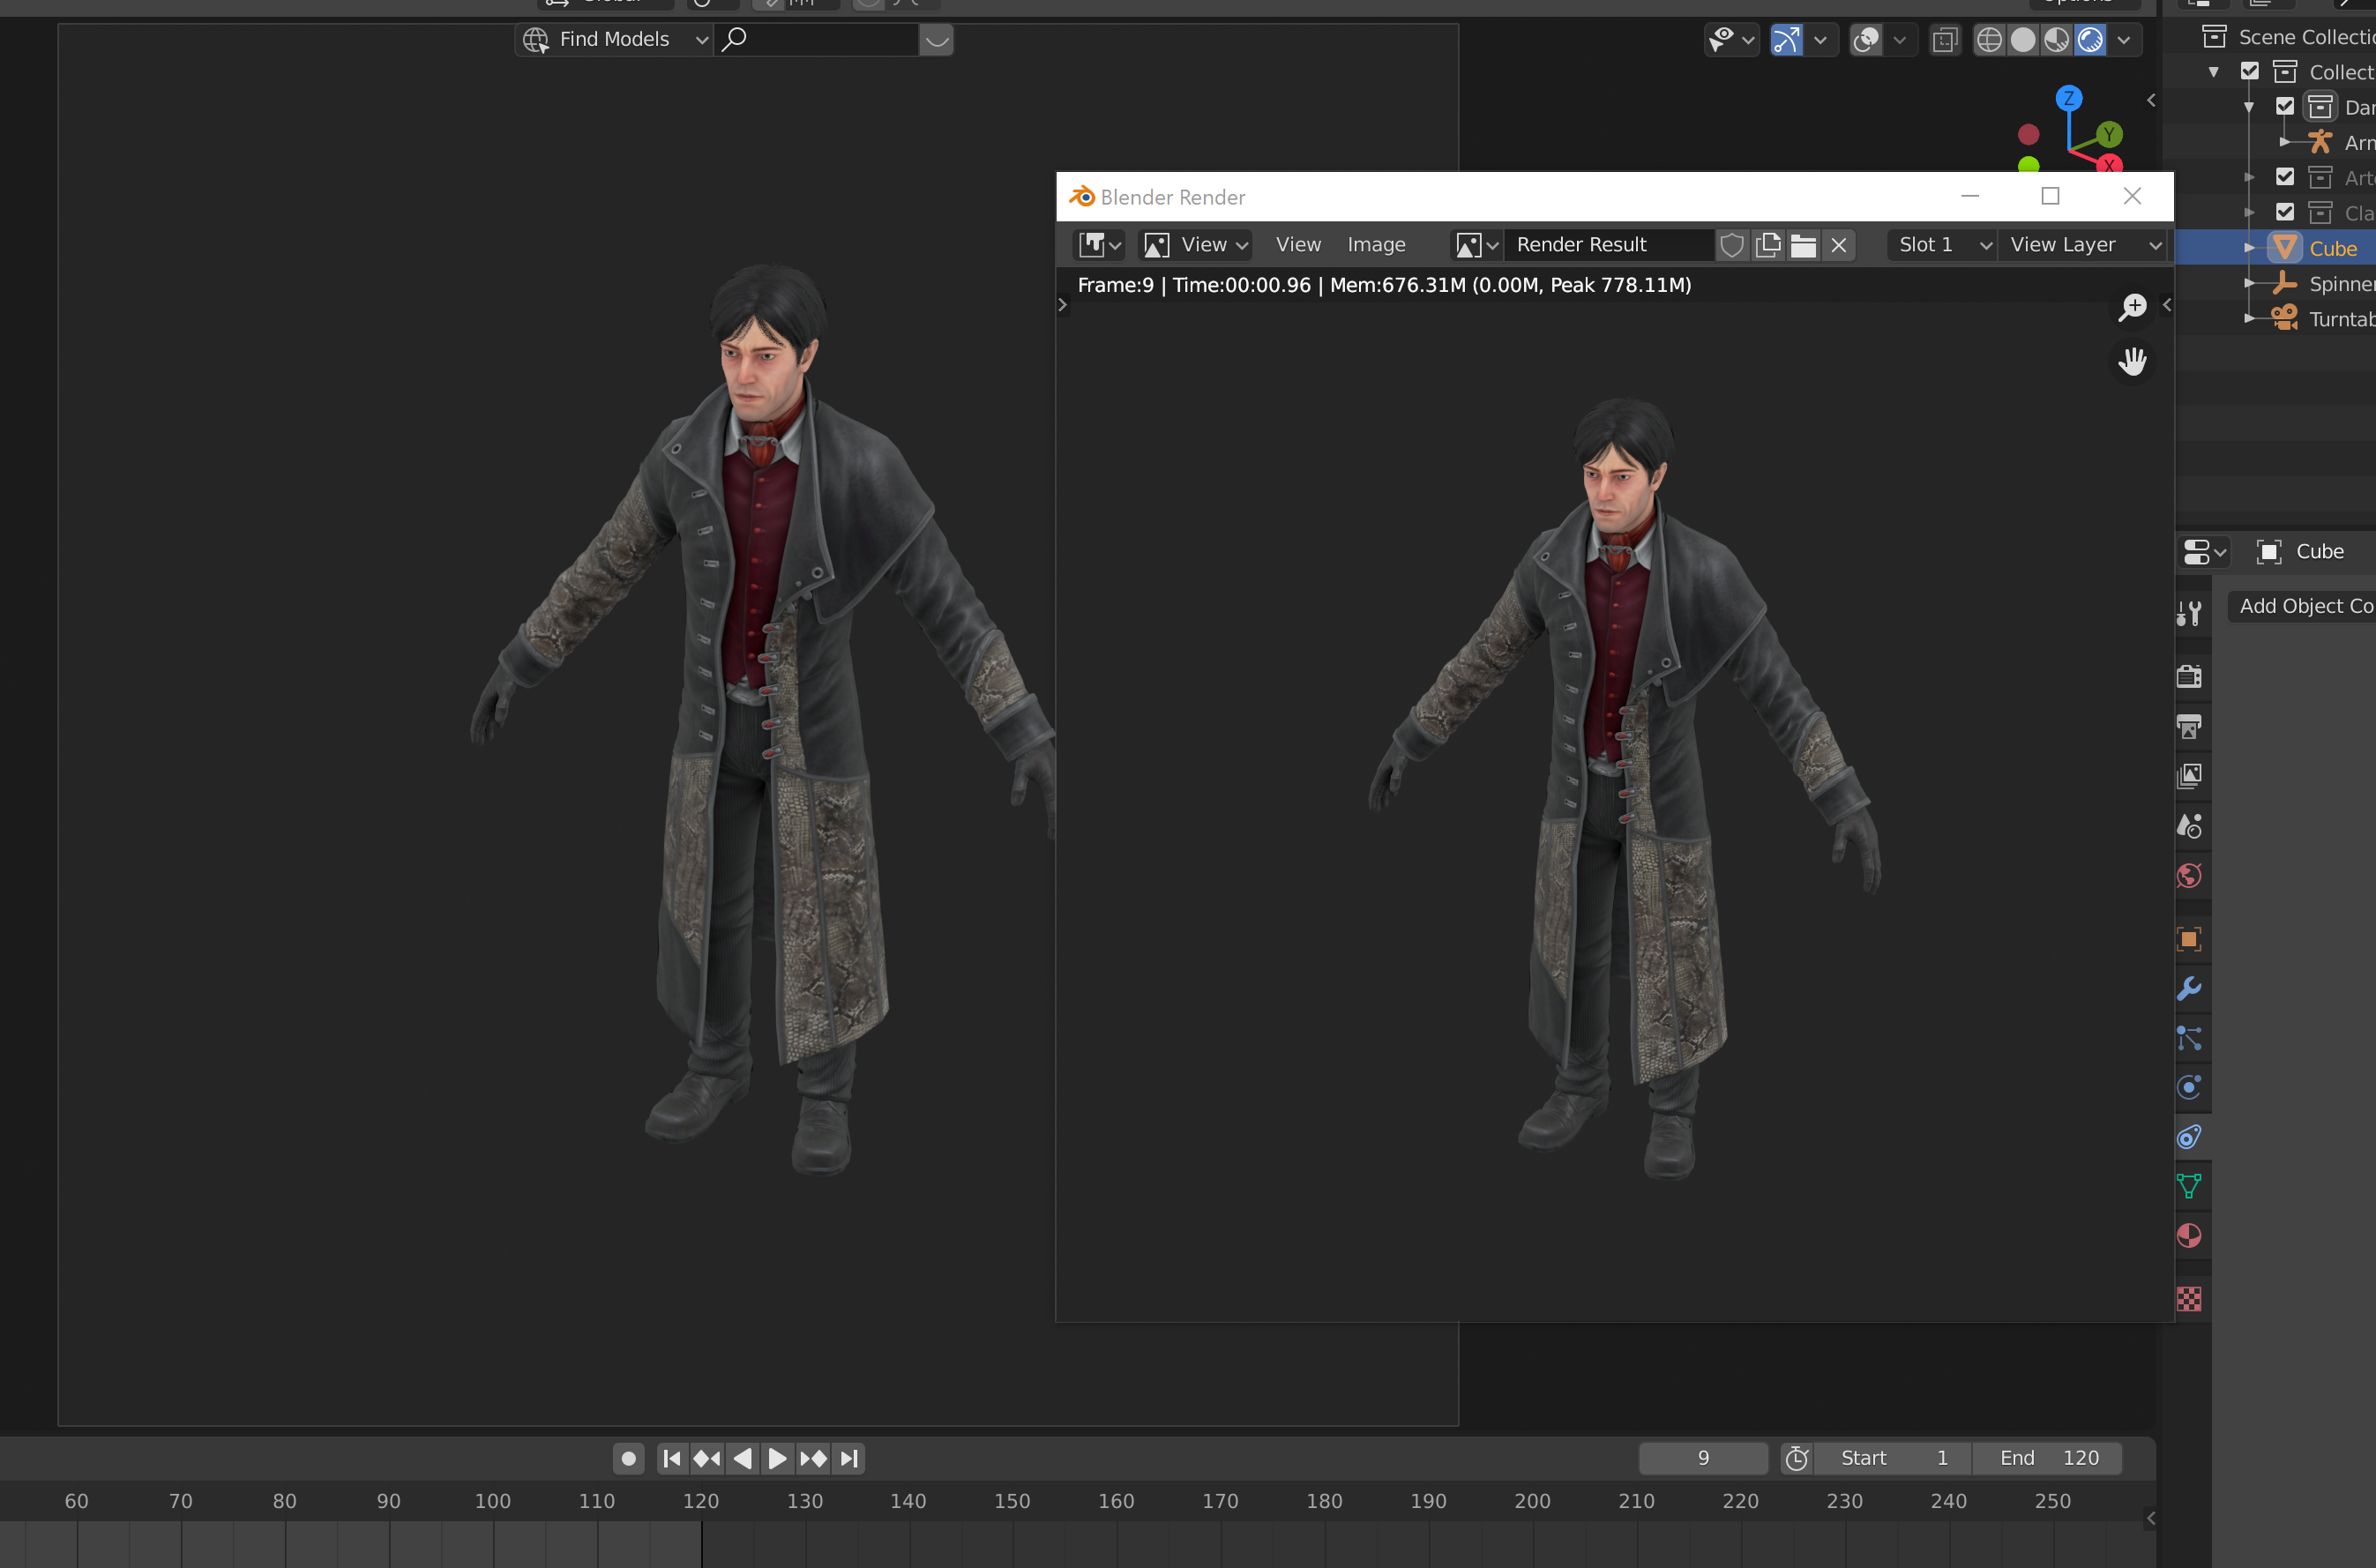
Before rendering the turntable animation, you may want to render a test image. This way, you can check if you've hidden all of the objects you want to hide, as well as making sure any lights and environment shaders are working properly. You can do this by going to Render / Render Image, or pressing F12.
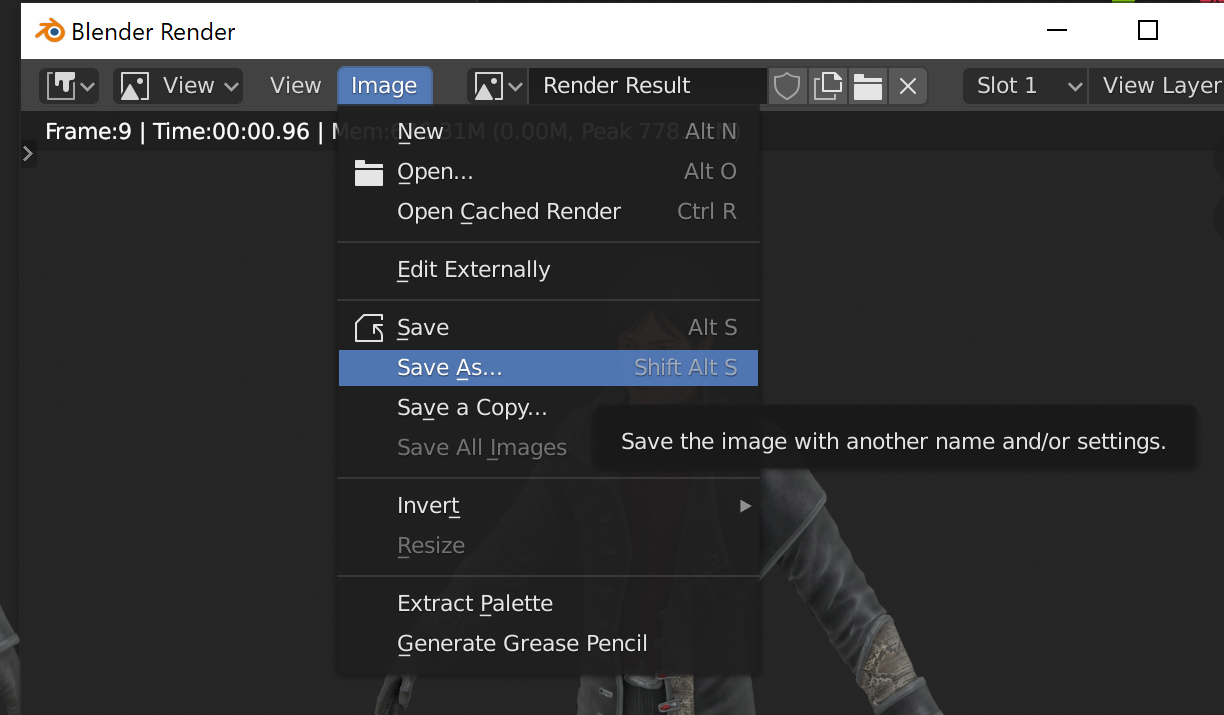
Looks good! You can save this render if you'd like by going to Image / Save As, and choosing where to save the image.
If you're ready to render the turntable, you can go to Render / Render Animation, or press ctrl/CMD + F12. Just make sure that you have the right output folder set up under the Output tab (gray printer icon 3 tabs down). Once rendered, you can find the individual image in the output folder, numbered by frame.
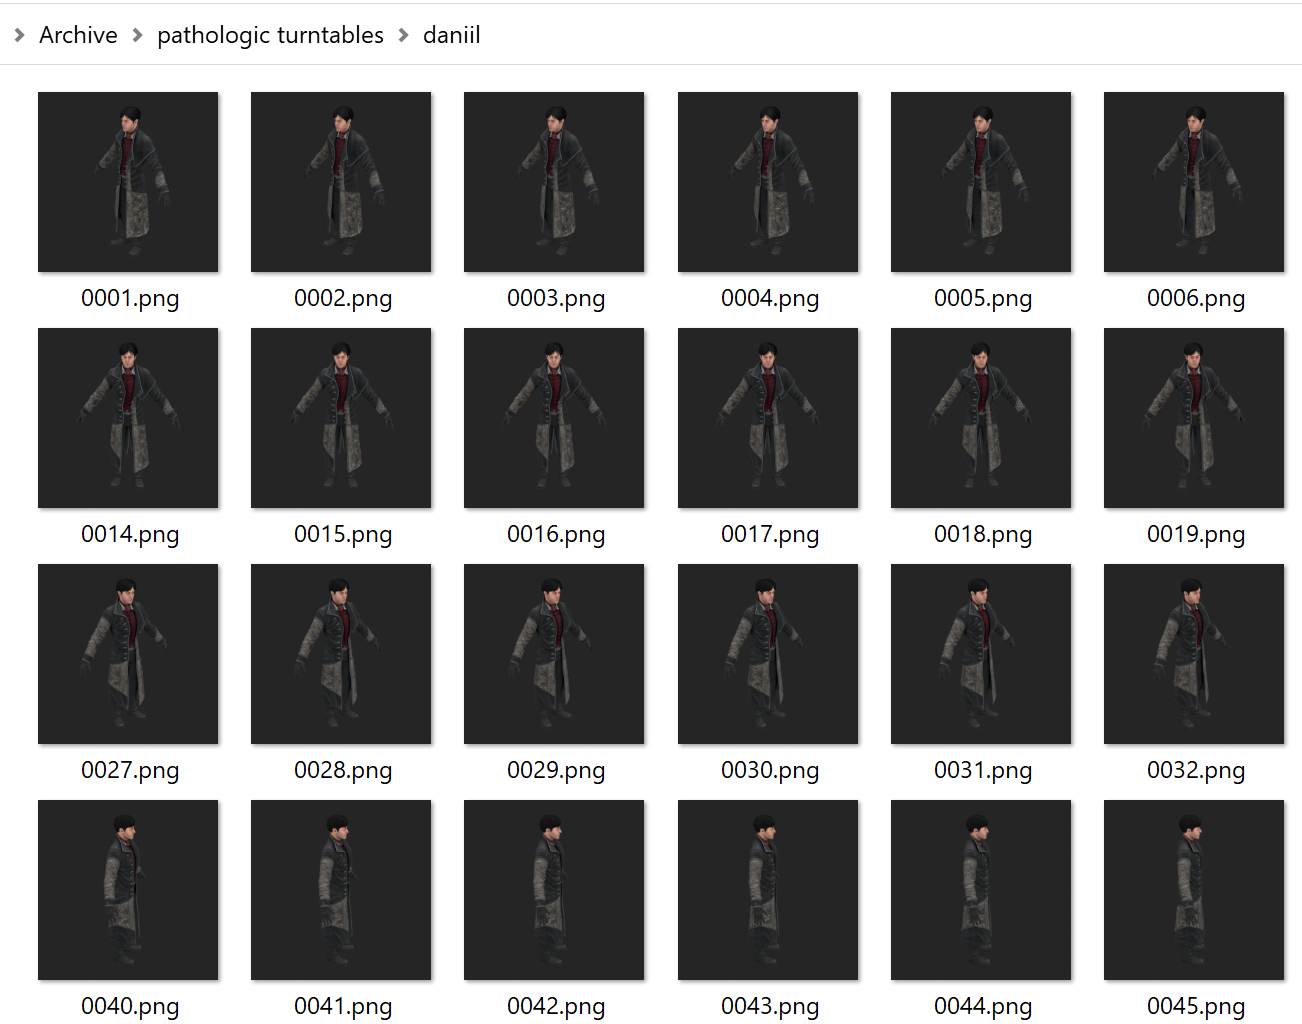
If Blender crashes in the middle of rendering an image sequence animation, you can resume on whatever frame you stopped by changing the Start frame on the timeline. For instance, if the last image I rendered successfully was "0059.png" (frame 59), I would start the timeline at frame 60, and resume rendering.
Looping Turntables in Davinci Resolve
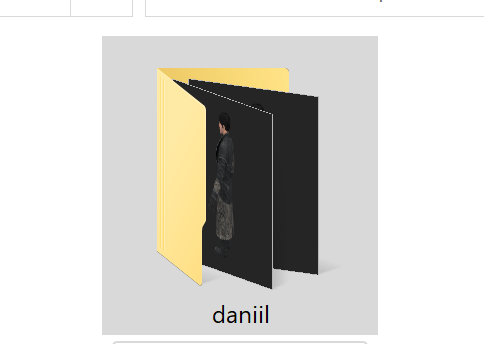
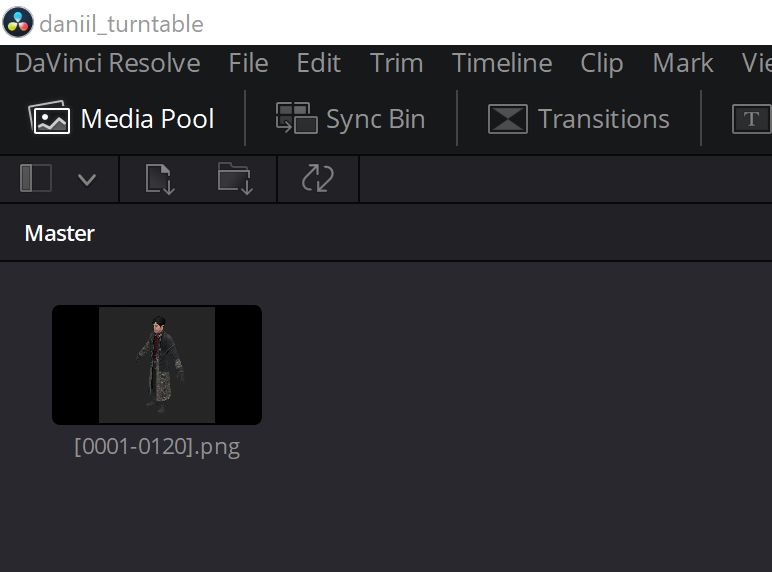
You can import the image sequences you've made in Blender into Davinci Resolve in order to loop them more than once. Launch Davinci Resolve, create a new project, and drag the whole folder into the Media Pool. Then, drag the image sequence into the timeline.
I like to loop it 5 times, so I drag it into the timeline once, drag the needle to the end of the timeline, copy the image sequence I've placed, and paste it 4 more times.
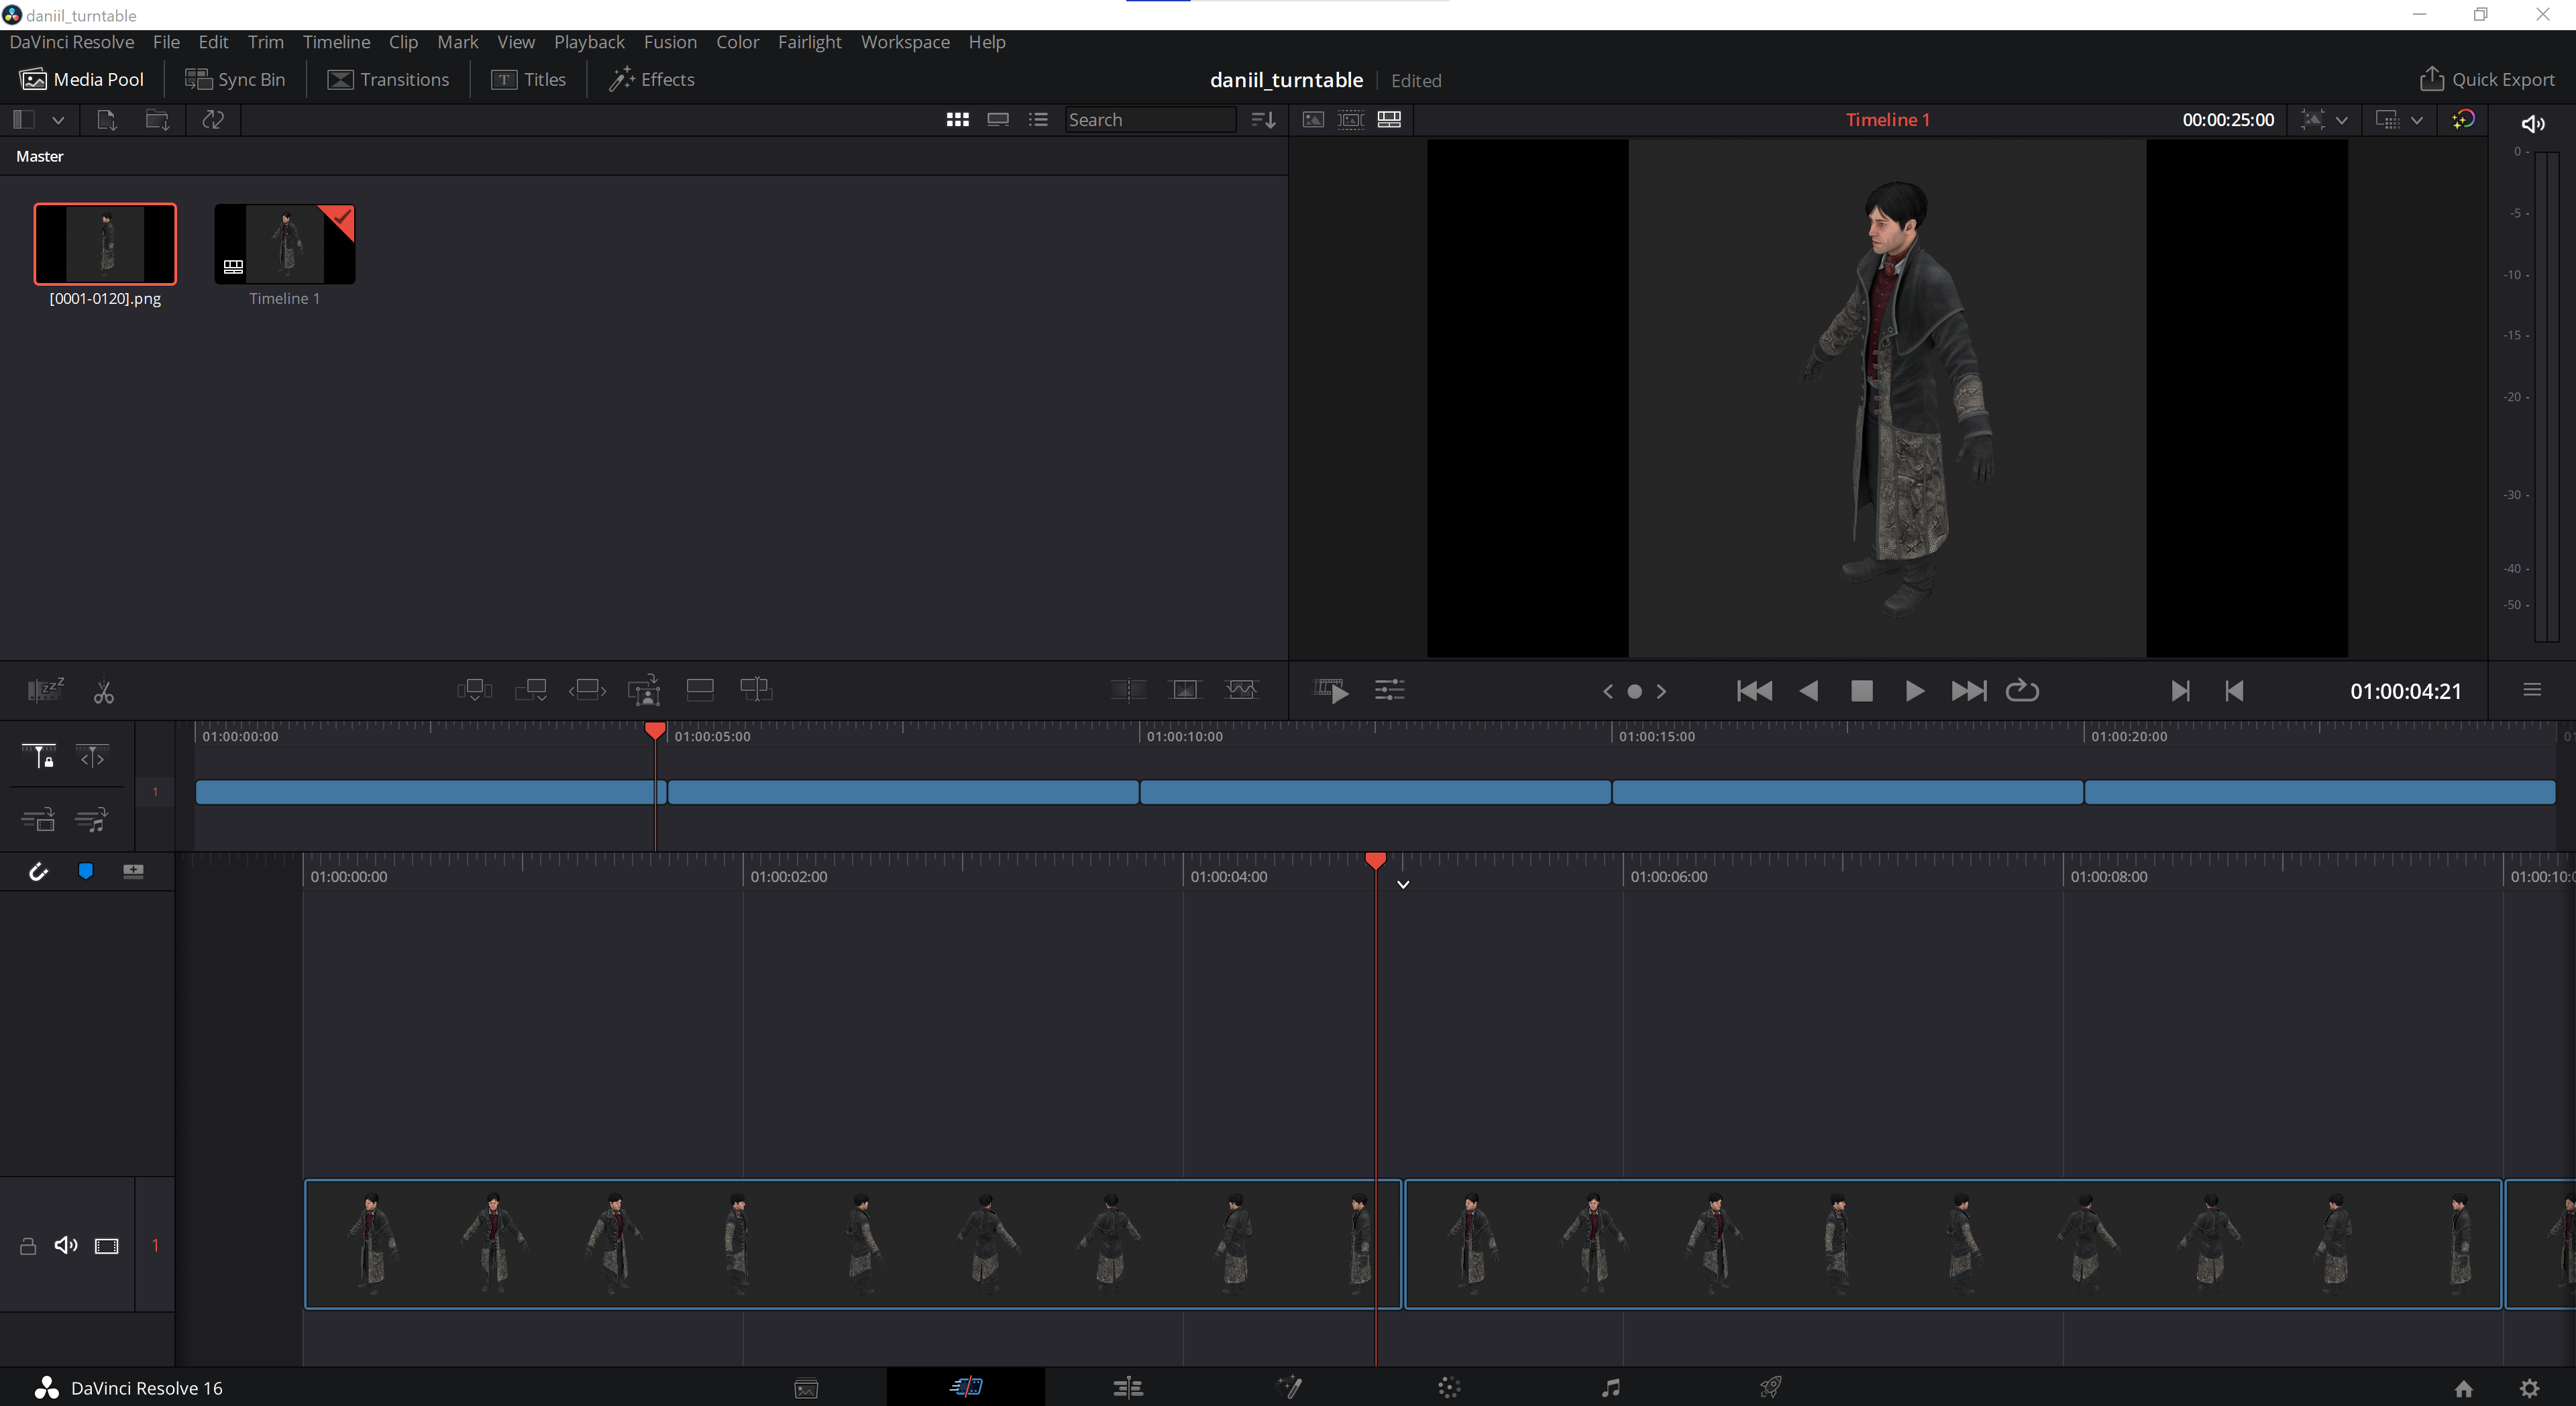
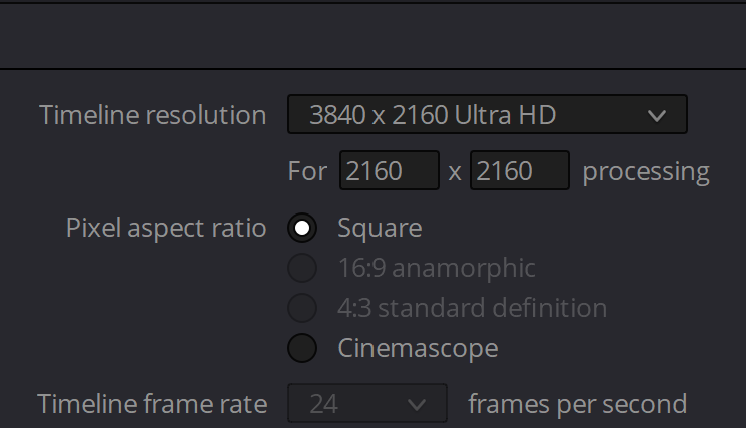
The video doesn't have a square ratio right now (you can tell by the black bars around the image in the preview.) You can change that by going to File / Project Settings on the top-left toolbar. In the Master Settings, we can change the timeline resolution to the size of our render. Mine was 2160px 2160px, which is the largest square video that the free version of Davinci Resolve will render.
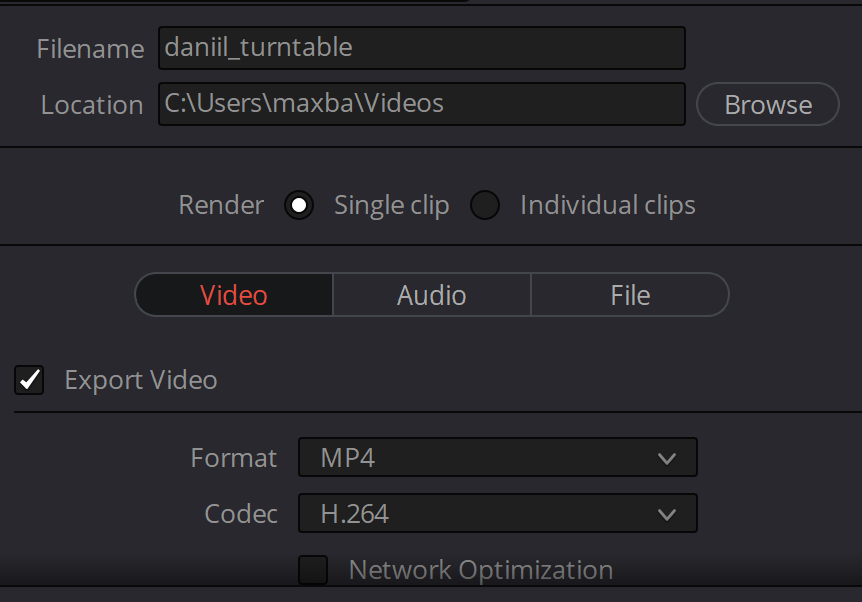
Now, we can render the video. Along the bottom of the screen, you'll see icons for the different workspaces. The last one that looks like a rocket is the render workspace. Click on this one. Here, we'll give the file a name, and select where we want to render it. I also recommend changing the format to mp4, because that's the format you can most easily upload to Twitter and Youtube.
Hit "Add to Render Queue", and if it's grayed out for some reason, select Render: Individual clips, and then select Render: Single clip again. Once in the Render Queue, you can hit Start Render.
Congratulations! You now have a lot of pictures of Daniil on your computer. Or maybe you have better taste than me and rendered a turntable for someone else... Who knows. Hope you found this tutorial useful, and many thanks to rotten-eye on deviantArt for extracting these models!